InstructBot Logo InstructBot
Login
Getting Started
Third Party Integrations
Overview StreamElements StreamLabs TipeeeStream Twitch
Applications
Commands
Overview
Command Types Creating Commands Downloading Commands Active Command Set Cooldowns Queues
Disable Profile Command Enable Profile Command External Command Help Command Input Command Mute Sound Command Parallel Command Play Sound Command Random Command Sequential Command Swap Left and Right Mouse Button Command Text Command Timeout Command Toggle Profile Command
Execute Command Nothing Command Use Command
Options
Environment
General Backup and Restore Console Key Bindings Sound Warnings
Notifications
Overview Connection
Commands
General Random Timeout Use
StreamElements StreamLabs TipeeeStream Twitch Users
Profiles
Rewards
Overview
Accumulator Discounts Follower Gifted Subscription Subscription
Editing Rewards Types of Rewards
Users Variables YouTube

Timeout Command

  1. Support
  2. Commands
  3. Timeout Command

See: General ( Name, Description, Public, Identifier, Reason, Cumulative, Help, Queue or Users ), Activation, Conditions ( Overview, Editing Conditions or Types of Conditions ) or Durations ( Add, Edit or Remove )

The timeout command is used to timeout users within chat.

For an overview of what the timeout command is and how to create them please watch the below.

General

See: Name, Description, Public, Identifier, Reason, Cumulative ( Enabled or Maximum Duration ), Help ( Use Default or Command ), Queue ( Use Default, Type or Name ) or Users ( Moderator, VIP, Viewer, Restore Moderator or VIP or Excluded )

Name

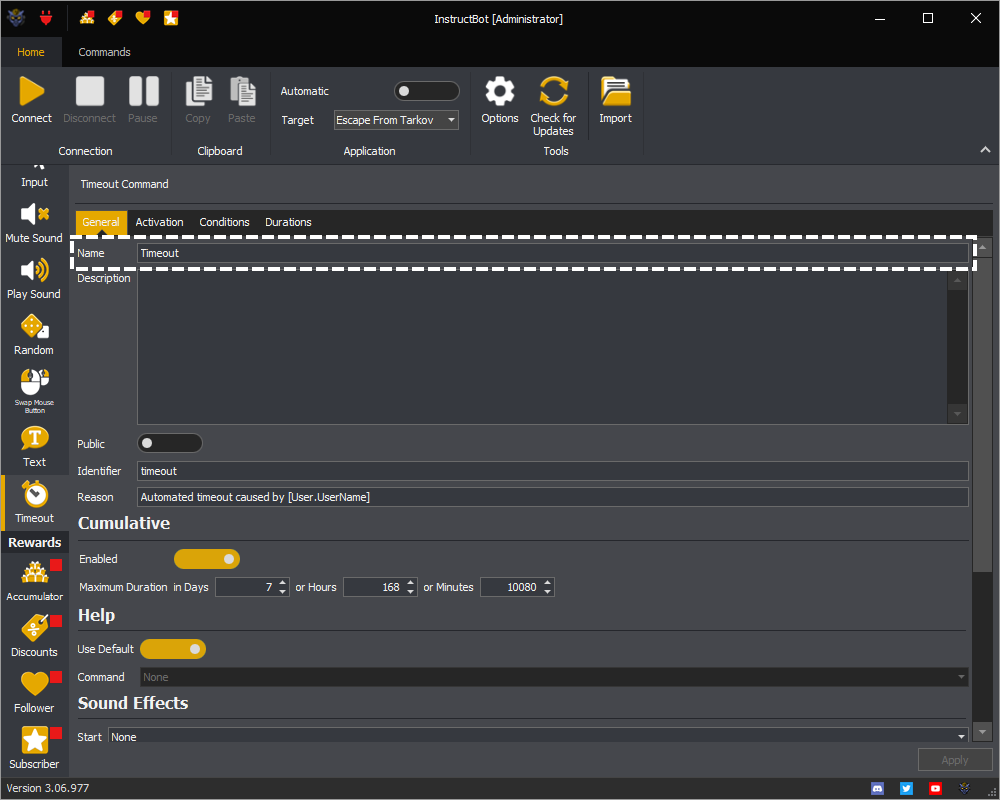
The name of the command. This is shown within the user interface and chat when the command is triggered (if the notification is enabled).

InstructBot showing the name of a command.

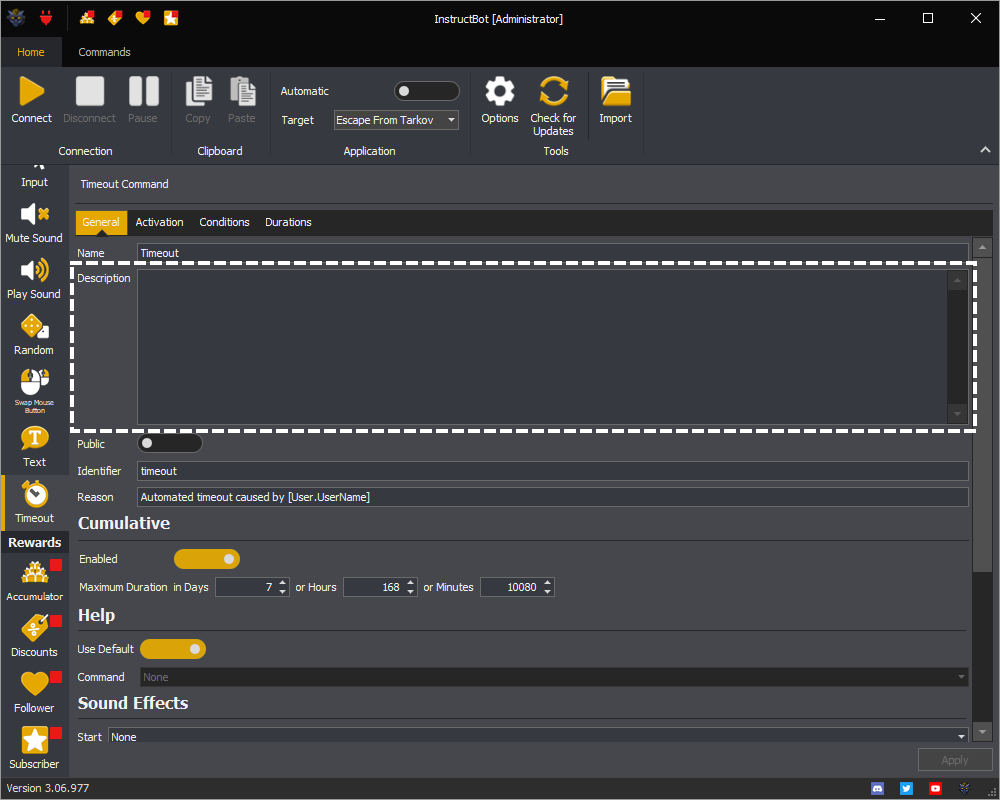
Description

A description of the command, this is shared when the command is public.

InstructBot description of the command.

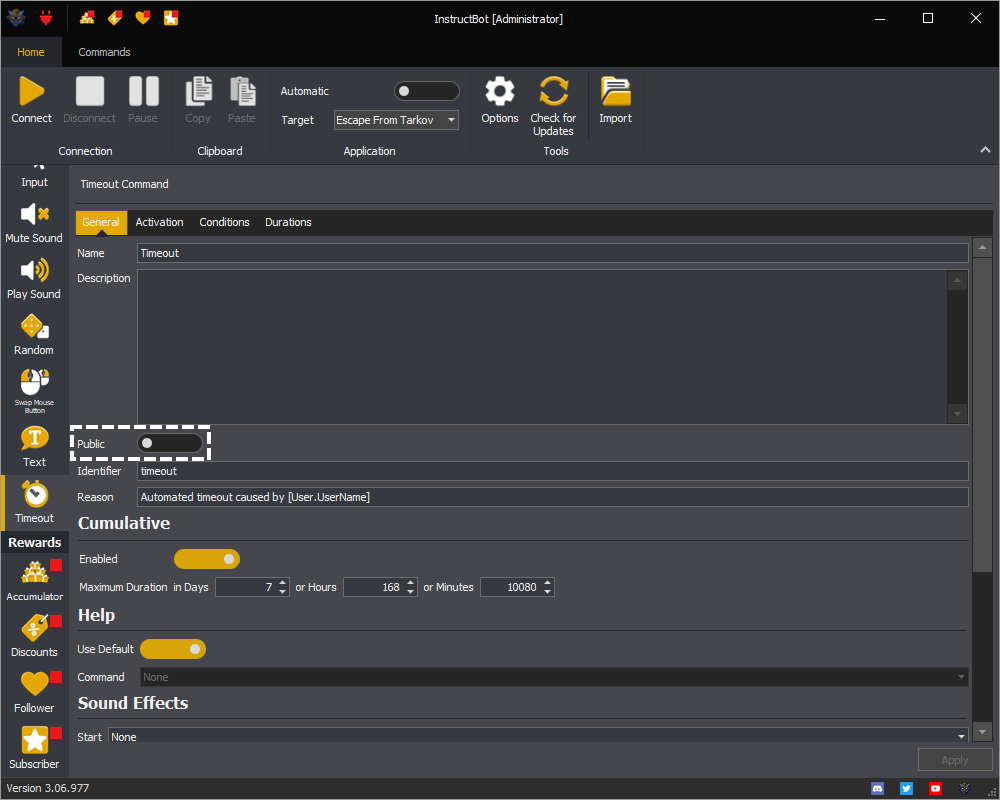
Public

When toggled on the command is public and can be downloaded by other users. If you wish to keep your commands private then toggle this off.

InstructBot public toggled button of the command.

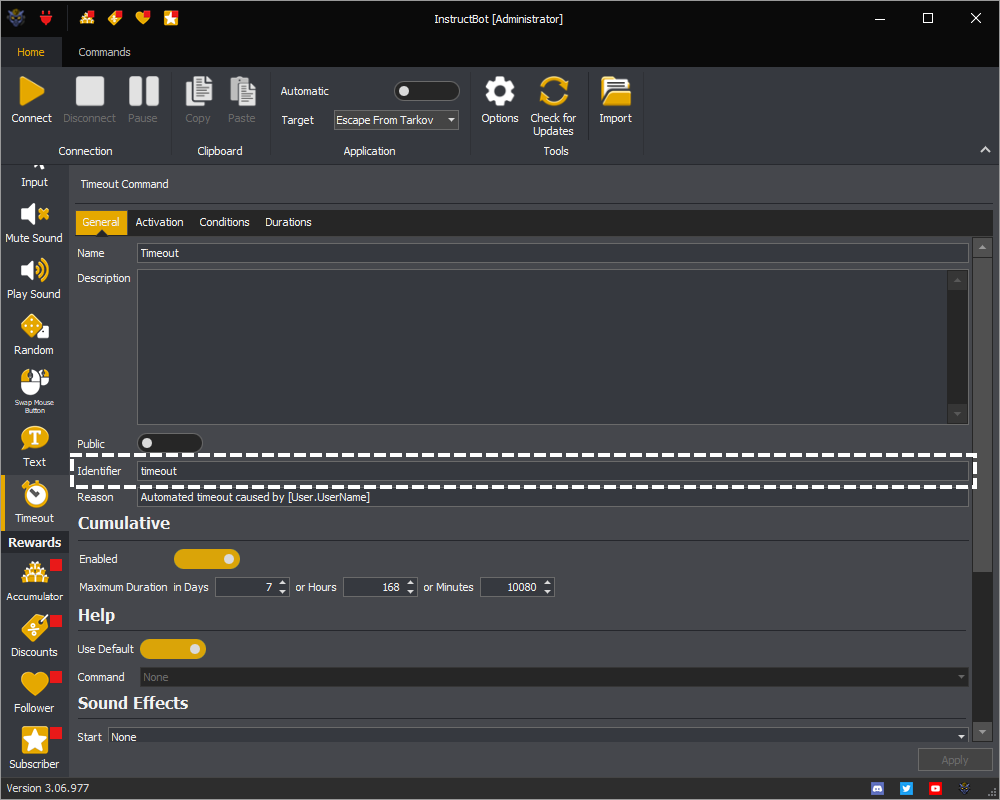
Identifier

The identifier is used trigger the command from chat or identifier the command to trigger when multiple commands have the same cost.

InstructBot showing how to assign the identifier to the command.

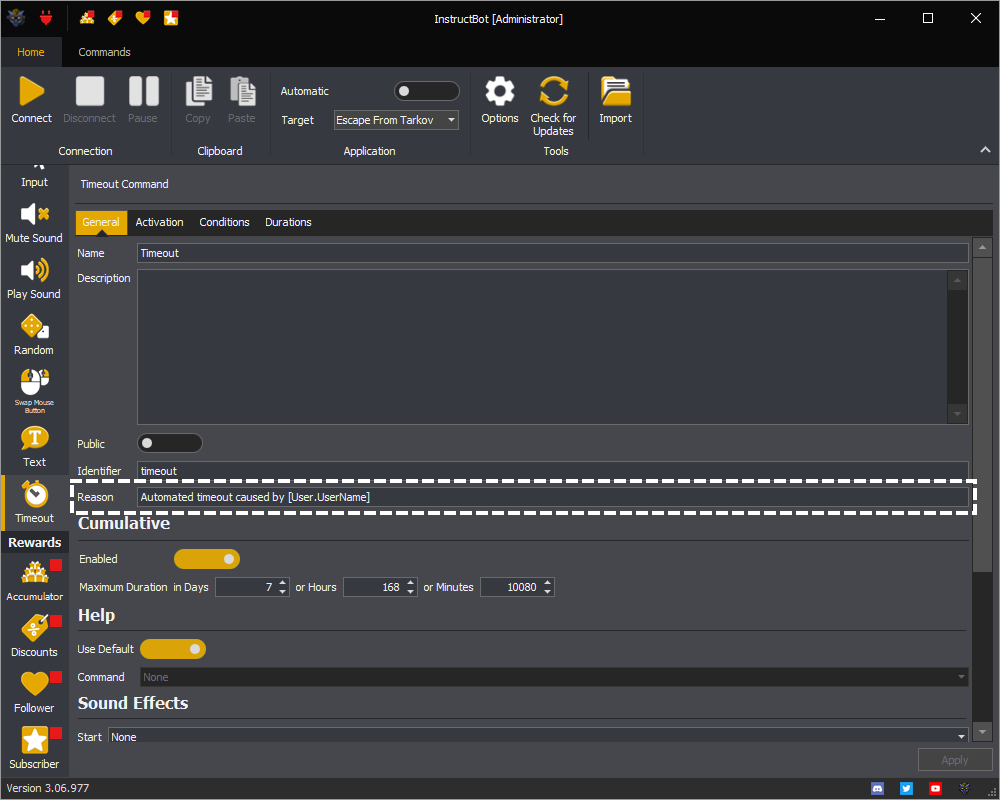
Reason

The reason is added to the timeout message so you can tell the user was automated through InstructBot.

InstructBot showing the reason for the timeout command.

Variables

Command: The command which was triggered, see here for a full list of variables.

TargetUser: The user targeted by the command, see here for a full list of variables.

User: The user which caused the command to be executed, see here for a full list of variables.

Cumulative

See: Enabled or Maximum Duration

Enabled

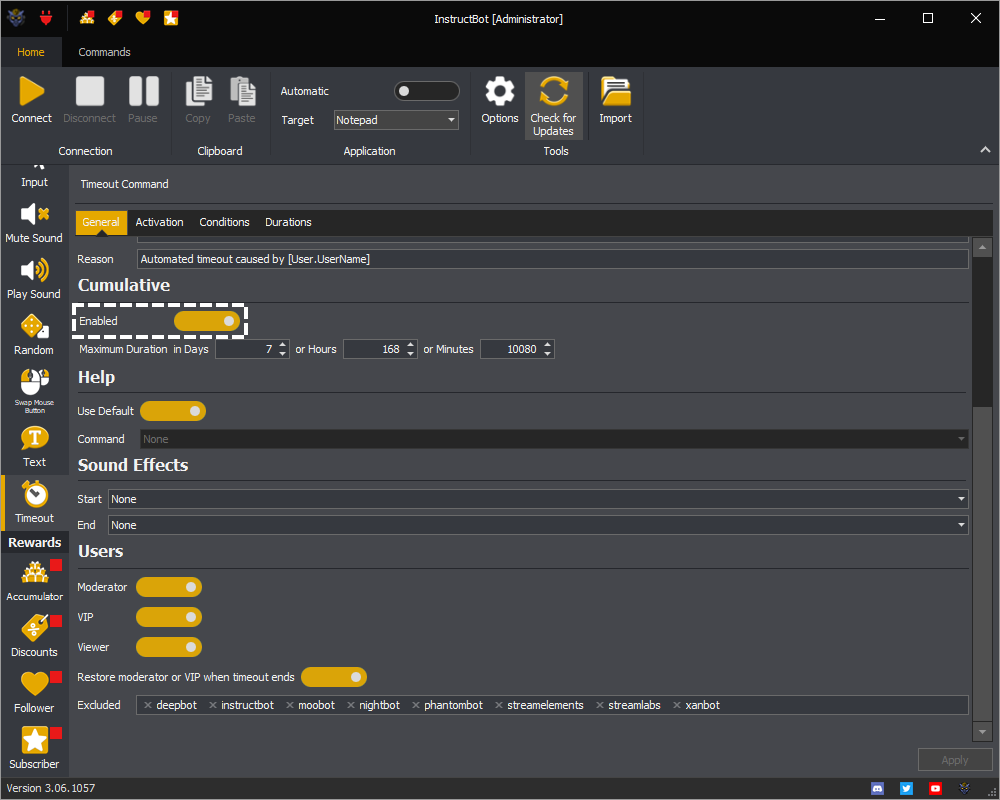
When cumulative timeouts are enabled, if InstructBot has timed out a user and they have time left, the new timeout is appended to the length rather than replacing the current timeout.

InstructBot showing how to enable cumulative timeouts of a timeout command.

Maximum Duration

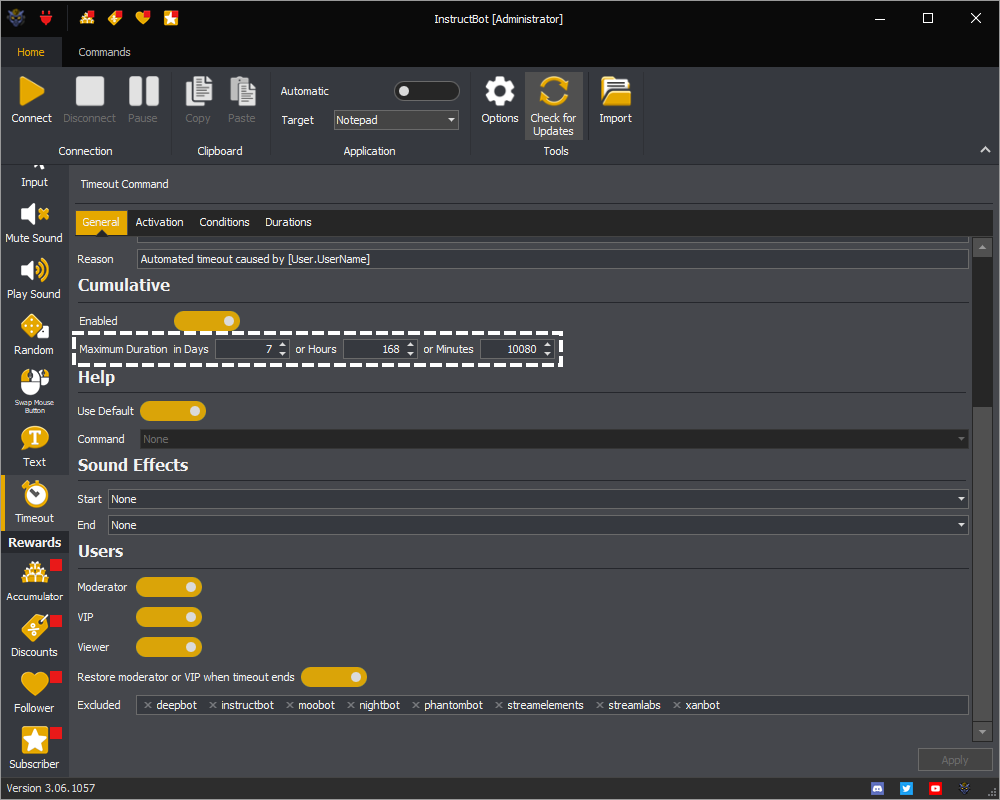
Shows the maximum duration a timeout can be extended to in days, hours and minutes.

InstructBot showing the maximum cumulative timeout of a timeout command.

Help

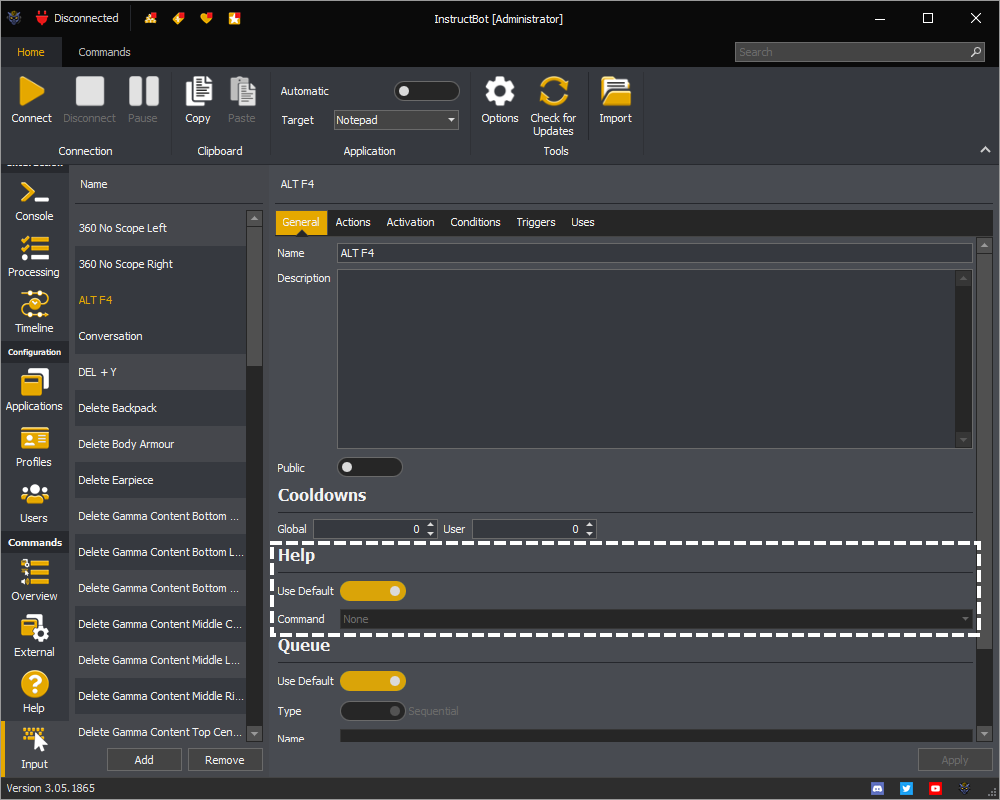
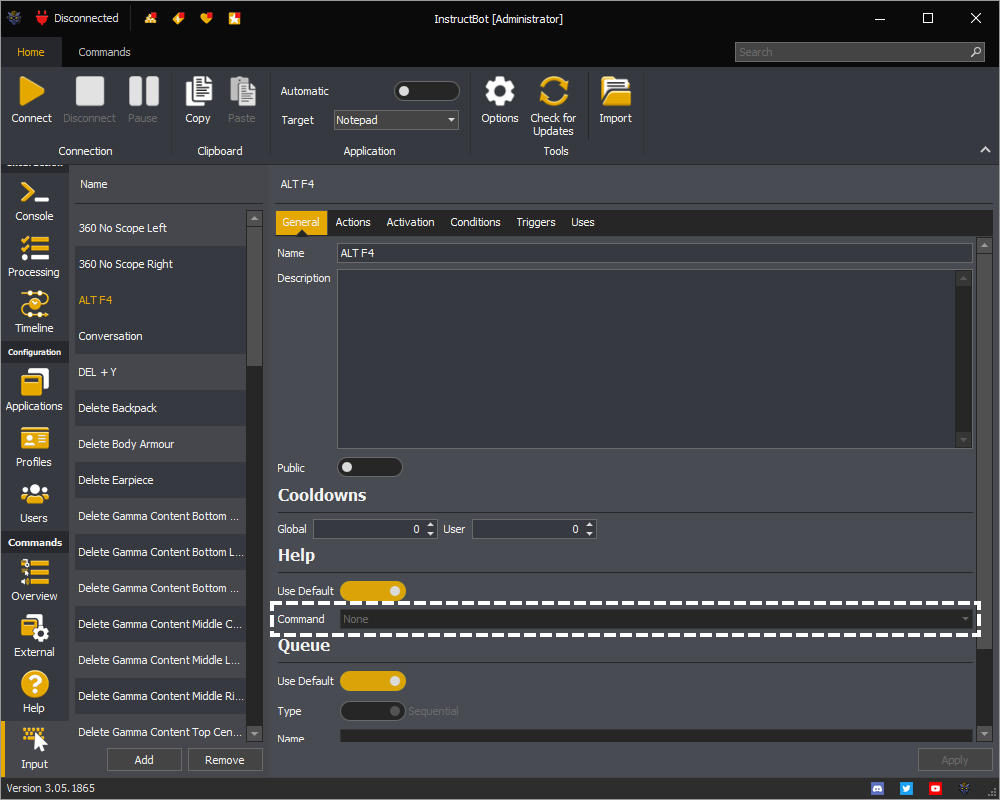
The help section controls what Help command, if any, the command will appear within.

An example of the Help section in InstructBot.

Note: The examples are for an Input command but this applies equally to all other command types which support help.

Use Default

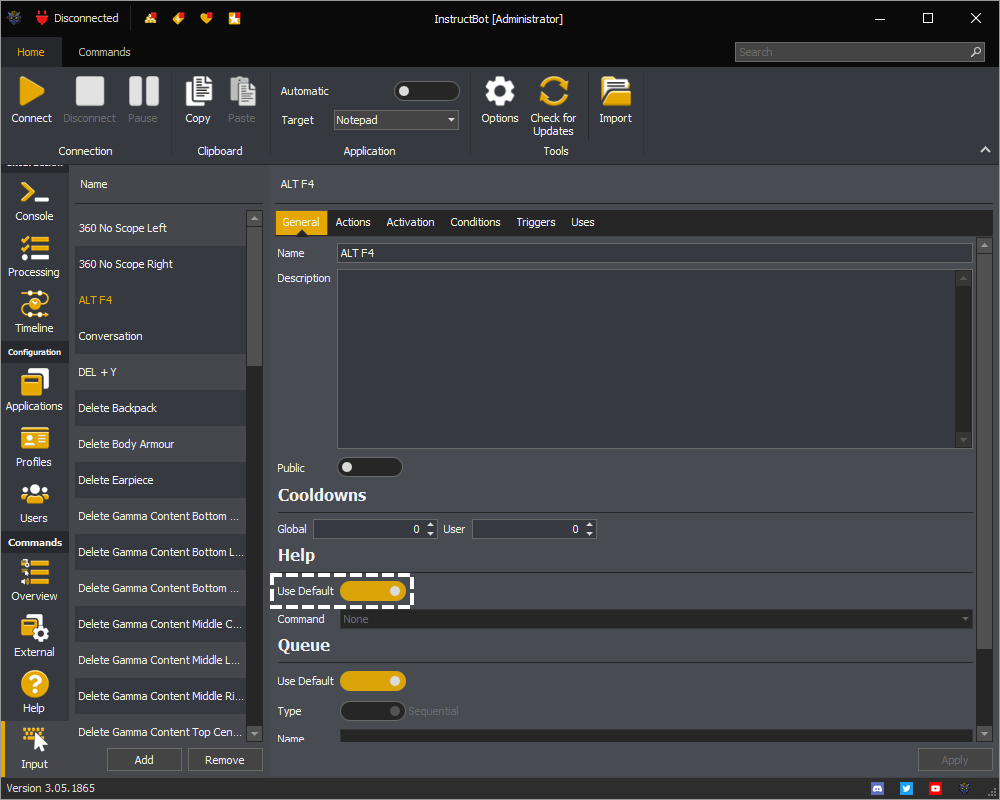
The use default toggle controls if the command will be included in the default help command, see here.

The use default help toggle button in the help section of a command in InstructBot.

Command

When use default is toggled off, you can select the help command you want this command to appear within, if any.

An example showing the help command selection drop down in the help section of a command in InstructBot.

Queue

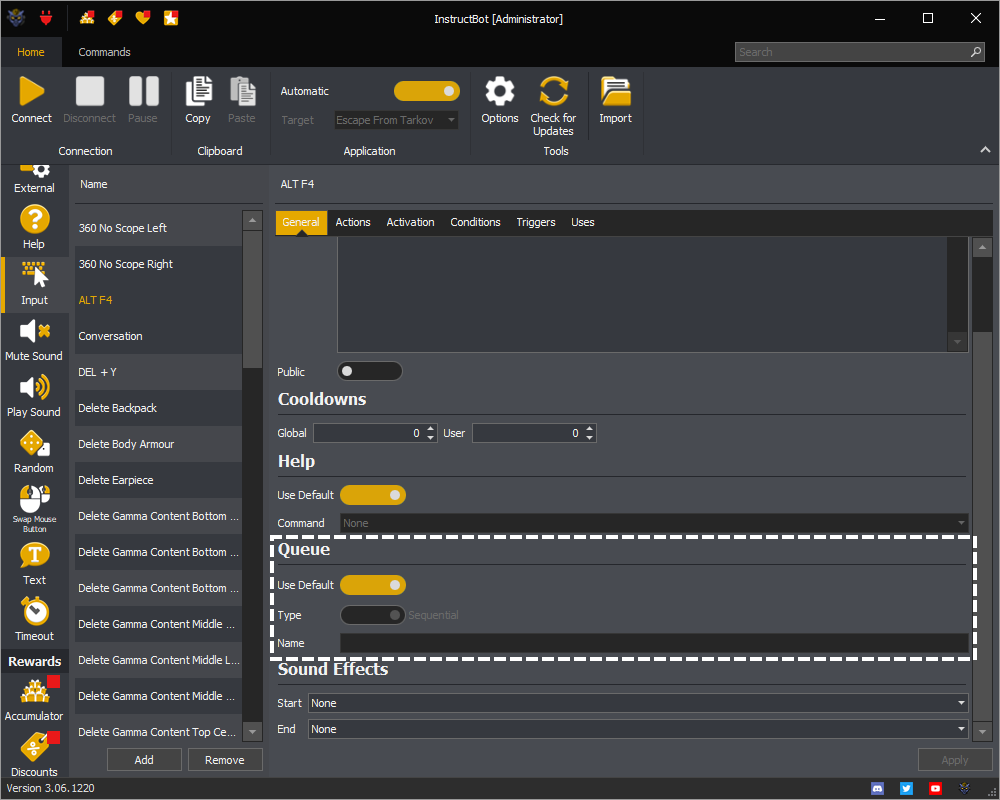
The queue section controls how the command is run. You can see an example of how queue's work here.

An example of the Queue section in InstructBot.

Note: The examples are for an Input command but this applies equally to all other command types.

Use Default

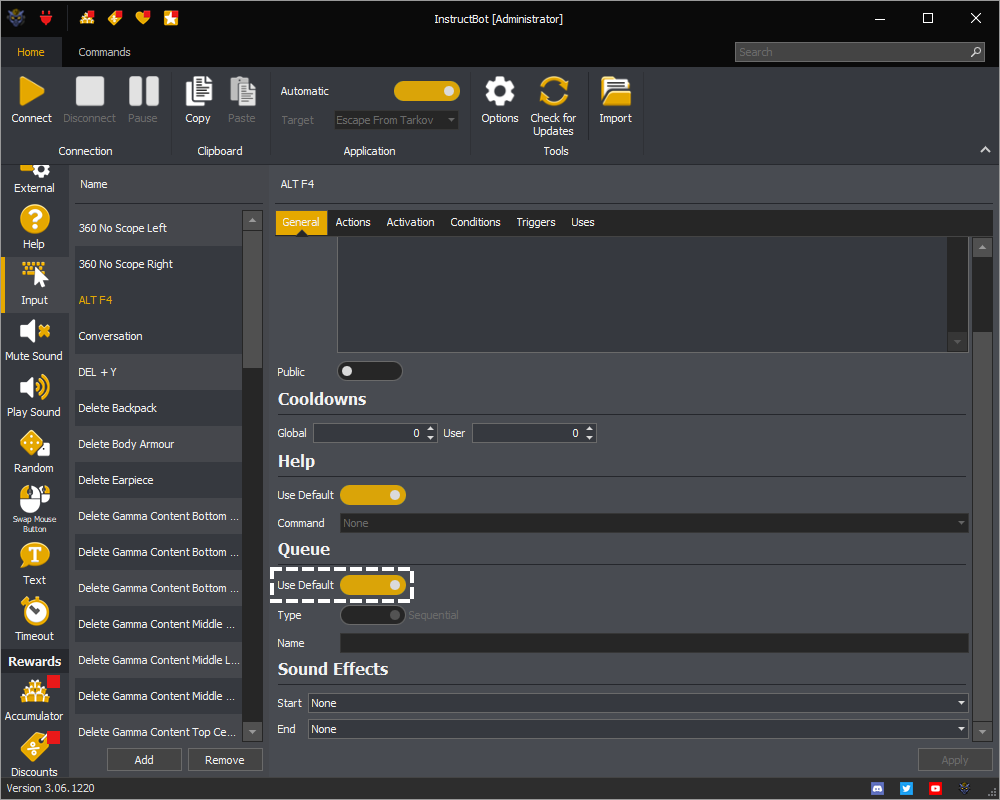
The use default toggle controls if the command will be assign to the default queue for it's type, see here.

InstructBot showing show to toggle using the default queue for the command type on a command.

Type

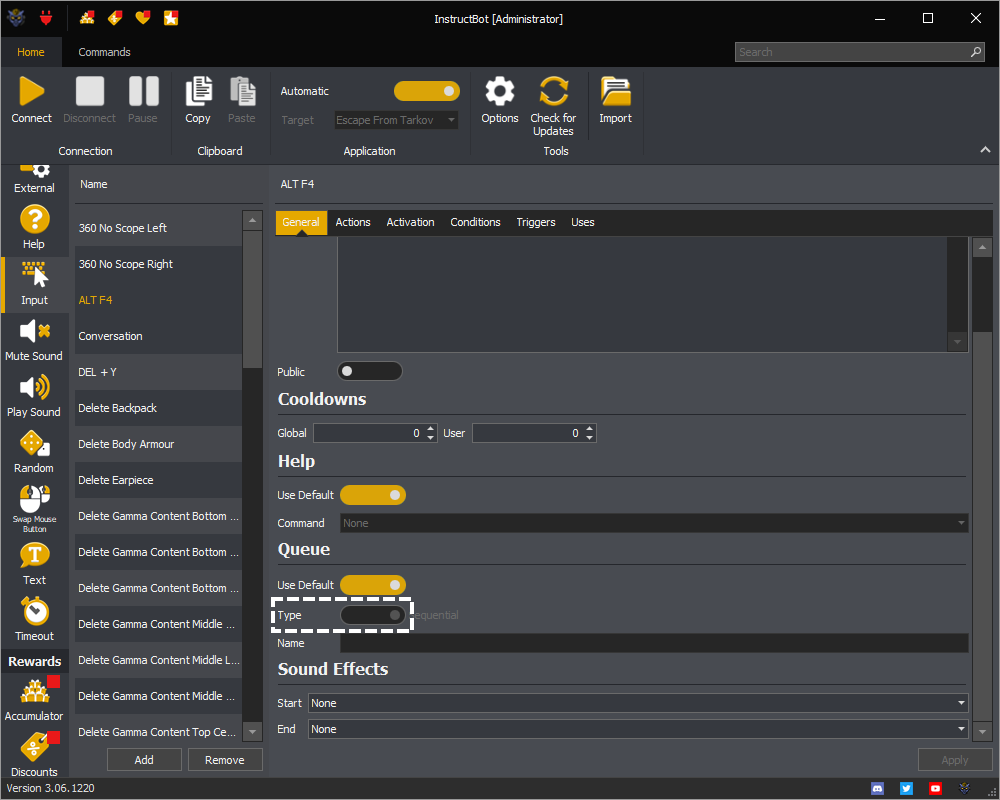
The type toggle button allows you to assign the command to the sequential or parallel queue when using the non-default queue for the command.

InstructBot showing how to assign the command to a sequential or parallel queue on a command.

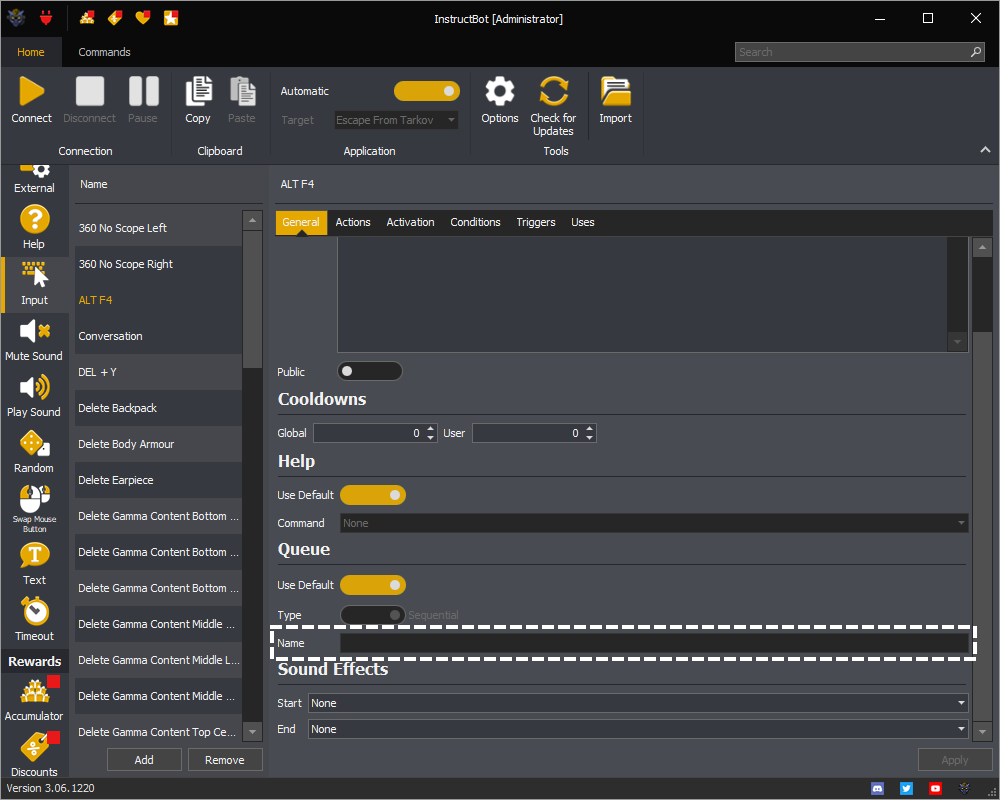
Name

If you want the command to run in a custom sequential queue, you can assign the name to group the commands together.

InstructBot showing how to assign a name to a custom sequential queue.

Users

See: Moderator, VIP, Viewer, Restore Moderator or VIP or Excluded

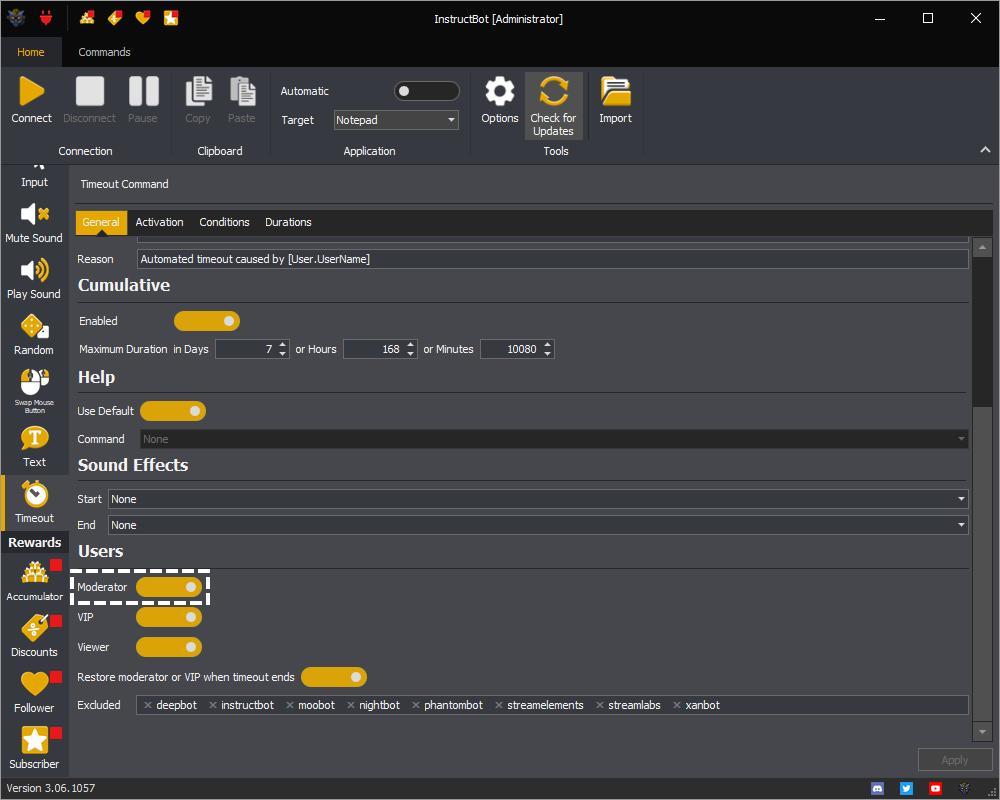
Moderator

When toggled on moderators can be be timed out.

InstructBot timeout command showing how to enable moderator timeout.

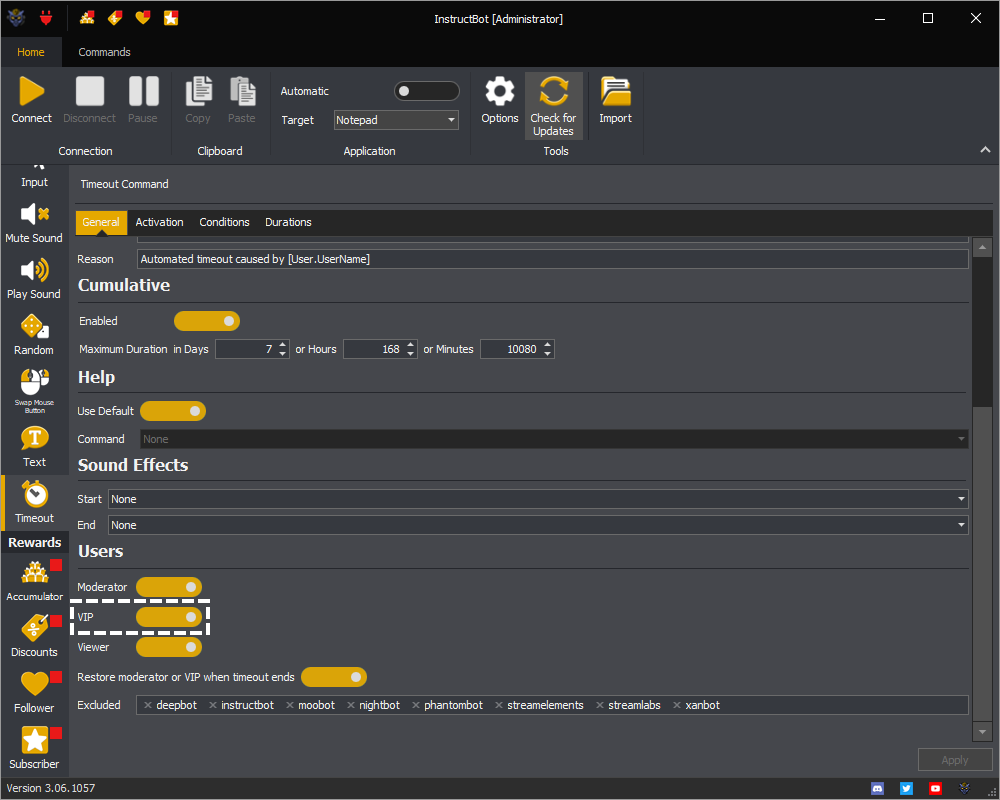
VIP

When toggled on VIPs can be be timed out.

InstructBot timeout command showing how to enable VIP timeout.

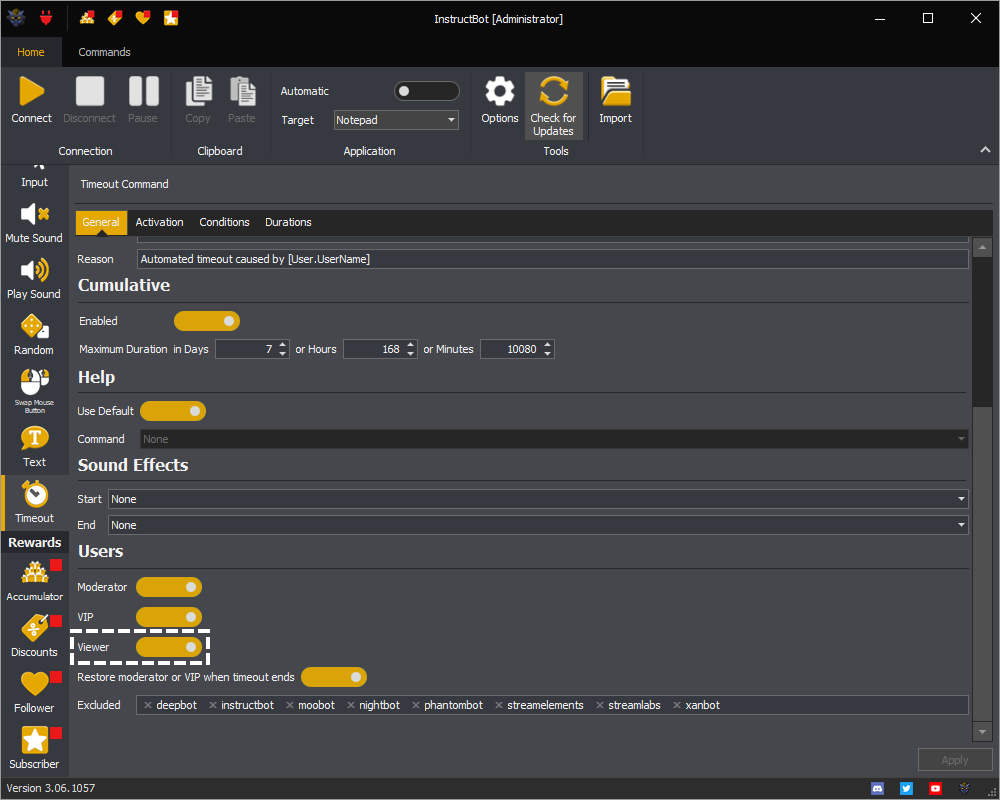
Viewer

When toggled on viewers can be be timed out.

InstructBot timeout command showing how to enable viewers timeout.

Restore Moderator or VIP

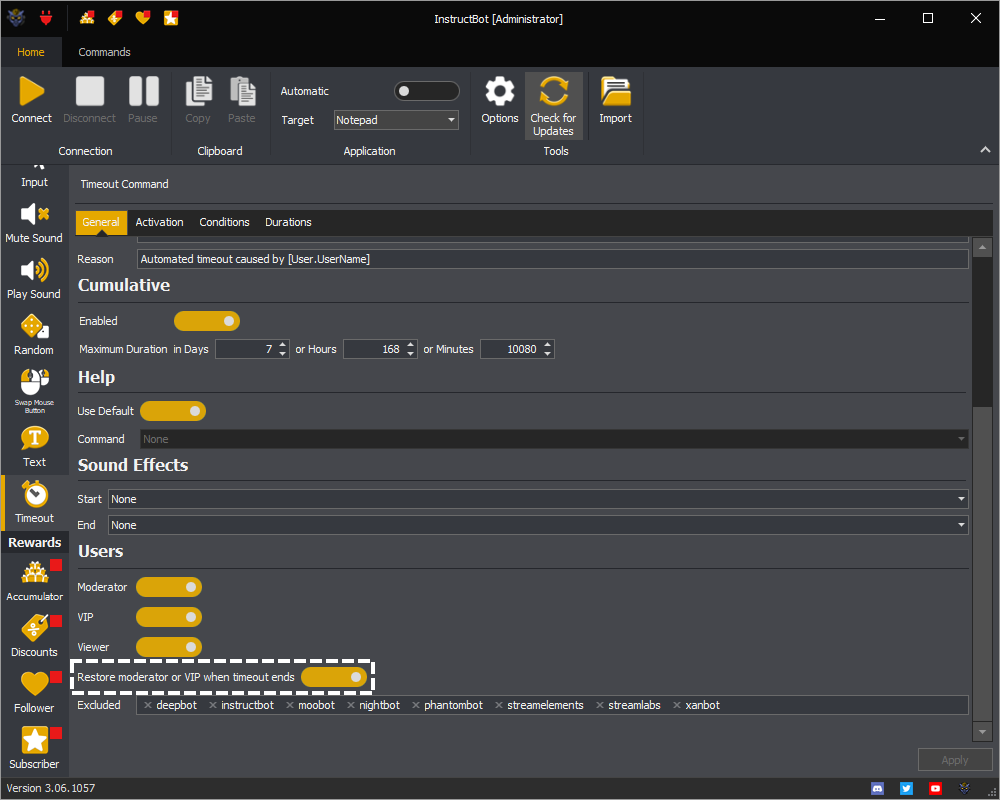
Restore moderator or VIP when timeout ends will restore a users state back to what they were before being timed out by InstructBot.

InstructBot timeout command showing how to restore moderator or VIP's after timeout.

Excluded

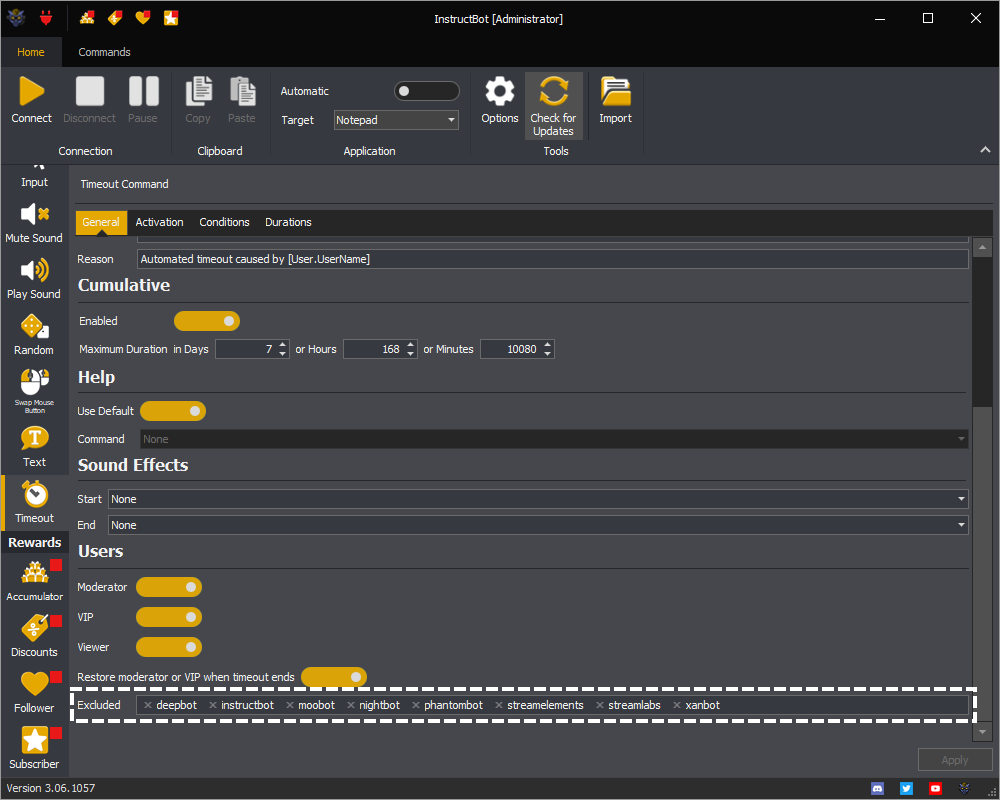
Allows you to set which users can't be timed out.

InstructBot timeout command showing how to excluded users from timeout.

Note: You can also set which users can't be timed out on the users screen as well, see here.

Activation

The activation tab of a command controls when a command is enabled or disabled. The command can be activated in two different ways.

Note: The examples below are for a Text command and Input command but this applies equally to all other command types.

The first is having the Command is always active toggle button on. When on the command will always be considered active, even if not linked to the currently active application.
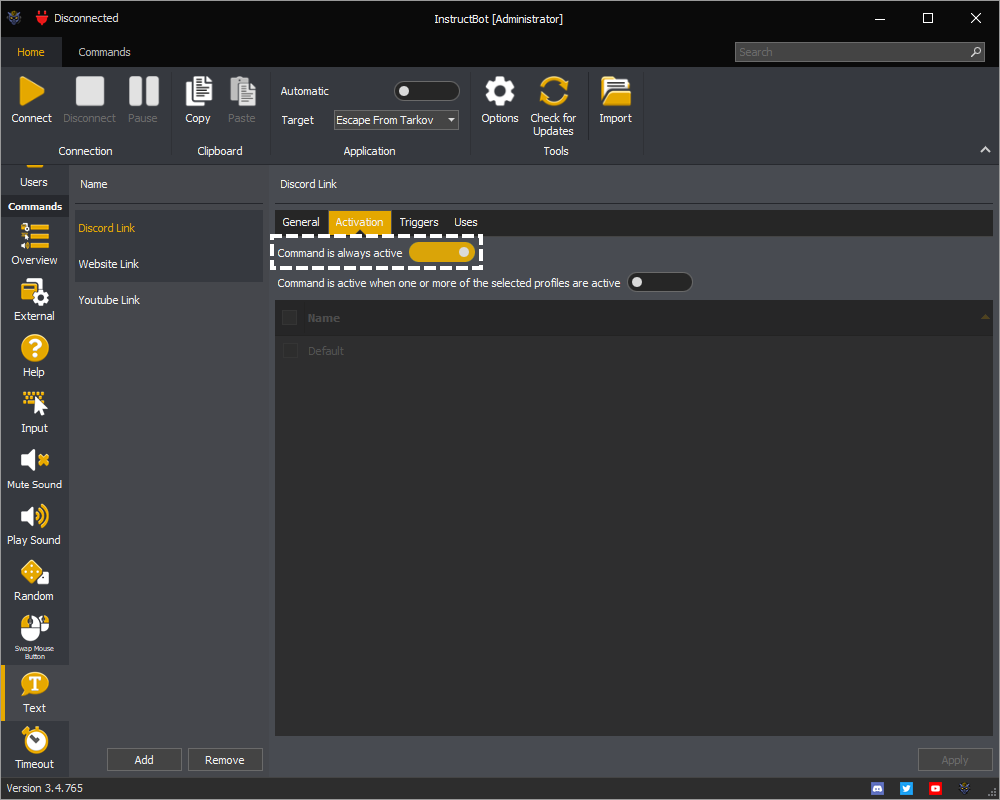
Showing an example of how to mark a command in InstructBot as 'Always Active'

The second way is toggling on the Command is active when one or more of the selected profiles are active and then one of the selected profiles is linked to the currently active application, and the profile it's self is enabled.
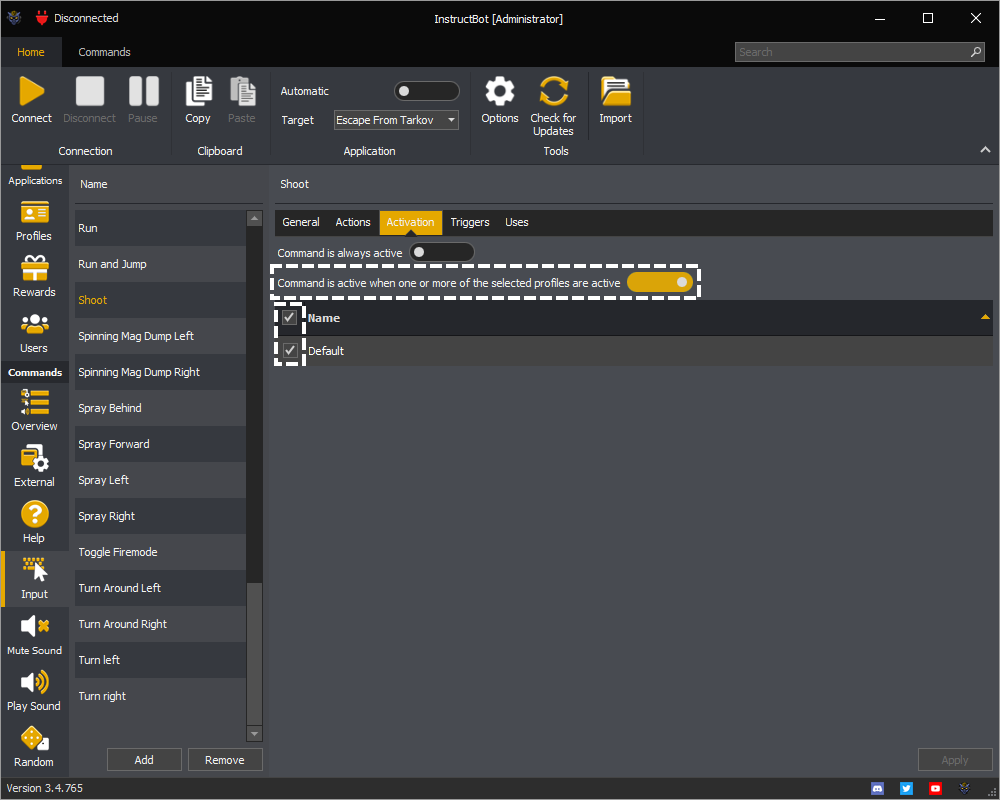
Showing an example of how to mark a command in InstructBot as activating when a selected profile is active.

In the above the Command is active when one or more of the selected profiles are active is toggled on and the Default is selected. This will cause the command to activate when the Default profile is linked to the active application.

Conditions

See: Overview, Editing Conditions ( Overview, Adding a Condition or Removing a Condition ) or Types of Conditions ( And, Or, Not, Application Active, Keyboard or Mouse Button )

Overview

Conditions are used by commands to indicate when they should execute. For example you might not want a command to run whilst you are pressing the Left Shift and W keys.

Creating a condition allows you to specify that the command should wait until you've released both of those keys and then execute.

Editing Conditions

See: Overview, Adding a Condition or Removing a Condition

Overview

The condition editor is common for all commands.

InstructBot showing an example of the conditions editor.

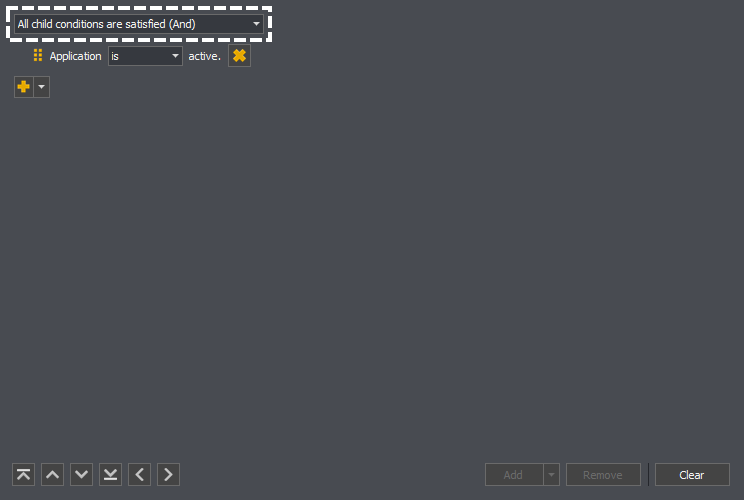
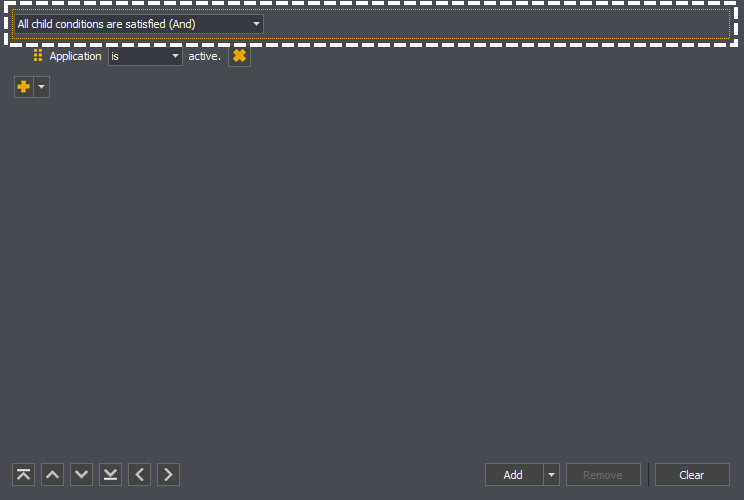
At the top of the editor is a root condition.

Highlighting the root condition of a condition in the conditions editor of InstructBot.

The root condition can act as an And Condition or Or Condition, depending upon what you require, and will always return true, e.g. the command should be executed, if there are no child conditions created.

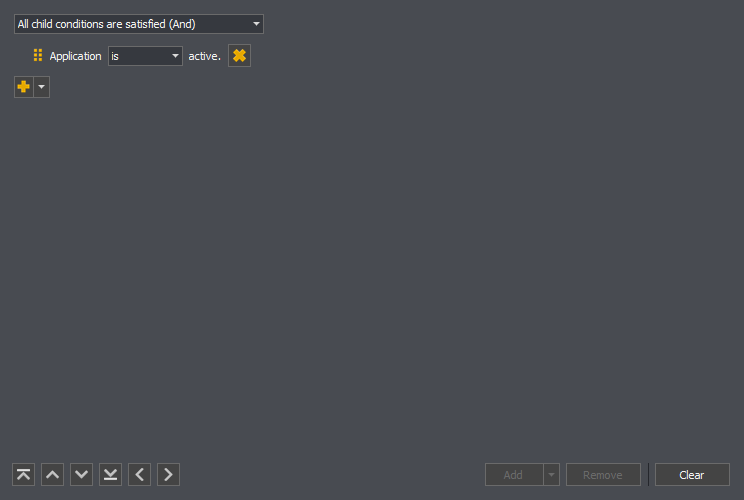
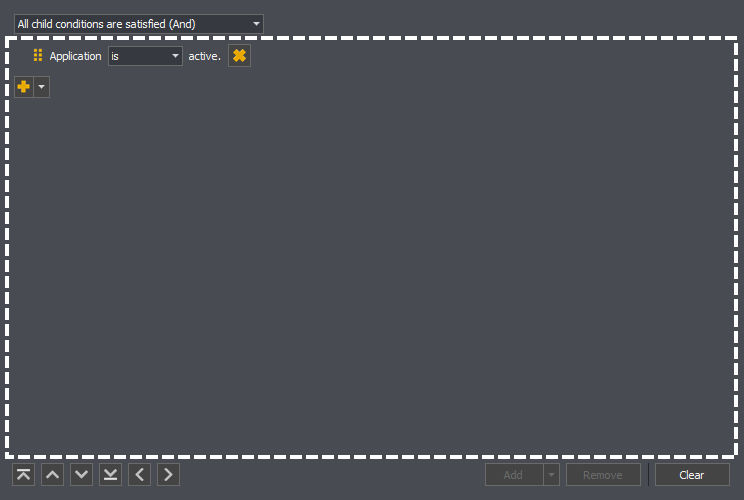
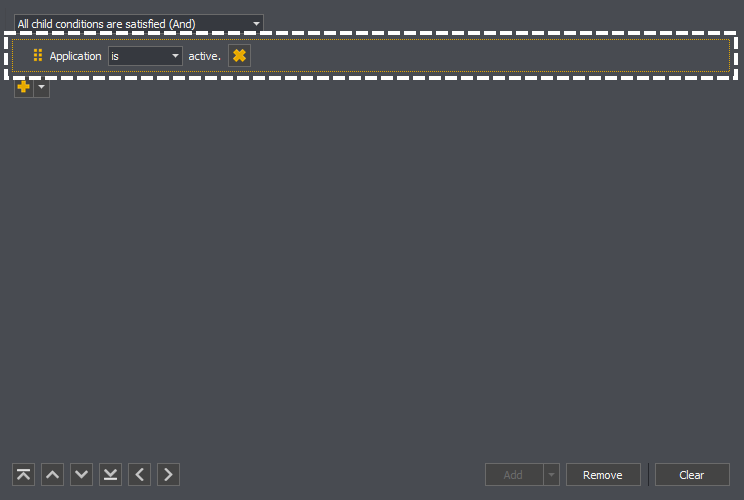
Below the root condition are it's child conditions, if any. In the example below there is an Application Active condition.

Highlighting the area the children of a root condition will appear within in the conditions editor of InstructBot.

Below that are then a number of buttons which can be used to add, remove, clear and move the conditions.

Adding a Condition

To create a new condition you must select the parent condition.

Condition editor showing the parent condition selected so that the add button is enabled in InstructBot.

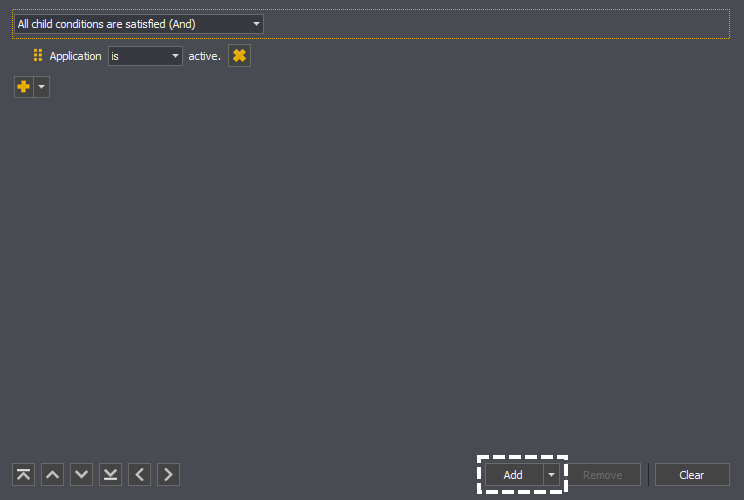
You can then click the add button.

Condition editor showing the enabled add button in InstructBot.

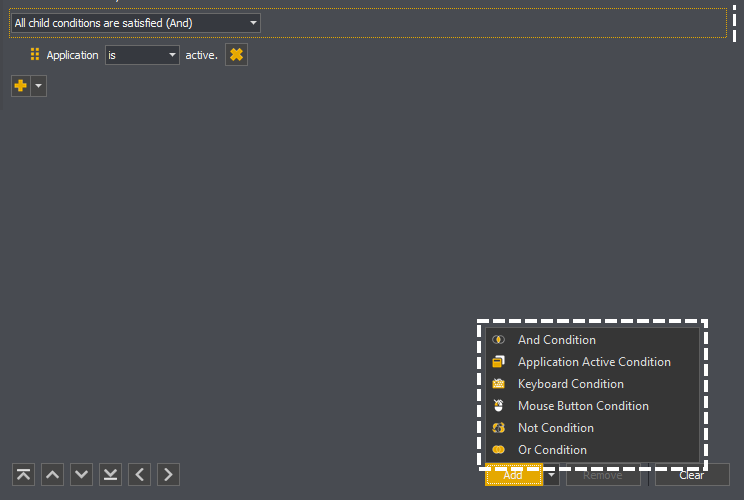
If you've added a condition before, a new condition of that type will be added, otherwise you'll be shown a list of the available condition types, see Types of Conditions, were clicking on one will create a new condition.

Condition editor showing the type of condition which can be added using the add button in InstructBot.

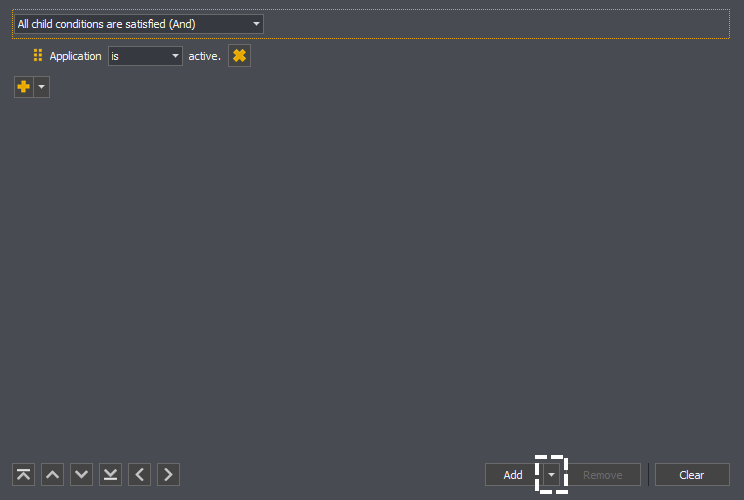
If you then wish to change the type of condition added, you can click upon the dropdown portion of the add button.

Condition editor showing the drop down portion of the add button in InstructBot.

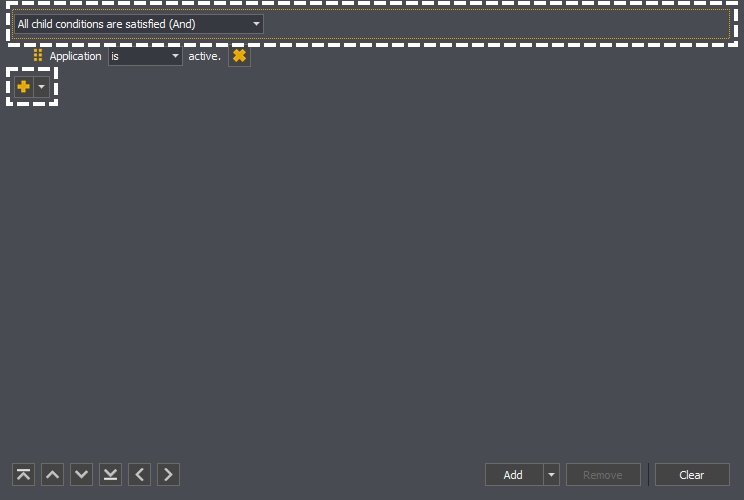
Alternativity to using the add button above, you can use the add at the same level in the hierarchy to the parent condition you wish to add a new condition to.

Condition editor showing the linked add button in InstructBot.

This will only ever added to the linked condition, as such you do not need to select the parent condition first.

Note: Only container conditions can have child conditions added to them, and some are limited in the number which can be added. Please see Types of Conditions for more information.

Removing a Condition

To remove an existing condition you must select it.

Showing how to select a condition to be removed in InstructBot.

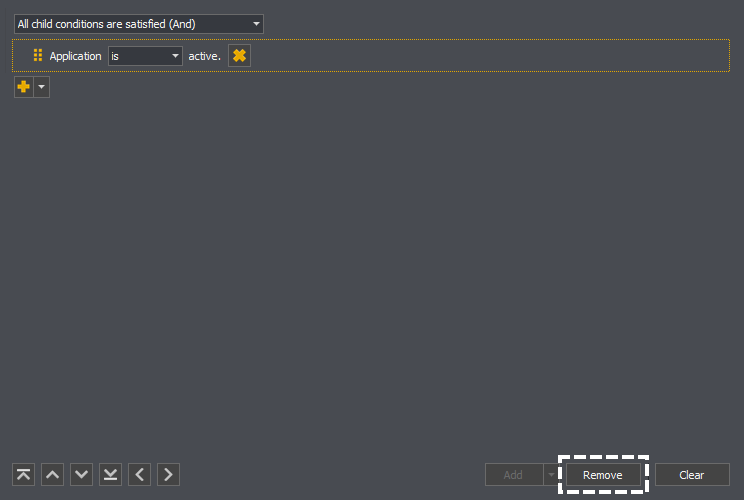
You can then press the remove button to remove the condition.

The condition editor showing how to remove the selected condition in InstructBot.

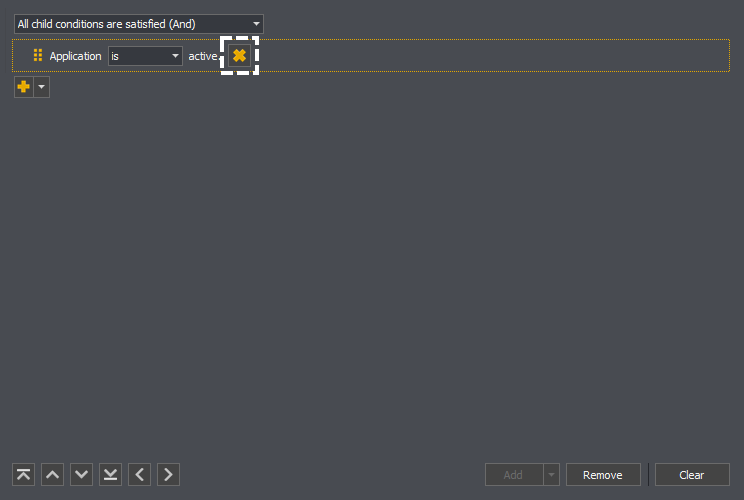
Alternatively you can click the remove button linked to the condition.

The condition editor showing how to remove a condition with it's linked remove button in InstructBot.

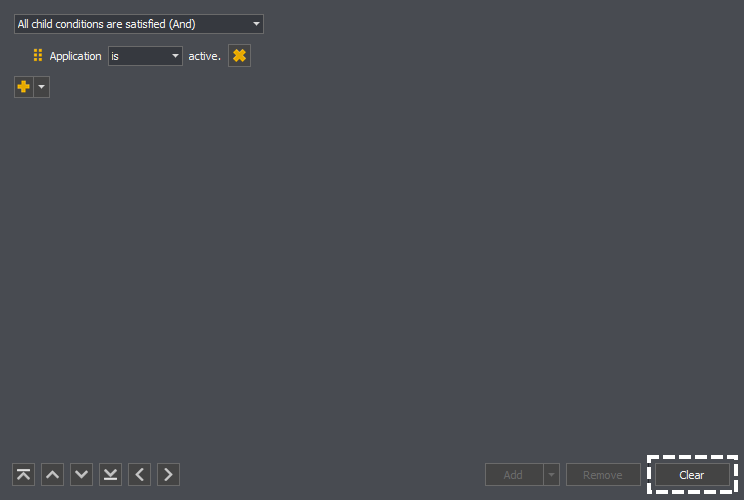
If you wish to remove all conditions, you can instead press the clear button.

The condition editor showing how to remove all conditions in InstructBot.

Note: You can't remove the root condition.

Types of Conditions

See: And, Or, Not, Application Active, Keyboard or Mouse Button

Container Condition

If a condition is marked as a container condition it can have child conditions which will be evaluated when it's evaluated. Some container conditions have a maximum number of children, if so they will be marked as much.

And

Container Condition: Unlimited.

The And Condition is satisfied when all of it's children are satisfied; otherwise it is unsatisfied.

The condition editor showing an example of an And condition in InstructBot.

In the example above the And condition would be satisfied when both the left shift and W keys a pressed. It would be unsatisfied if either the Left Shift key or the W key were pressed or nether the keys were pressed.

Note: If an And condition has no children, it is satisfied.

Or

Container Condition: Unlimited.

The Or Condition is satisfied when any of it's children are satisfied; otherwise it is unsatisfied.

The condition editor showing an example of an Or condition in InstructBot.

In the example above the Or condition would be satisfied when the left shift key was pressed, the W key was pressed or both the left shift key and w are pressed. It would be unsatisfied when nether the keys are pressed.

Note: If an Or condition has no children, it is satisfied.

Not

Container Condition: One.

The Not Condition inverts the result of it's child condition.

The condition editor showing an example of an Not condition in InstructBot.

In the example above the Not condition would be satisfied when the application is not active, and satisfied when the application is active. 

Note: If an Not condition has no children, it is satisfied.

Application Active

The Application Active condition returns satisfied depending upon it's match type. When configured to look for an active application is will return satisfied when that application is active and unsatisfied when that application in inactive.

The condition editor showing an example of an application active condition matching when the application is active in InstructBot.

When configured to look for an inactive application is will return satisfied when that application is inactive and unsatisfied when that application in active.

The condition editor showing an example of an application active condition matching when the application is inactive in InstructBot.

Keyboard

The Keyboard condition returns satisfied depending upon it's match type and specified key. When configured to look for a pressed key it will return satisfied when that key is down and unsatisfied when that key is up.

The condition editor showing an example of an keyboard condition matching when the key is pressed in InstructBot.

When configured to look for a released key it will return satisfied when that key is up and unsatisfied when that key is down.

The condition editor showing an example of an keyboard condition matching when the key is not pressed in InstructBot.

You can control the key queried by clicking in the editor and pressing the required key.

The condition editor showing an example of an keyboard condition key selection in InstructBot.

Mouse Button

The Mouse Button condition returns satisfied depending upon it's match type and specified button. When configured to look for a pressed button it will return satisfied when that button is down and unsatisfied when that button is up.

The condition editor showing an example of an mouse button condition matching when the button is pressed in InstructBot.

When configured to look for a released button it will return satisfied when that button is up and unsatisfied when that button is down.

The condition editor showing an example of an mouse button condition matching when the button is not pressed in InstructBot.

You can control the button queried by clicking in the editor and pressing the required button.

The condition editor showing an example of an mouse button condition button selection in InstructBot.

Durations

See: Add, Edit or Remove

The duration's control how long a user is timed out for, for a linked trigger.
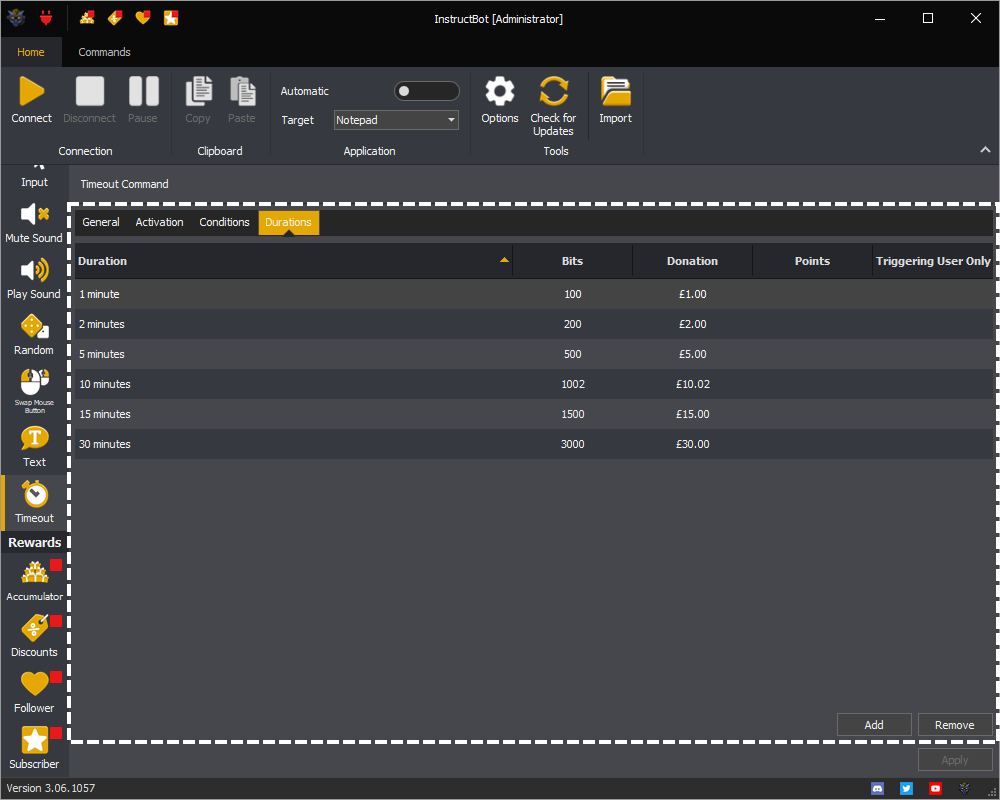
InstructBot showing the duration's of a timeout command.

Each duration has a time, and can have a bits cost, donation cost and points cost. For example in the below the 1 minute duration has a trigger of 100 bits or a donation trigger of £1.
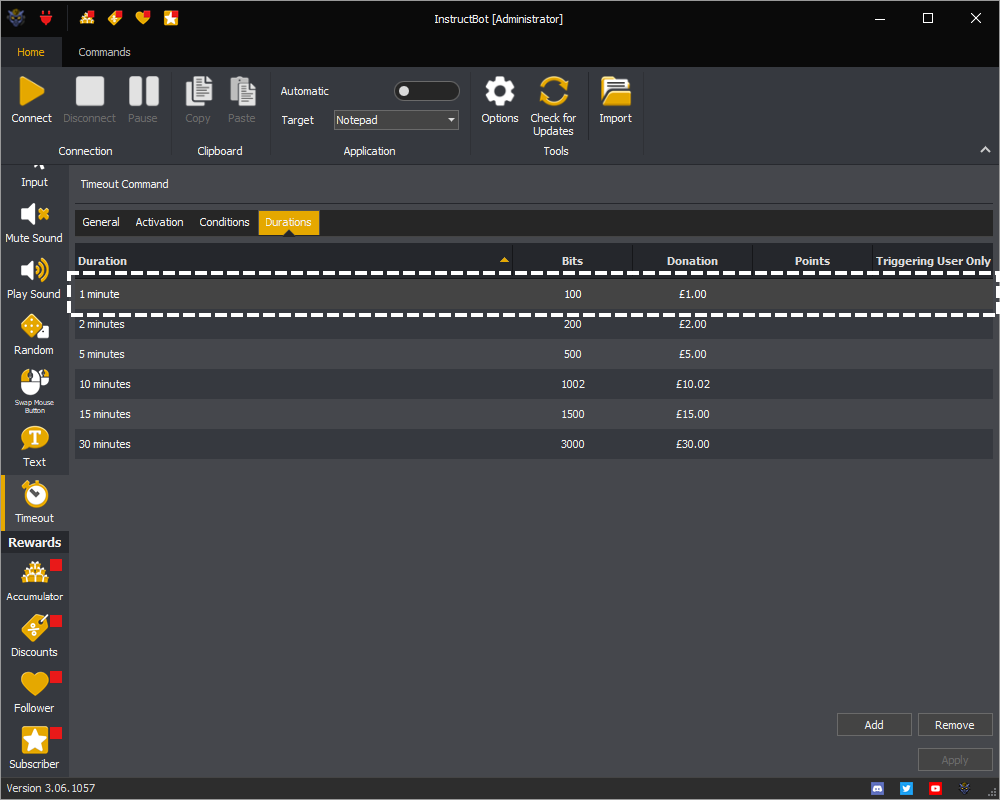
InstructBot showing an example of a 1 minute duration for a timeout command.

Add

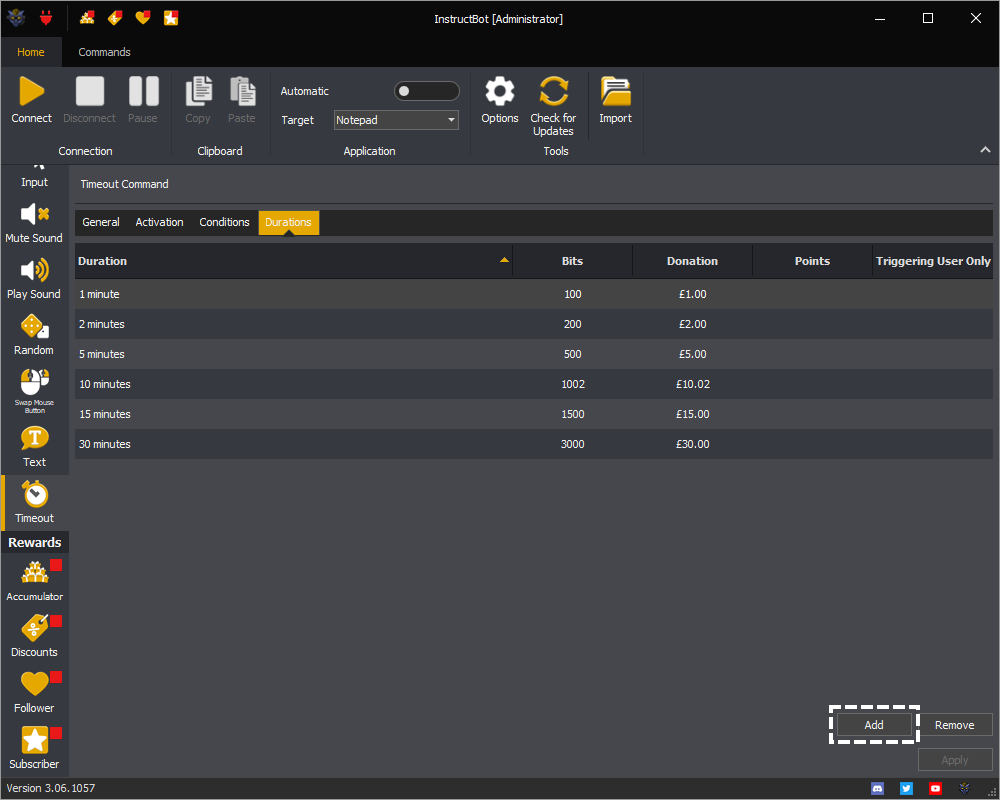
To create a new duration press the add button.

InstructBot duration's screen of the timeout command, showing the add button.

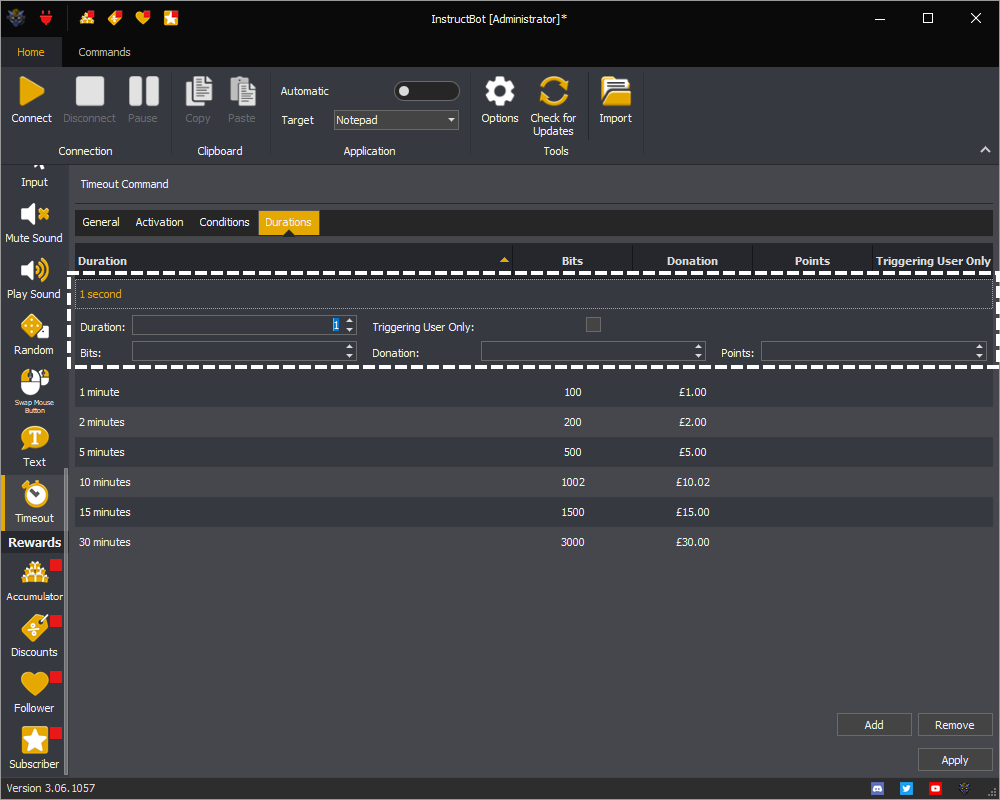
This will create a new row and open the editor.

InstructBot showing example of a new duration row for a timeout command.

Edit

To edit a duration double click upon the row to open the editor.

InstructBot showing how to edit a timeout duration.

Duration: Is the length of time in seconds the user will be timed out for.

Bits: The bits required to trigger the timeout.

Donation: The donation required to trigger the timeout.

Points: The points required to trigger the timeout.

Remove

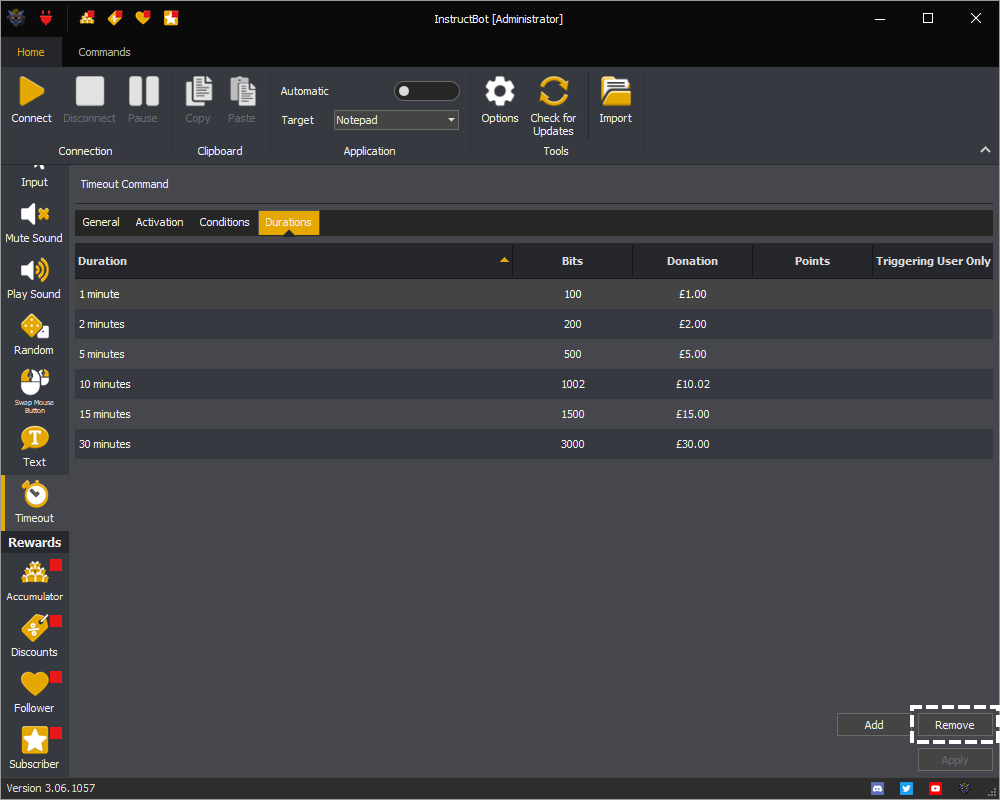
To remove a duration select the row and then press the remove button.

InstructBot showing how to remove a duration from a timeout command.

This website uses cookies to improve your experience. We'll assume you're ok with this, but you can opt-out if you wish.AcceptReject