See: General ( Name, Description, Public, Cooldowns, Help, Queue, Sound Effects or Text ), Actions ( Editing Actions or Types of Actions ), Activation, Conditions ( Overview, Editing Conditions or Types of Conditions ), Triggers ( Overview, Identifier, Alias, Editing Triggers, Types of Triggers or Permissions ) or Uses ( Add, Edit, Remove or Clear )
An input command is used to send keyboard or mouse input to an application.
For an overview of what input commands are and how to create them please watch the below.
General
See: Name, Description, Public, Cooldowns ( Global or User ), Help ( Use Default or Command ), Queue ( Use Default, Type or Name ), Sound Effects ( Start or End ) or Text ( Start or End )
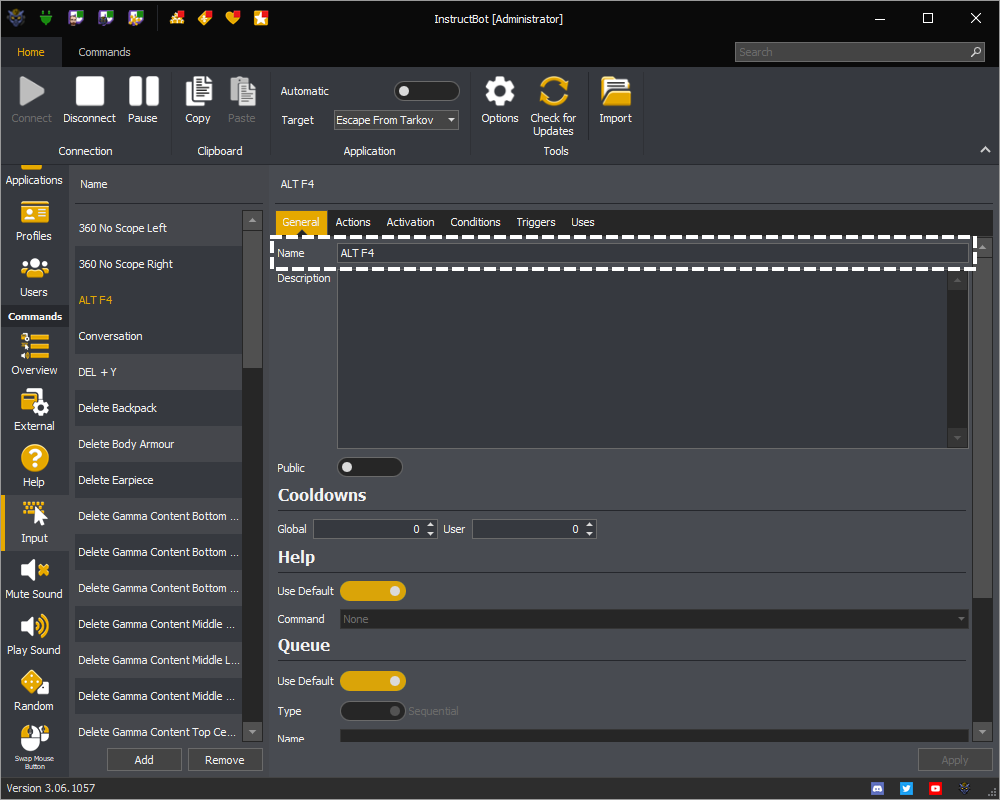
The name of the command. This is shown within the user interface and chat when the command is triggered (if the notification is enabled).
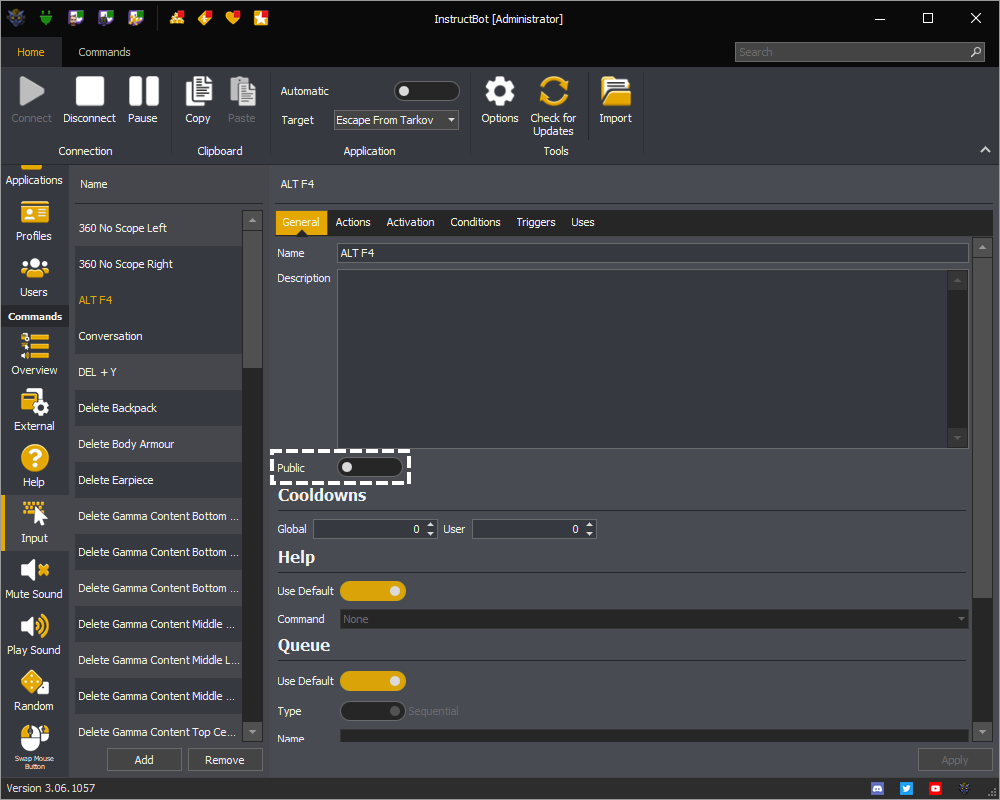
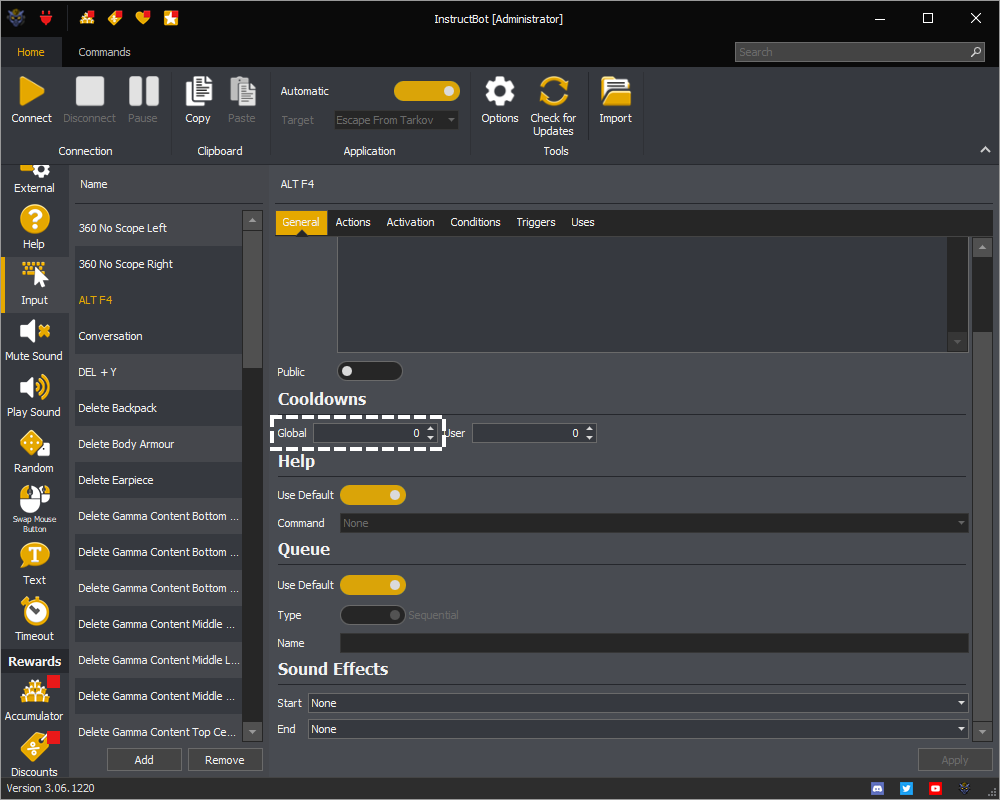
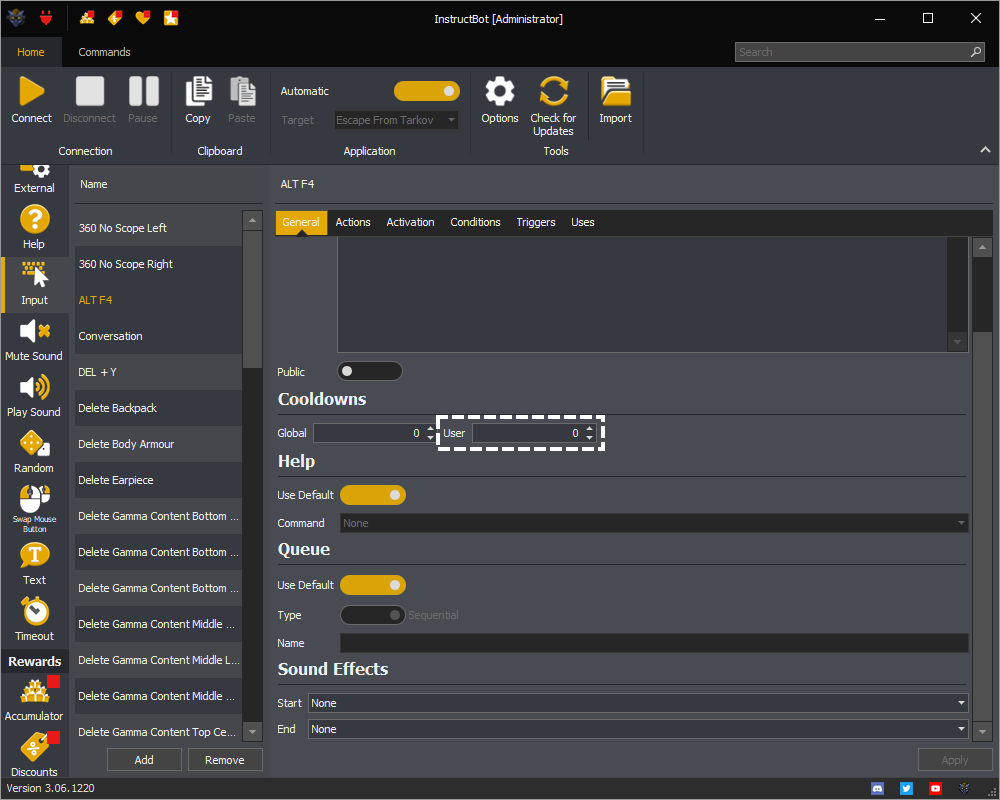
The cooldowns section controls how often the command can be run. You can see how cooldowns work here.
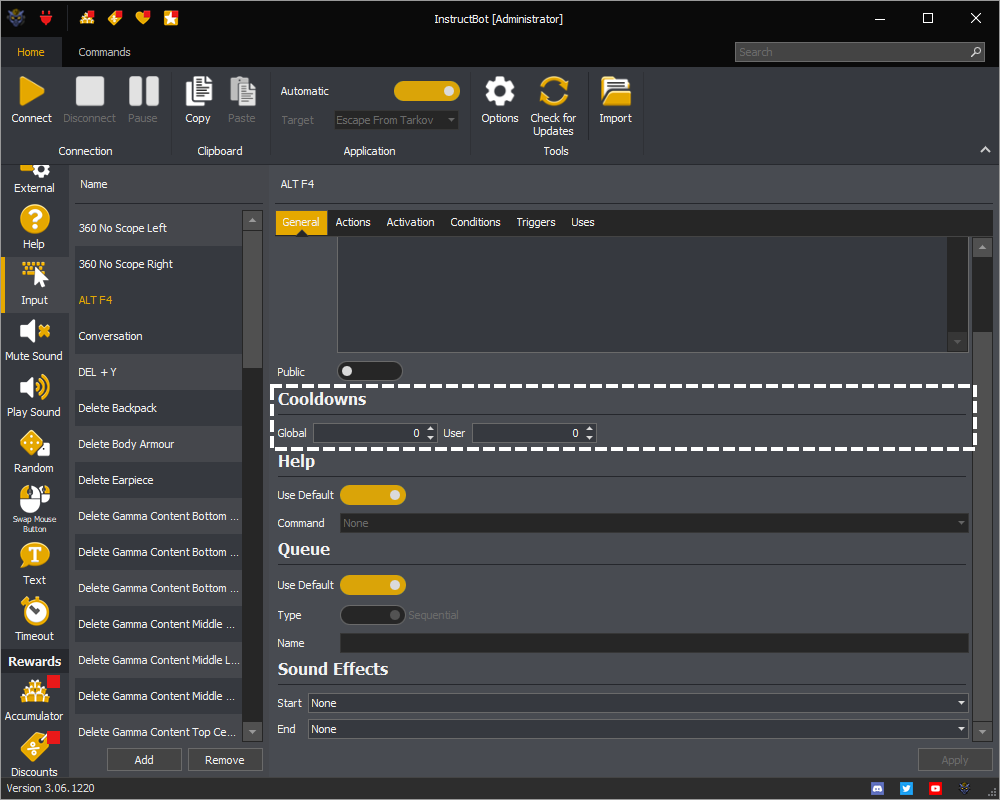
Note: The examples are for an Input command but this applies equally to all other command types.
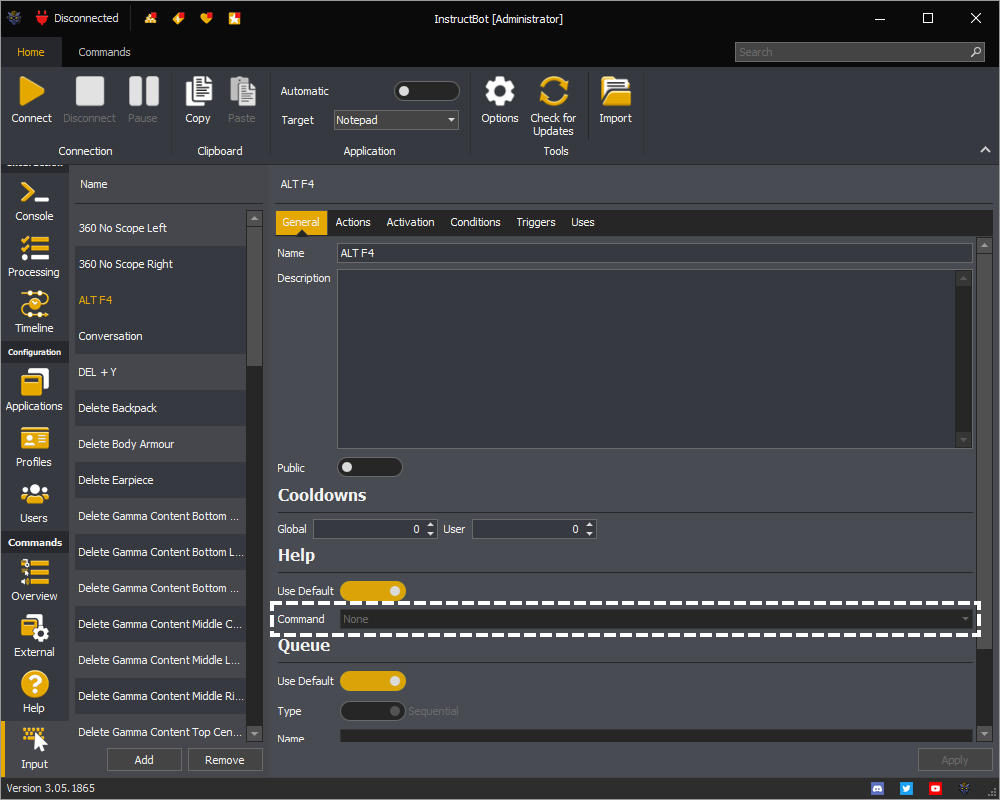
The help section controls what Help command, if any, the command will appear within.
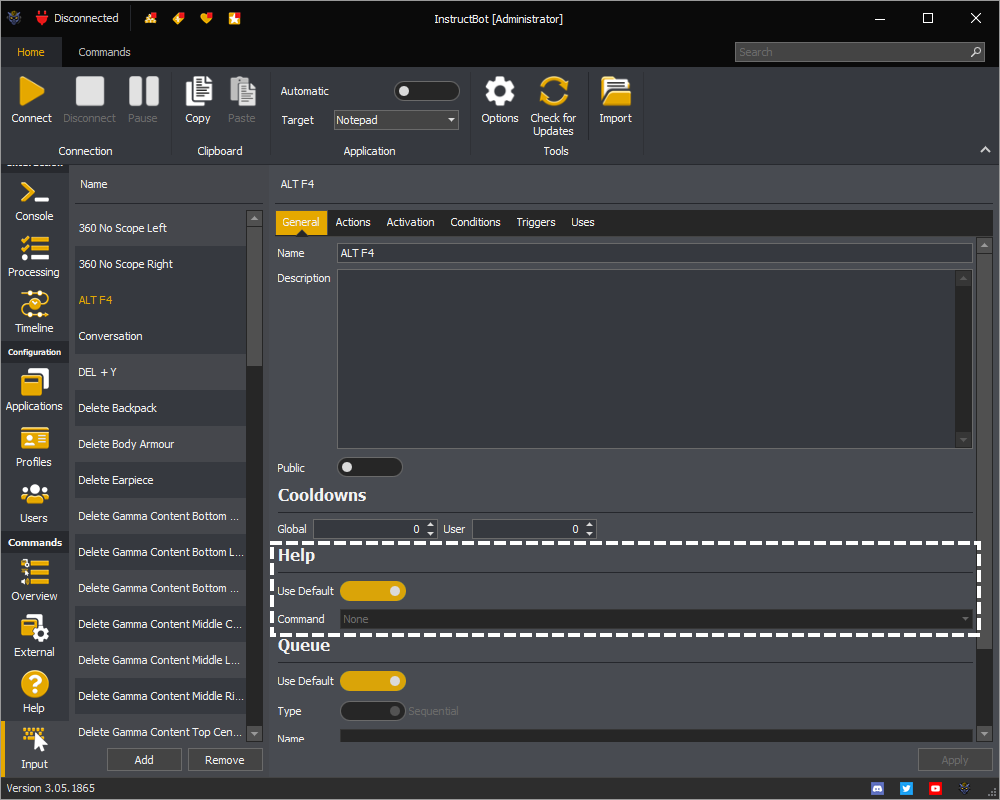
Note: The examples are for an Input command but this applies equally to all other command types which support help.
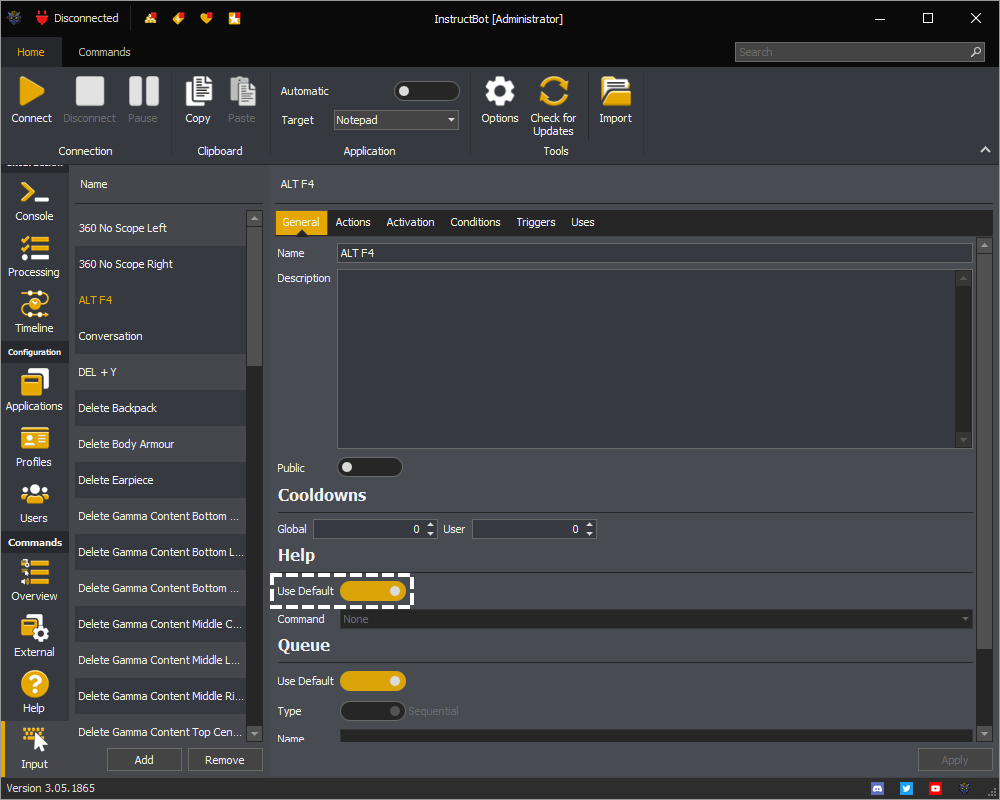
The use default toggle controls if the command will be included in the default help command, see here.
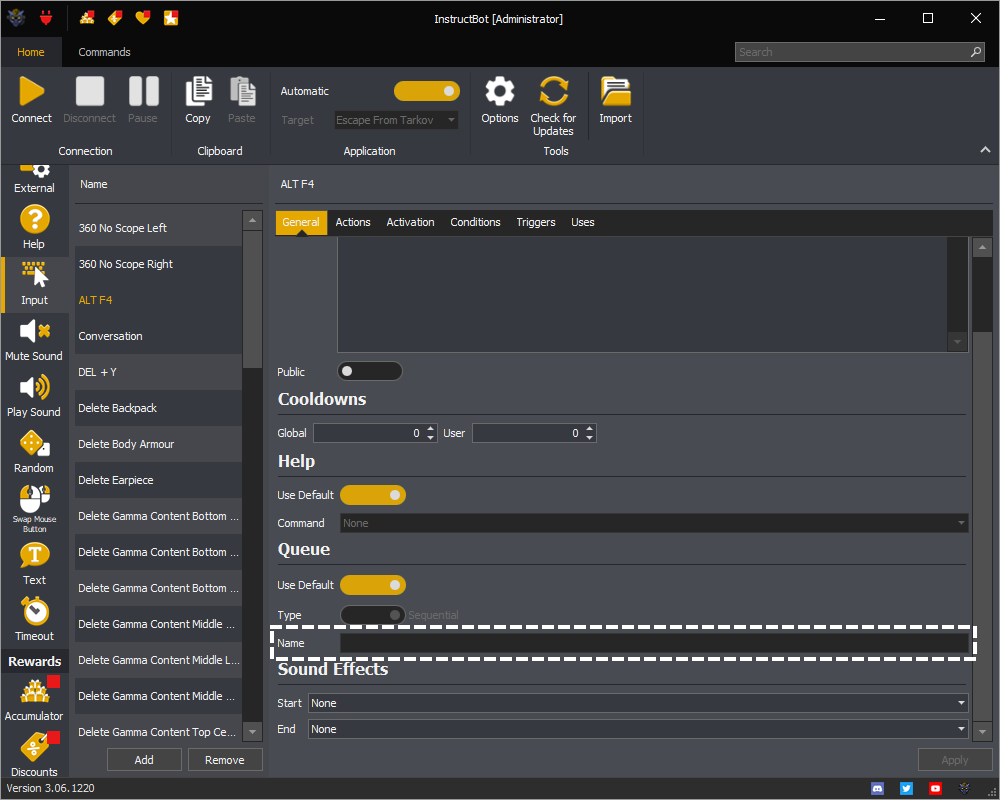
The queue section controls how the command is run. You can see an example of how queue's work here.
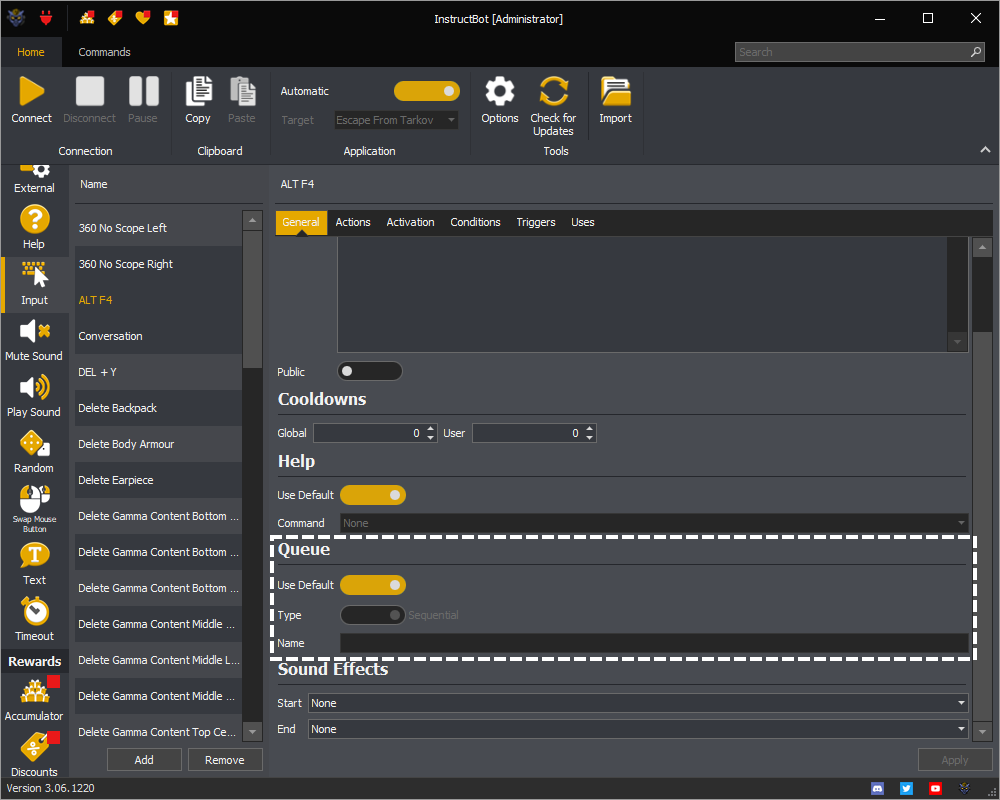
Note: The examples are for an Input command but this applies equally to all other command types.
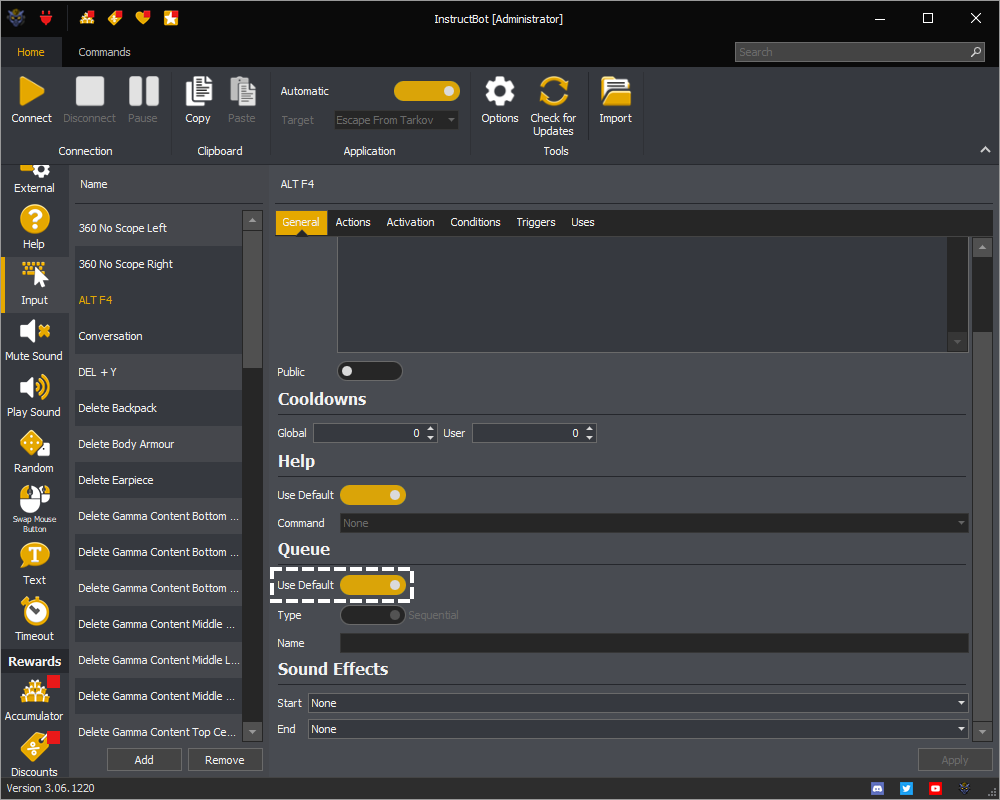
The use default toggle controls if the command will be assign to the default queue for it's type, see here.
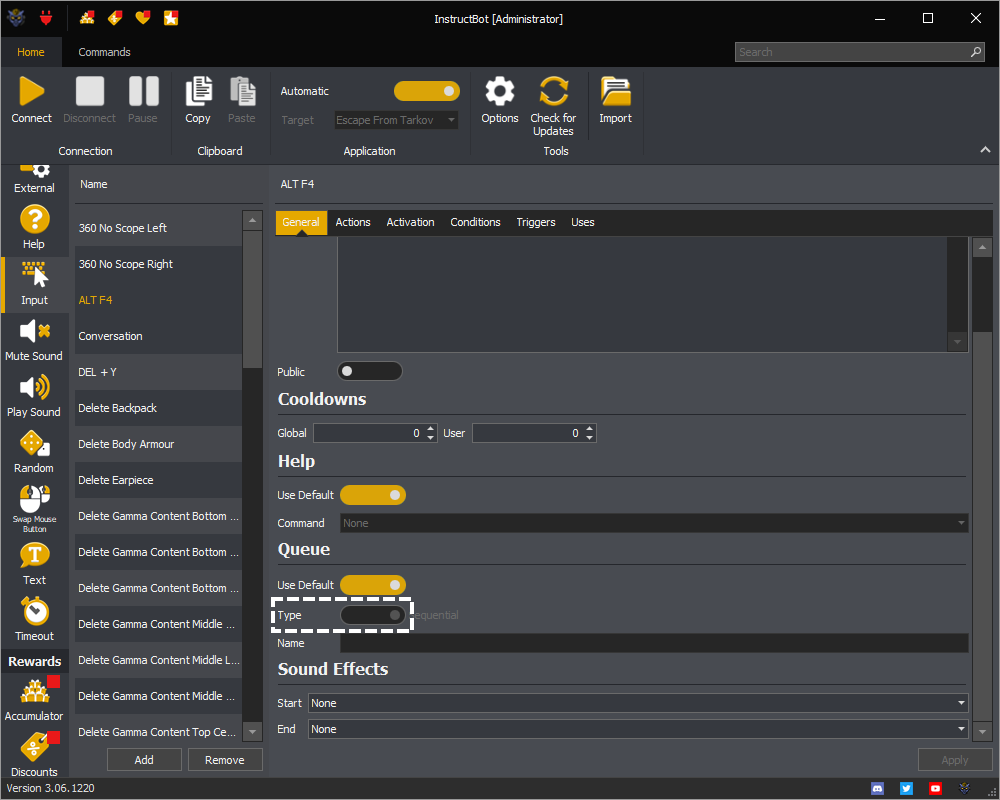
The type toggle button allows you to assign the command to the sequential or parallel queue when using the non-default queue for the command.
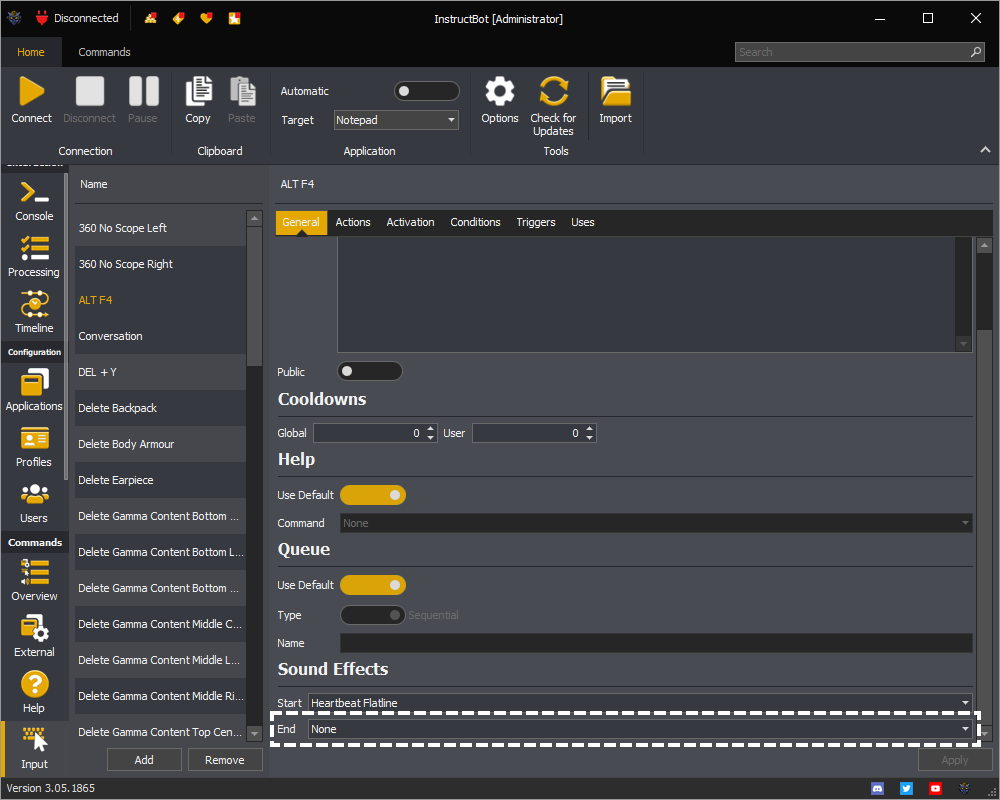
The sound effects section controls what Play Sound commands, if any, are executed at the start and end of the command.
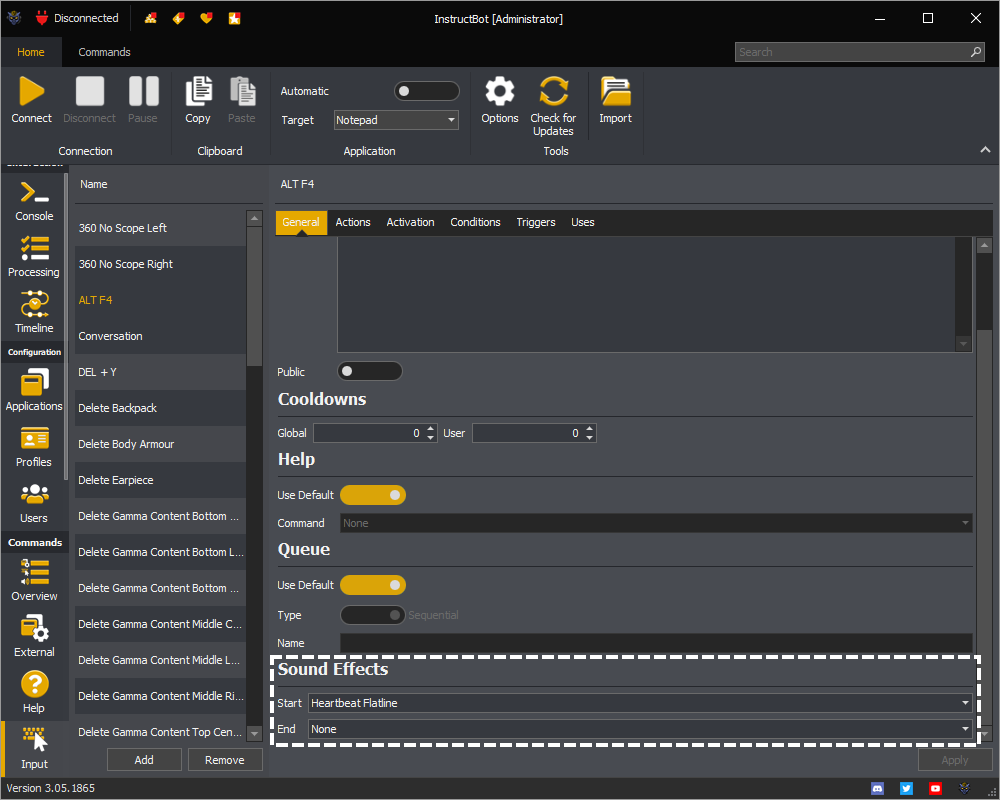
Note: The examples are for an Input command but this applies equally to all other command types which support sound effects.
The start play sound command to run when the owner command starts executing.

For example in the above the "Heartbeat Flatline" play sound command would play.
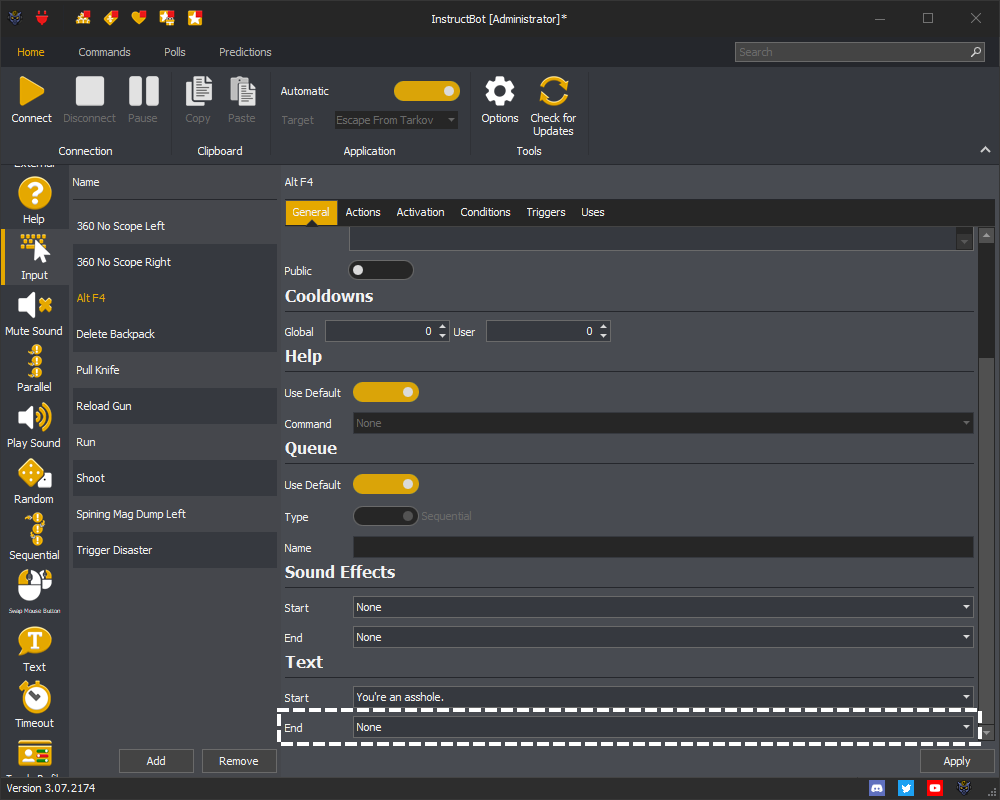
The text section controls what Text commands, if any, are executed at the start and end of the command.
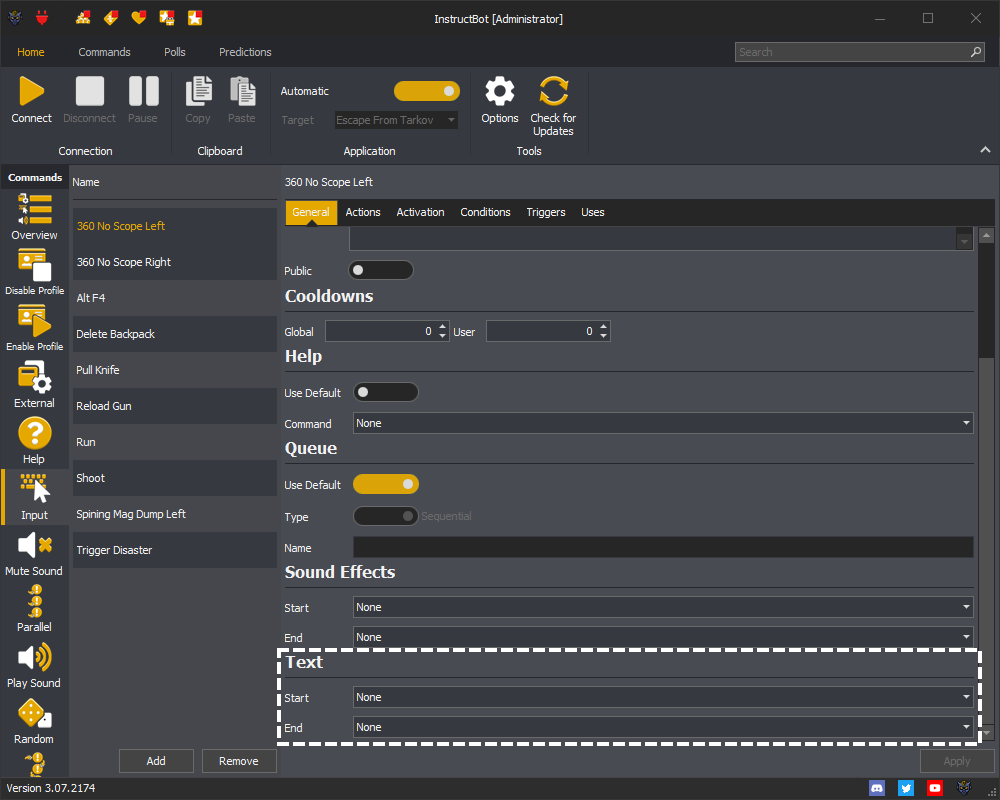
Note: The examples are for an Input command but this applies equally to all other command types which support text.
The start text command to run when the owning command starts executing.
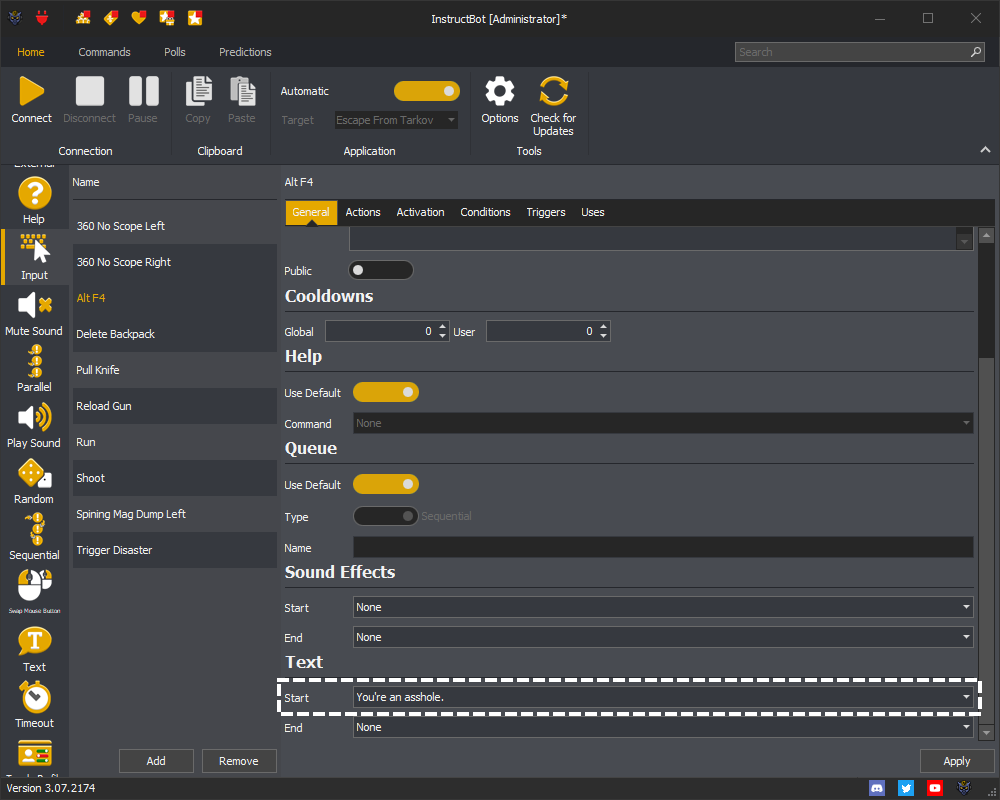
For example in the above the "You're an asshole" text command would run.
Actions
See: Editing Actions ( Overview, Adding an Action, Editing an Action, Removing an Action or Ordering Actions ) or Types of Actions ( Key Down, Key Press, Key Up, Mouse Button Down, Mouse Button Press, Mouse Button Up, Mouse Movement Absolute, Mouse Movement Relative, Mouse Scroll Wheel Down, Mouse Scroll Wheel Up, Pause or Repeat )
Actions are the sequence of items sent to the application.
Editing Actions
See: Overview, Adding an Action, Editing an Action, Removing an Action or Ordering Actions
The action editor is shared by input commands and repeat actions.
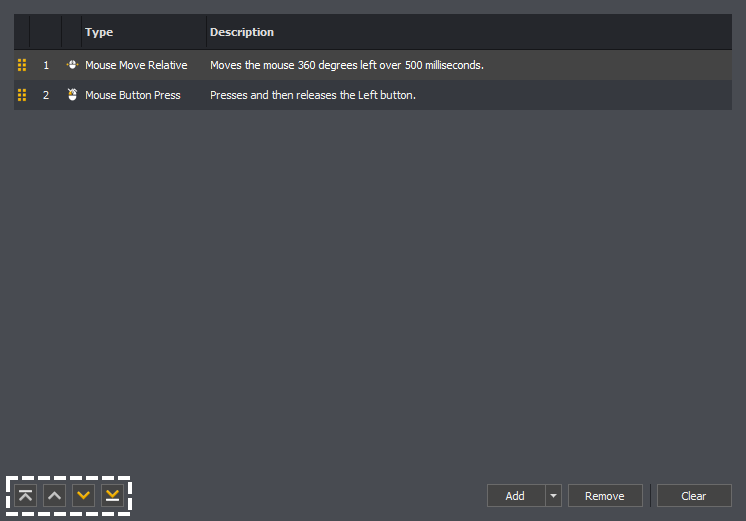
The drag handle ![]() column allows you to drag individual actions up and down the list.
column allows you to drag individual actions up and down the list.
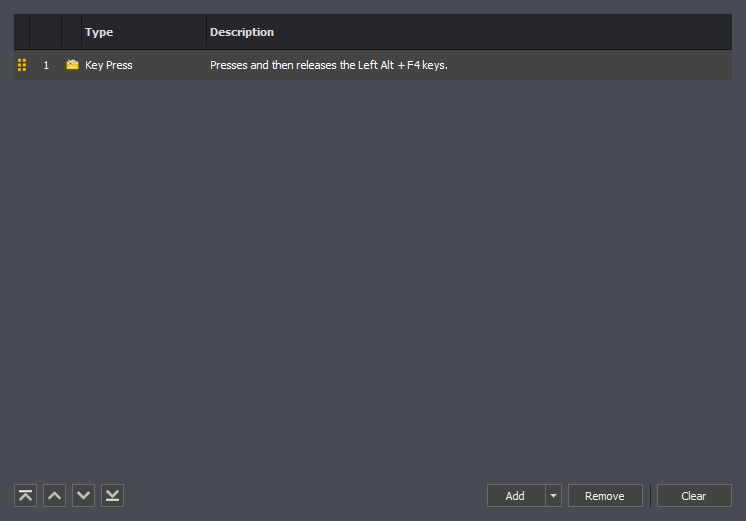
The order column shows the order of the action.
The type column shows the type icon and name of an action.
The description column shows a brief piece of text outlining what that action will do.
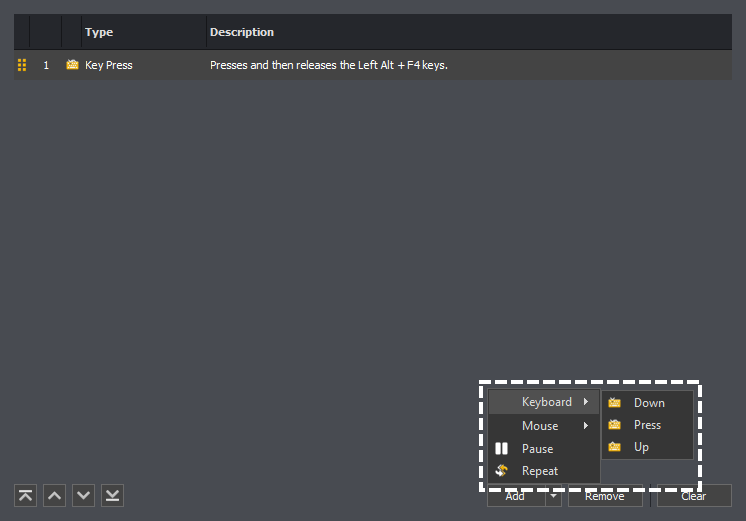
To create a new action, press the add button.
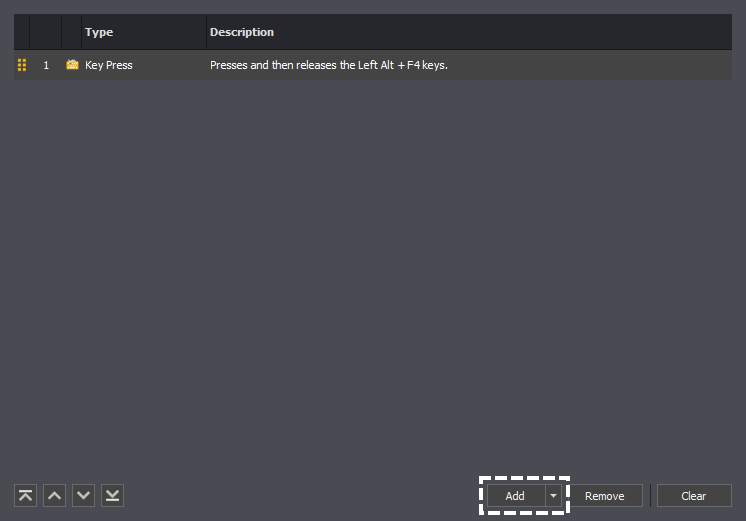
If you've added an action before, a new action of that type will be added, otherwise you'll be shown a list of the available action types, see Types of Actions, clicking on one will create a new action of that type.
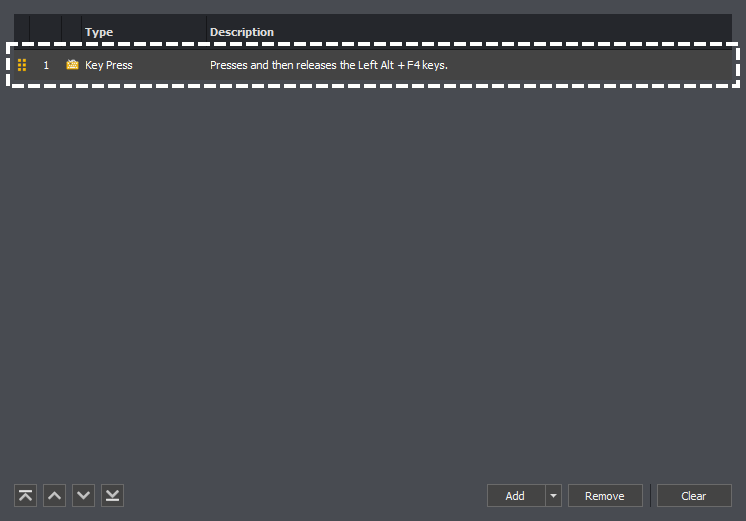
To edit an action you should double click upon the row.

This will open the editor for the selected action.
To remove an action select the required action.
You can then press the remove button to remove the action.
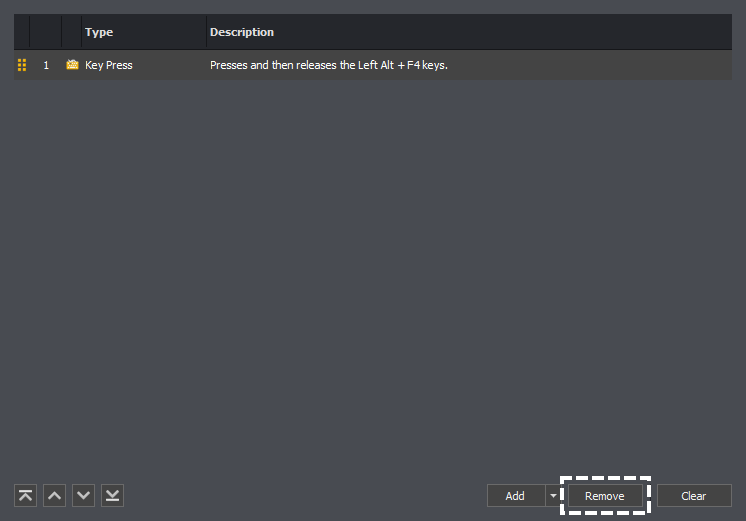
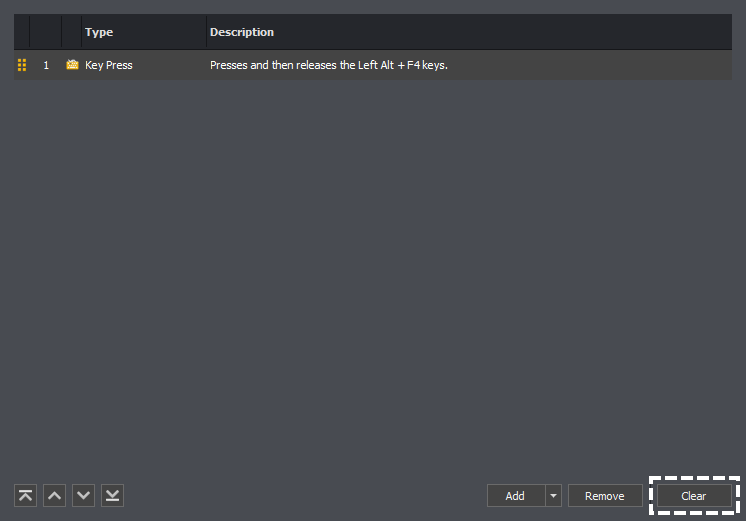
If you wish to remove all actions, you can instead press the clear button.

Types of Actions
See: Key Down, Key Press, Key Up, Mouse Button Down, Mouse Button Press, Mouse Button Up, Mouse Movement Absolute, Mouse Movement Relative, Mouse Scroll Wheel Down, Mouse Scroll Wheel Up, Pause or Repeat
There are several types of actions an input command can perform.
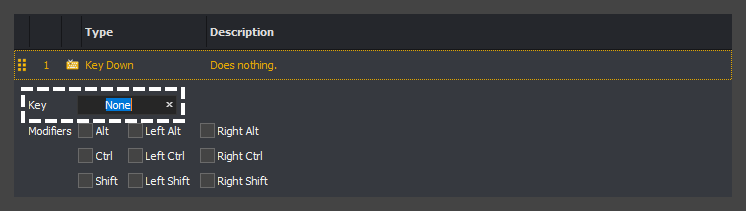
A key down action presses and holds the assigned key until a matching key up action is sent (see: key up action), you physically press the keys on you keyboard again, or the command finishes executing.

To assign the key click on the key textbox.
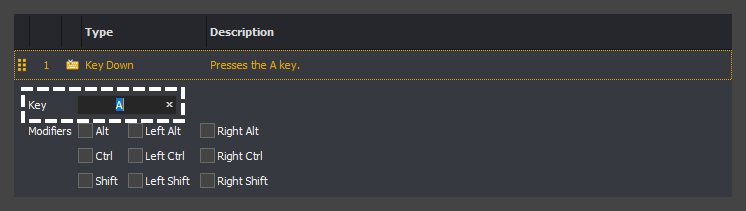
You can then press the key you want to send. Once pressed it will be shown in the textbox, for example A below.
If you need the key to be modified by Alt, Ctrl or Shift then check the required modifier, for example Left Shift in the below.

Note: You can either have a general alt, ctrl or shift key modifiers or specific left / right versions. Games may require either to function correctly.
If you have no key selected it will just hold the modifier key, for example just Left Shift would be held in the below.

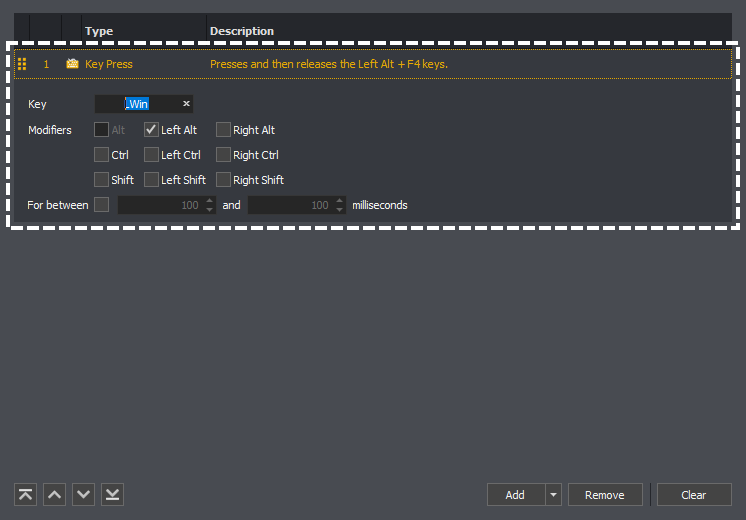
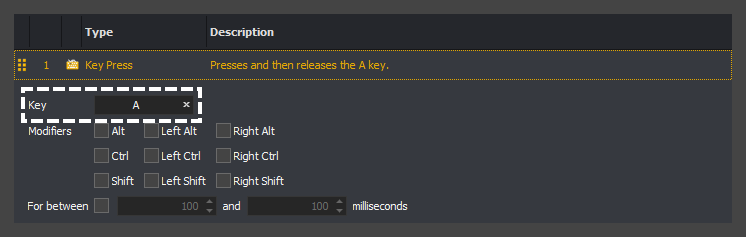
A key press action presses and the releases the assigned key.

To assign the key click on the key textbox.

You can then press the key you want to send. Once pressed it will be shown in the textbox, for example A below.
If you need the key to be modified by Alt, Ctrl or Shift then check the required modifier, for example Left Shift in the below.
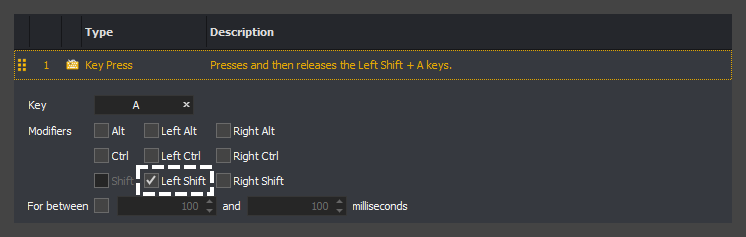
Note: You can either have a general alt, ctrl or shift key modifiers or specific left / right versions. Games may require either to function correctly.
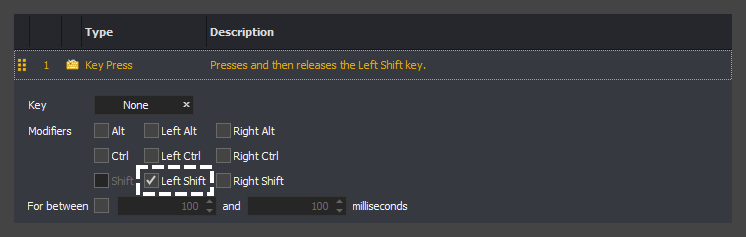
If you have no key selected it will just press the modifier key, for example just Left Shift would be pressed in the below.
If you want to perform the key press for a time period check the for between checkbox.
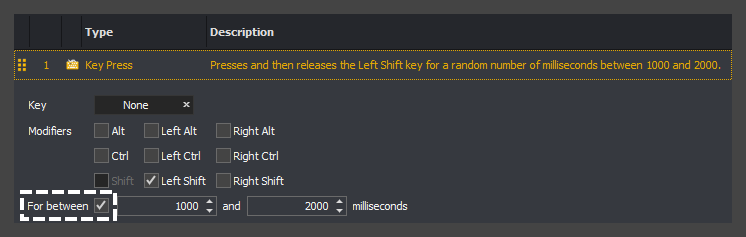
You can then enter the minimum and maximum duration in milliseconds for the key to be pressed.
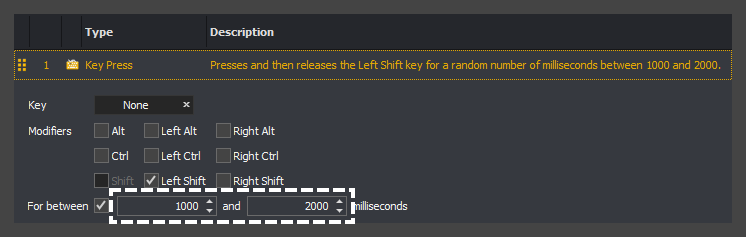
If the minimum and maximum duration are equal the key will be pressed for that amount, otherwise it will be pressed for a random amount between the two values.
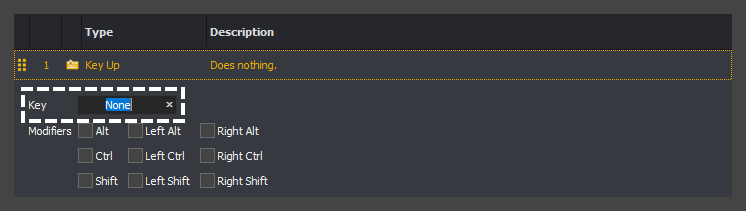
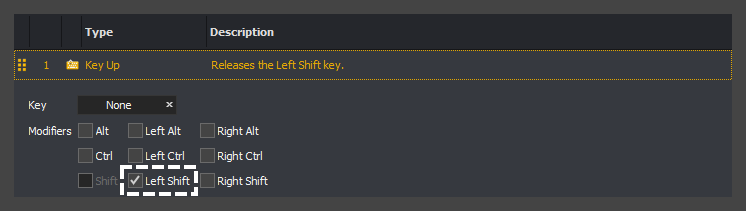
A key up action releases the assigned key which was previously held by a key down action (see: key down action). If you have not previously sent a key down action, the key will be released if you're currently pressing it on you keyboard.

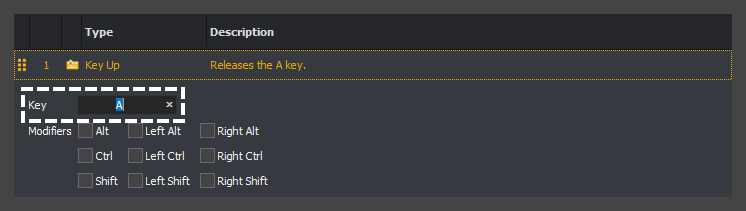
To assign the key click on the key textbox.
You can then press the key you want to send. Once pressed it will be shown in the textbox, for example A below.
If you need the key to be modified by Alt, Ctrl or Shift then check the required modifier, for example Left Shift in the below.
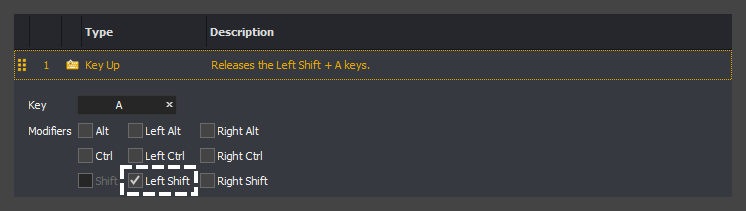
Note: You can either have a general alt, ctrl or shift key modifiers or specific left / right versions. Games may require either to function correctly.
If you have no key selected it will just hold the modifier key, for example just Left Shift would be released in the below.
A mouse button down action presses and holds the assigned mouse button until a matching mouse button up action is sent (see: mouse button up action), you physically press the mouse button on you mouse again, or the command finishes executing.

To assign the mouse button click on the button textbox.

You can then press the button you want to send. Once pressed it will be shown in the textbox, for example Left below.

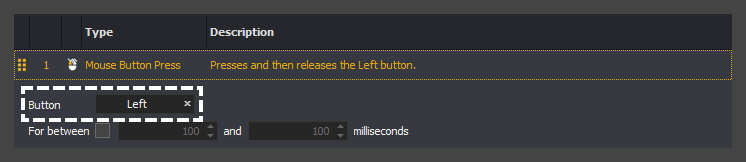
A mouse button press action presses and the releases the assigned button.

To assign the button click on the button textbox.
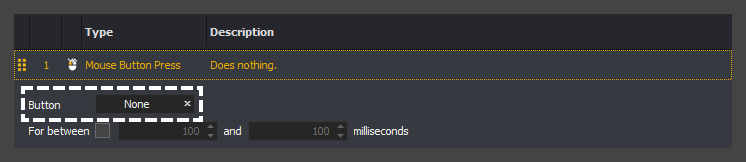
You can then press the button you want to send. Once pressed it will be shown in the textbox, for example Left below.
If you want to perform the button press for a time period check the for between checkbox.
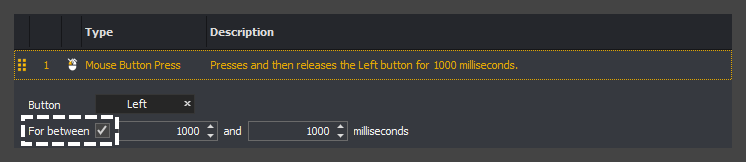
You can then enter the minimum and maximum duration in milliseconds for the button to be pressed.
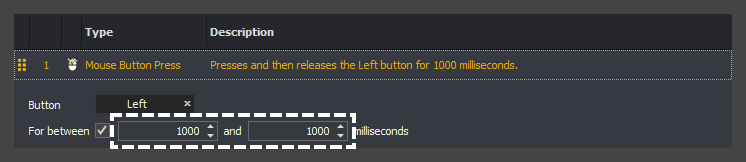
If the minimum and maximum duration are equal the key will be pressed for that amount, otherwise it will be pressed for a random amount between the two values.
A mouse button up action releases the assigned button which was previously held by a mouse button down action (see: mouse button down action). If you have not previously sent a mouse button down action, the button will be released if you're currently pressing it on you mouse.

To assign the mouse button click on the button textbox.

You can then press the button you want to send. Once pressed it will be shown in the textbox, for example Left below.

An absolute mouse movement moves the cursor to specific coordinates on your primary screen.

To configure the coordinates the mouse is moved to, click on the cog.

This will open the current mouse position window showing you the coordinate of the cursor on your screen.
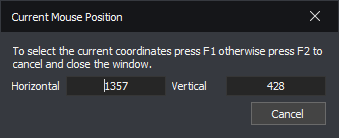
You can use the hotkeys to accept or cancel the coordinates used. By default the hotkey to accept the coordinates is F1 and to cancel F2. You can change the configured hotkeys in the options if required.
To pick a position.
-
Open the current mouse position window.
-
Open the game.
-
Move your mouse to the position within the game you want to select.
-
Press the accept coordinate hotkey.
After accepting the mouse coordinates the current mouse position window will close and the coordinates in the action will be updated to match.

A relative mouse movement action turns your character by the specified number of degrees.

For each game you must configure the mouse so that InstructBot can translate the degree's entered into an amount of mouse movement, see relative mouse configuration for an application.
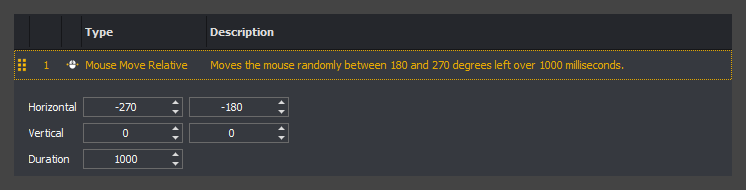
For horizontal movement to turn your character left enter negative numbers, to turn right enter a positive numbers. For vertical movement to turn up enter negative numbers, to turn down enter positive number.
If the numbers you enter are the same for the movement axis the character will turn exactly that amount. If you enter a range, a random number inclusive of two will be picked.
For example the in the below the character will turn between 180 and 270 degrees to the left, with no vertical movement.
As apposed to the below were the character will turn 90 degree right and look 90 degrees up.
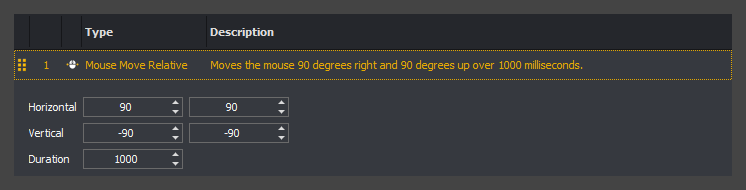
The duration determines how quickly the turn will occur. For example in both of the above the turn will occur over 1000 milliseconds (1 second).
A mouse scroll wheel down action turns your scroll wheel down for the specified number of clicks over a duration.

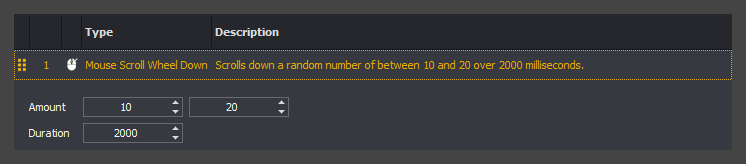
When the minimum and maximum numbers are the same, the amount of clicks is fixed.
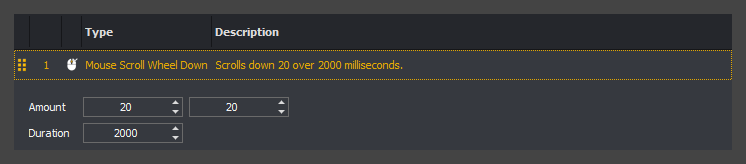
When the minimum and maximum are different a random number inclusive of the two will be picked.
If you want the scroll to happen immediately you can set the duration to 0, otherwise the clicks will be performed over the specified duration. For example in the above the clicks will be performed over 2000 milliseconds (2 seconds).
A mouse scroll wheel up action turns your scroll wheel up for the specified number of clicks over a duration.

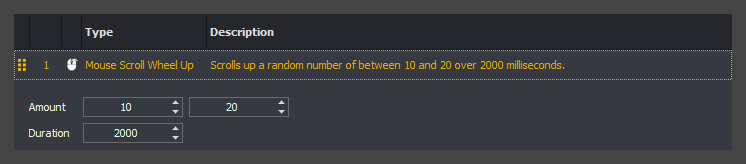
When the minimum and maximum numbers are the same, the amount of clicks is fixed.
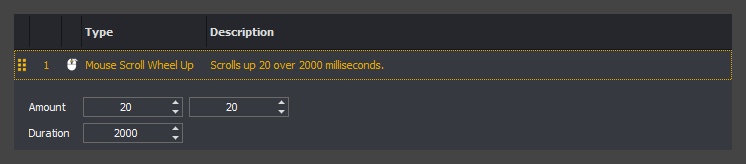
When the minimum and maximum are different a random number inclusive of the two will be picked.
If you want the scroll to happen immediately you can set the duration to 0, otherwise the clicks will be performed over the specified duration. For example in the above the clicks will be performed over 2000 milliseconds (2 seconds).
A pause action stops execution of the input command for the specified number of milliseconds.

If the numbers entered are the same then the pause will be for a fixed duration.

If the numbers entered are different then a random number between the minimum and maximum will be picked.

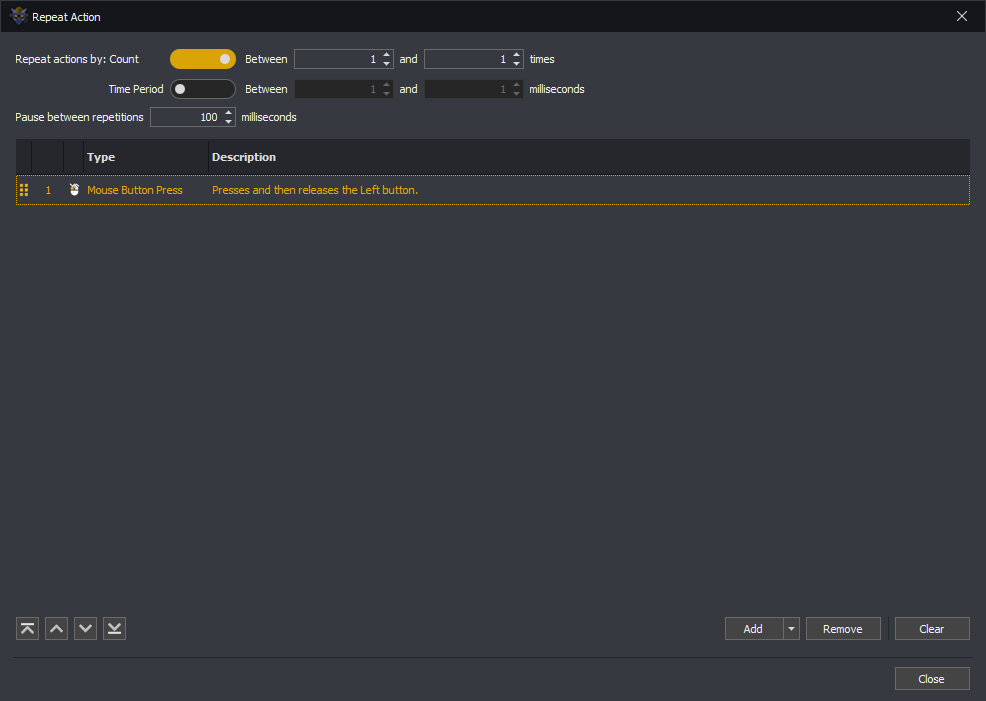
A repeat action allows you to repeat a sequence of actions over a count or time period.

When you edit a repeat action the Repeat Action window will open. You can modify the action list the same as the input command, the only difference being that you can add a repeat action to another repeat action.
If you toggle on count, the repeat action will perform the sequence of actions between the minimum and maximum times.
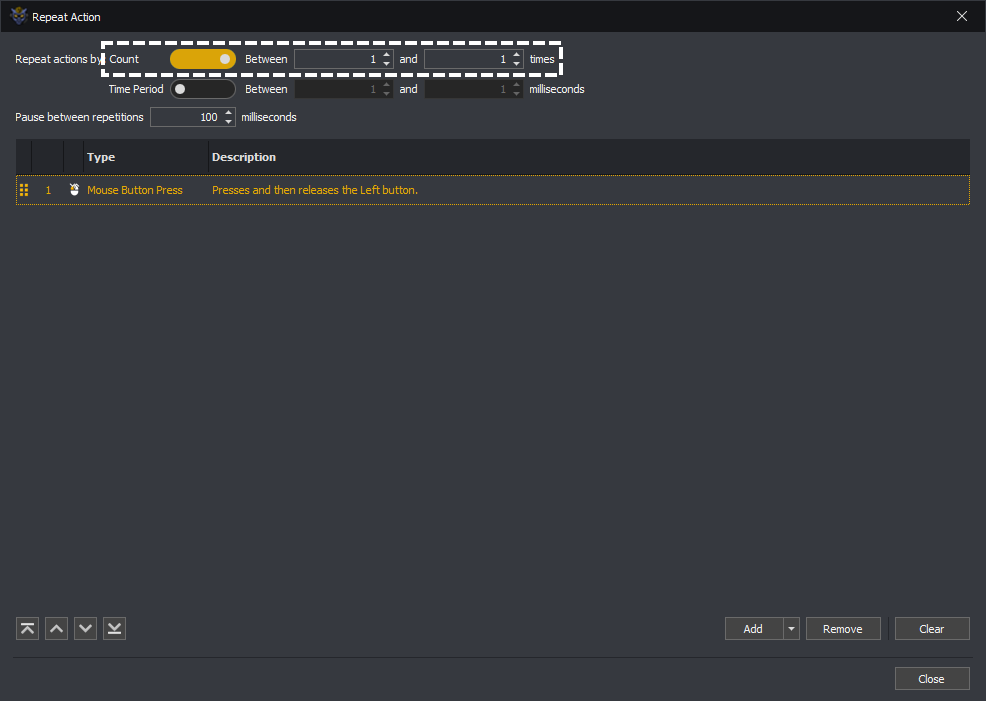
If the minimum and maximum number of times entered are the same, the actions will be repeated for that amount. If the minimum and maximum number of times entered are different, a random number between them inclusively will be picked and then the actions repeated that amount.
If you toggle on time period, the repeat action will perform the sequence of actions between the minimum and maximum milliseconds defined.
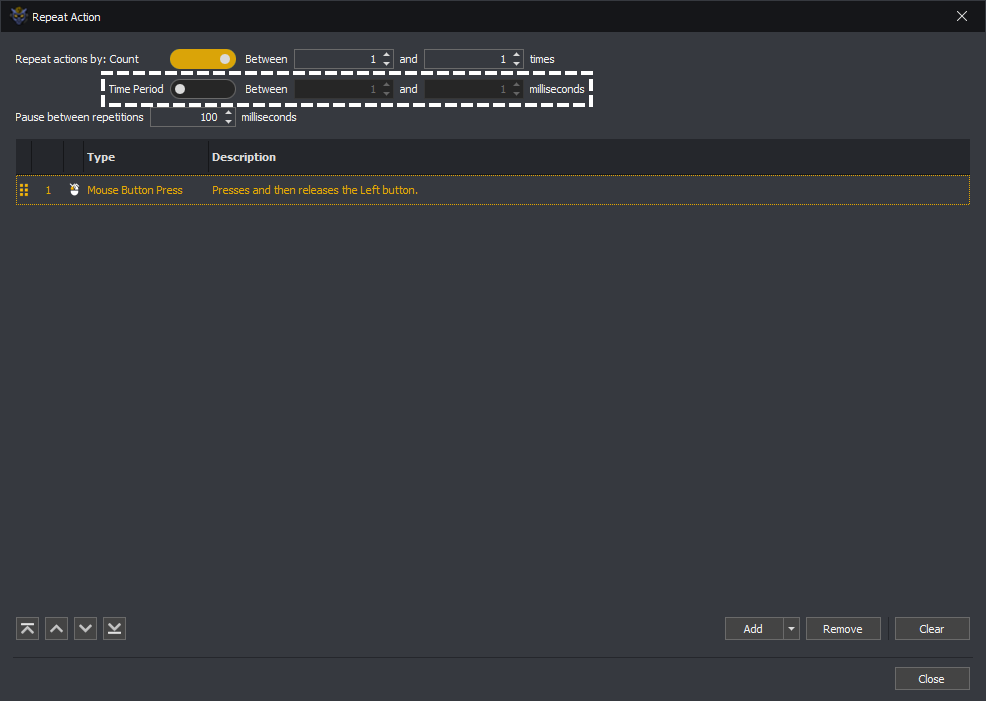
If the minimum and maximum number of milliseconds entered are the same, the actions will be repeated over that period. If the minimum and maximum milliseconds entered are different, a random number between them inclusively will be picked and then the actions repeated that period.
If you want to pause between different repetitions, you can specify a pause.
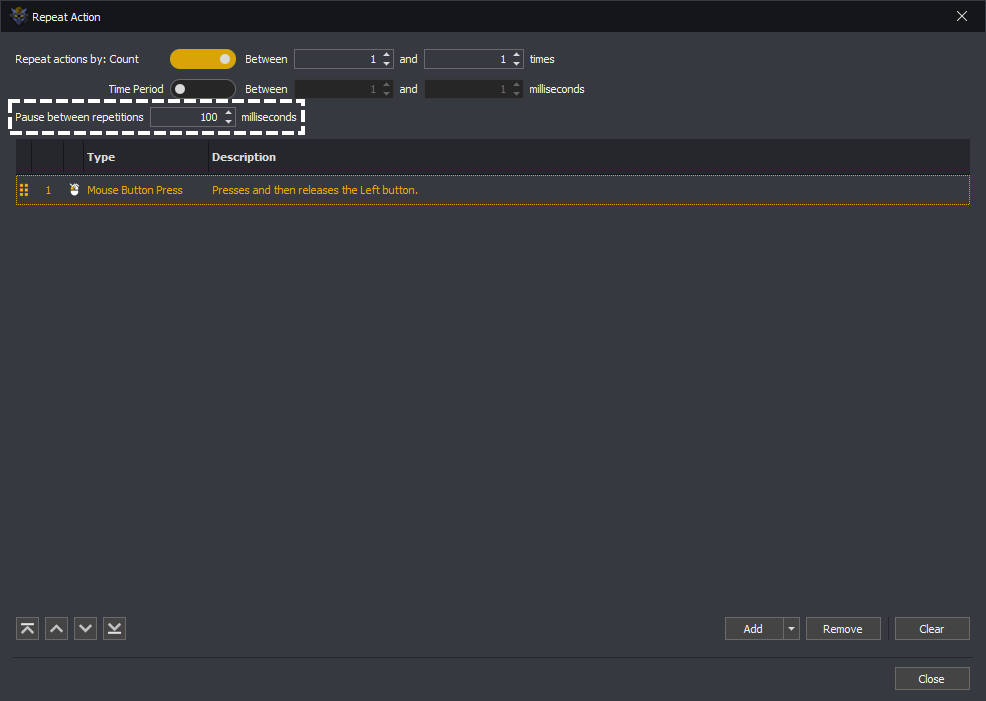
If you don't want to pause, then you can leave this as 0 milliseconds.
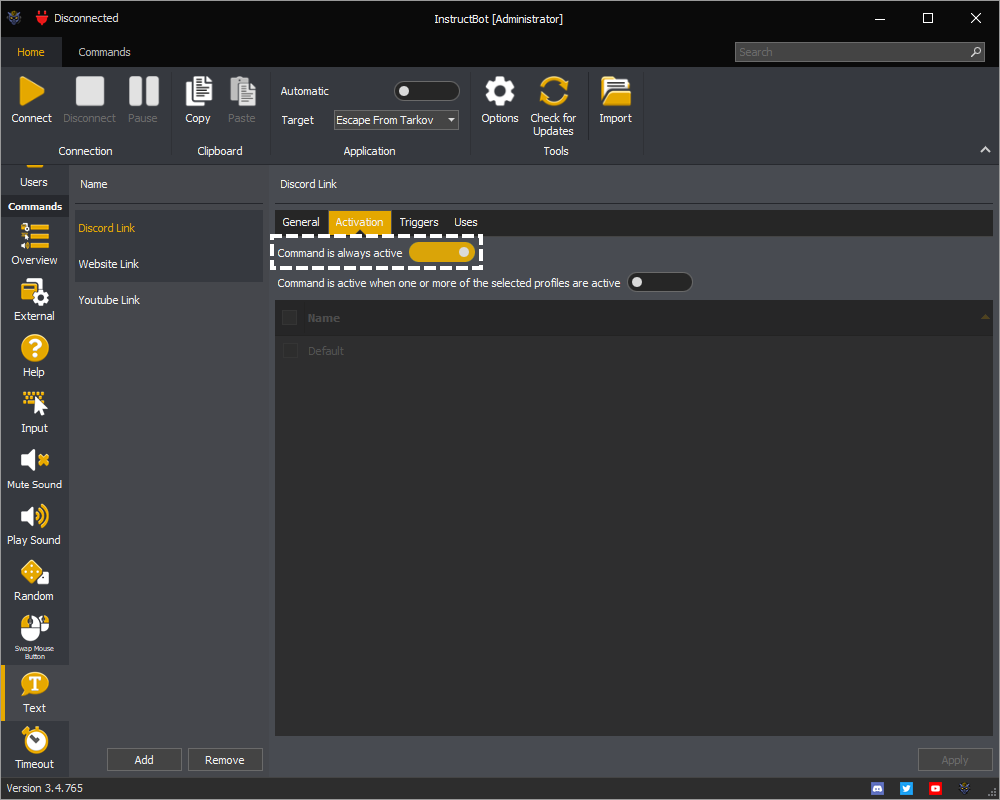
The activation tab of a command controls when a command is enabled or disabled. The command can be activated in two different ways.
Note: The examples below are for a Text command and Input command but this applies equally to all other command types.
The first is having the Command is always active toggle button on. When on the command will always be considered active, even if not linked to the currently active application.
The second way is toggling on the Command is active when one or more of the selected profiles are active and then one of the selected profiles is linked to the currently active application, and the profile it's self is enabled.
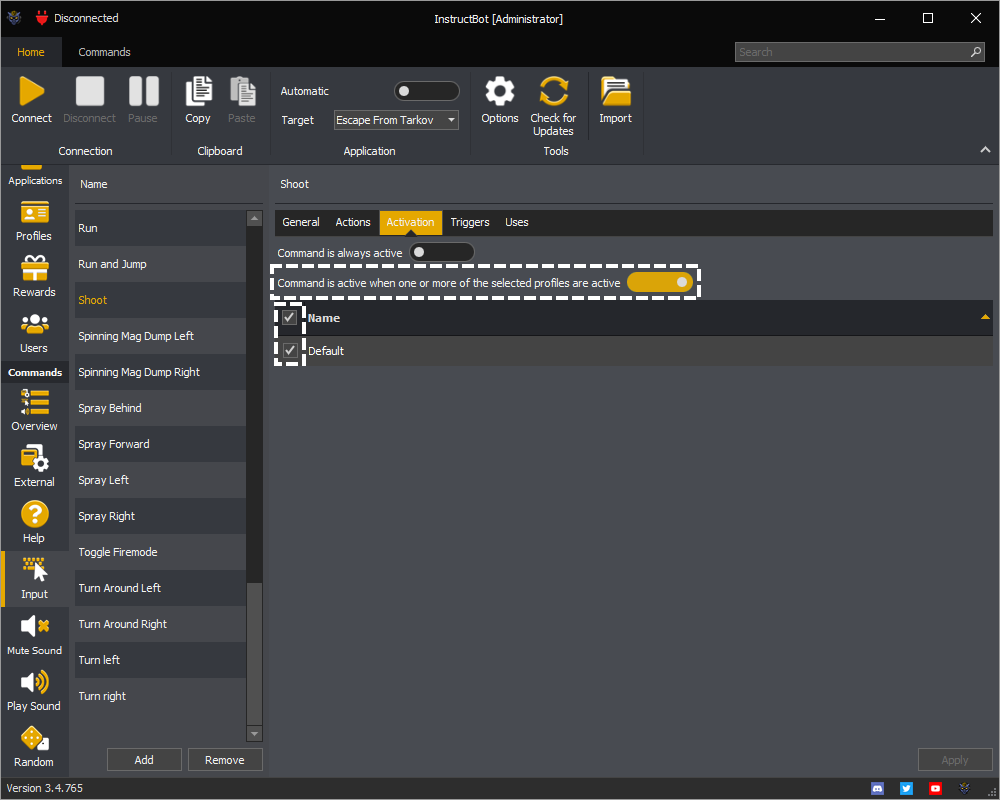
In the above the Command is active when one or more of the selected profiles are active is toggled on and the Default is selected. This will cause the command to activate when the Default profile is linked to the active application.
Conditions
See: Overview, Editing Conditions ( Overview, Adding a Condition or Removing a Condition ) or Types of Conditions ( And, Or, Not, Application Active, Keyboard or Mouse Button )
Conditions are used by commands to indicate when they should execute. For example you might not want a command to run whilst you are pressing the Left Shift and W keys.
Creating a condition allows you to specify that the command should wait until you've released both of those keys and then execute.
The condition editor is common for all commands.
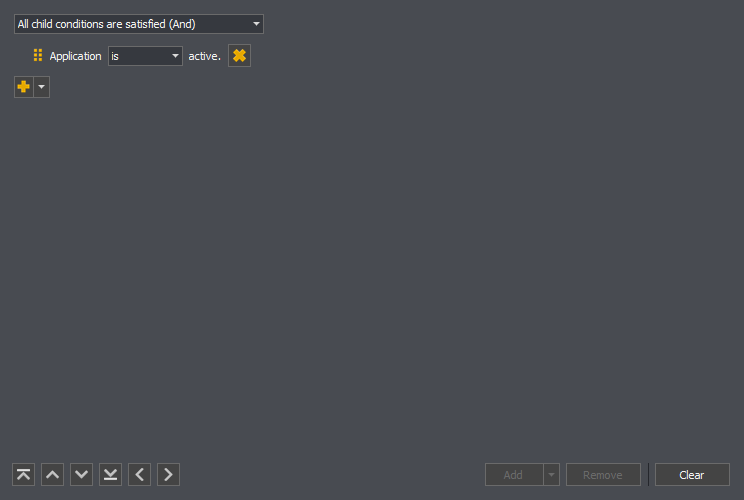
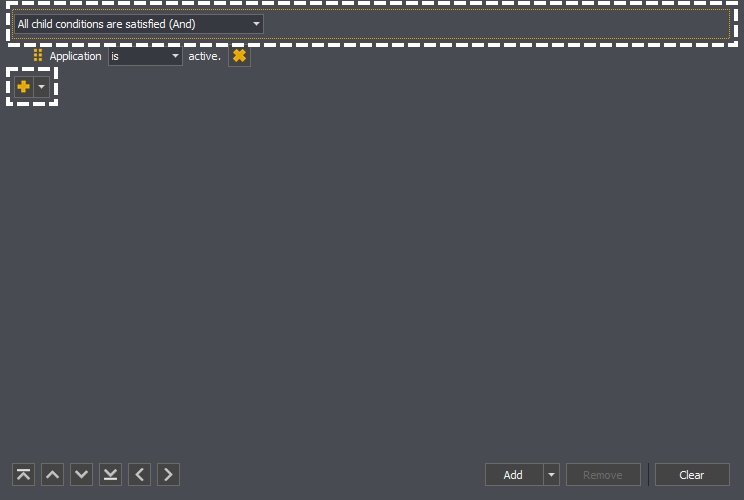
At the top of the editor is a root condition.
The root condition can act as an And Condition or Or Condition, depending upon what you require, and will always return true, e.g. the command should be executed, if there are no child conditions created.
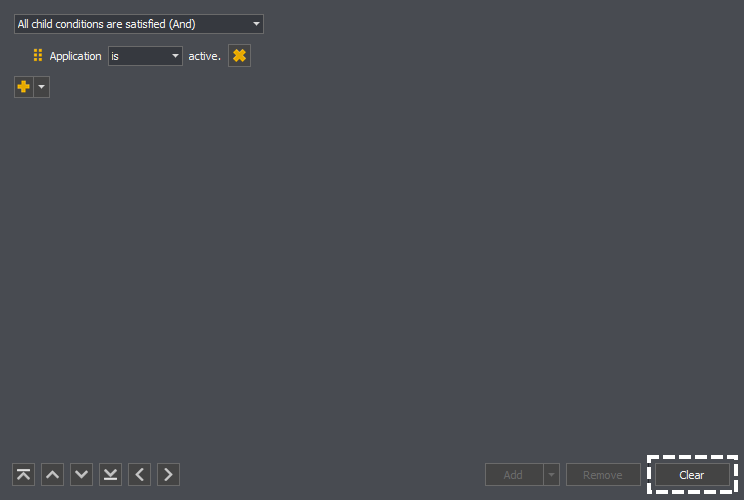
Below the root condition are it's child conditions, if any. In the example below there is an Application Active condition.
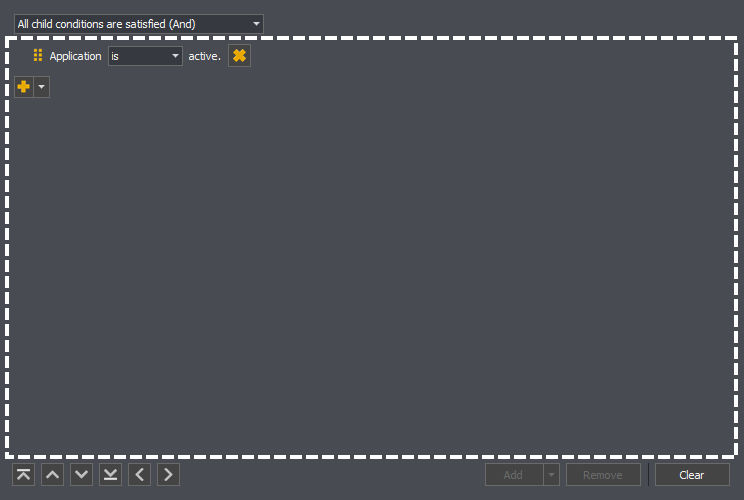
Below that are then a number of buttons which can be used to add, remove, clear and move the conditions.
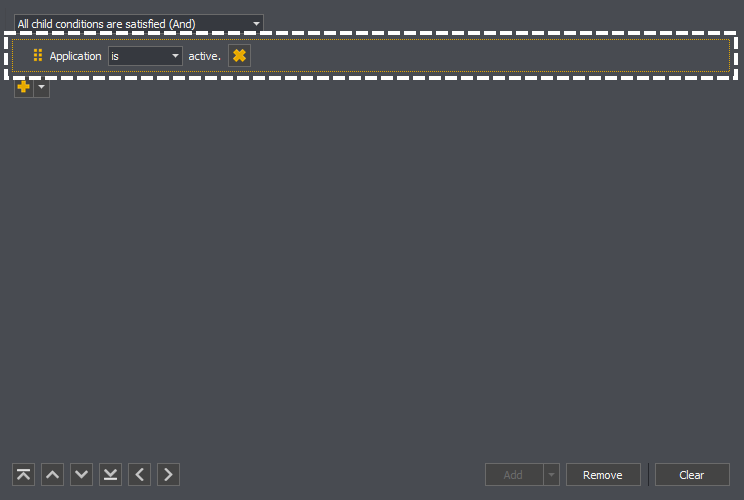
To create a new condition you must select the parent condition.
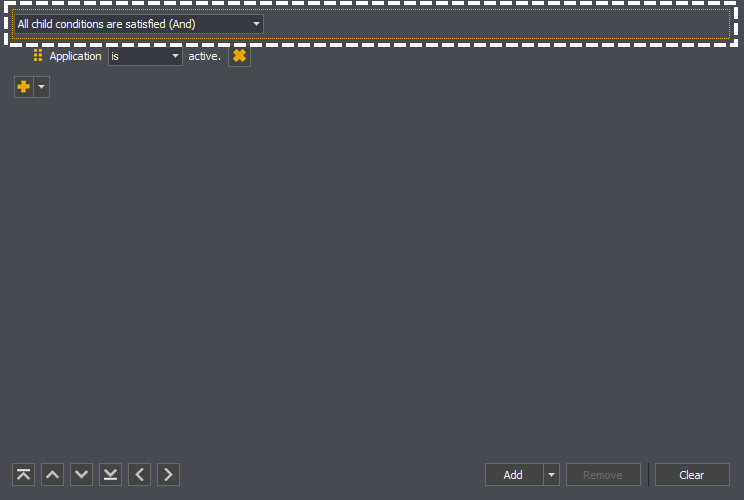
You can then click the add button.

If you've added a condition before, a new condition of that type will be added, otherwise you'll be shown a list of the available condition types, see Types of Conditions, were clicking on one will create a new condition.
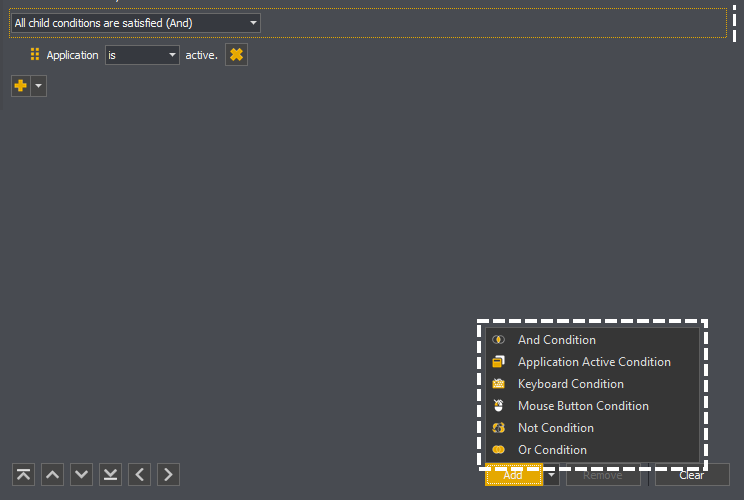
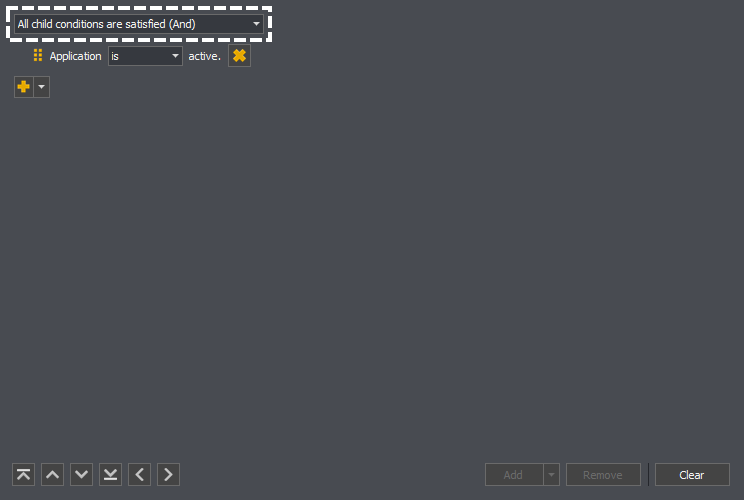
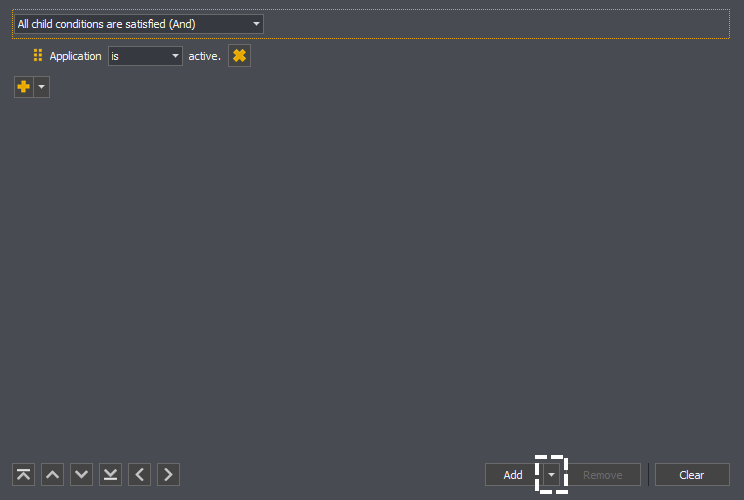
If you then wish to change the type of condition added, you can click upon the dropdown portion of the add button.
Alternativity to using the add button above, you can use the add at the same level in the hierarchy to the parent condition you wish to add a new condition to.
This will only ever added to the linked condition, as such you do not need to select the parent condition first.
Note: Only container conditions can have child conditions added to them, and some are limited in the number which can be added. Please see Types of Conditions for more information.
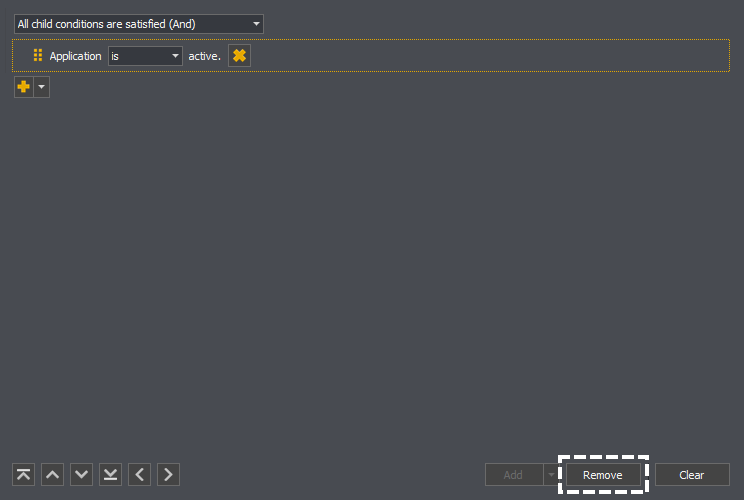
To remove an existing condition you must select it.
You can then press the remove button to remove the condition.
Alternatively you can click the remove button linked to the condition.
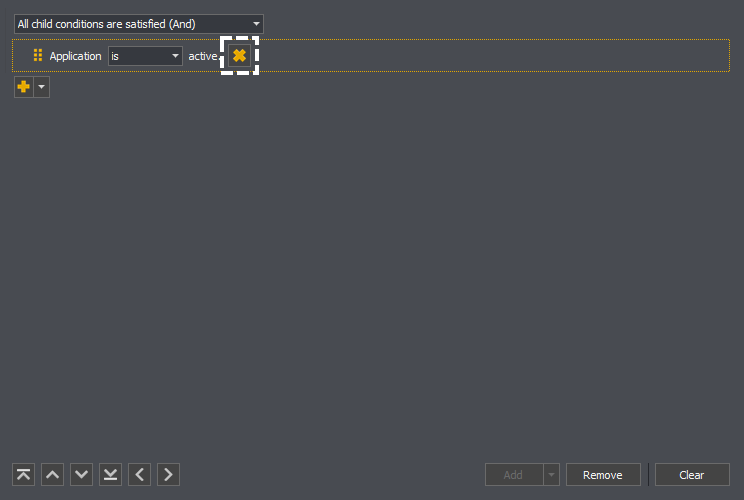
If you wish to remove all conditions, you can instead press the clear button.
Note: You can't remove the root condition.
Types of Conditions
See: And, Or, Not, Application Active, Keyboard or Mouse Button
Container Condition
If a condition is marked as a container condition it can have child conditions which will be evaluated when it's evaluated. Some container conditions have a maximum number of children, if so they will be marked as much.
Container Condition: Unlimited.
The And Condition is satisfied when all of it's children are satisfied; otherwise it is unsatisfied.

In the example above the And condition would be satisfied when both the left shift and W keys a pressed. It would be unsatisfied if either the Left Shift key or the W key were pressed or nether the keys were pressed.
Note: If an And condition has no children, it is satisfied.
Container Condition: Unlimited.
The Or Condition is satisfied when any of it's children are satisfied; otherwise it is unsatisfied.
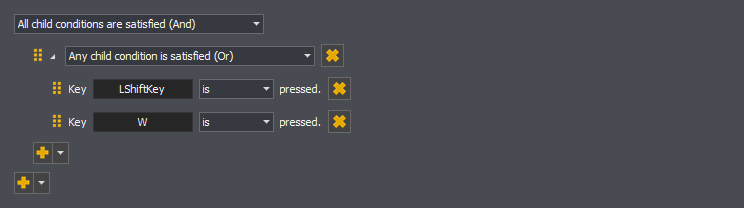
In the example above the Or condition would be satisfied when the left shift key was pressed, the W key was pressed or both the left shift key and w are pressed. It would be unsatisfied when nether the keys are pressed.
Note: If an Or condition has no children, it is satisfied.
Container Condition: One.
The Not Condition inverts the result of it's child condition.

In the example above the Not condition would be satisfied when the application is not active, and satisfied when the application is active.
Note: If an Not condition has no children, it is satisfied.
The Application Active condition returns satisfied depending upon it's match type. When configured to look for an active application is will return satisfied when that application is active and unsatisfied when that application in inactive.

When configured to look for an inactive application is will return satisfied when that application is inactive and unsatisfied when that application in active.

The Keyboard condition returns satisfied depending upon it's match type and specified key. When configured to look for a pressed key it will return satisfied when that key is down and unsatisfied when that key is up.

When configured to look for a released key it will return satisfied when that key is up and unsatisfied when that key is down.

You can control the key queried by clicking in the editor and pressing the required key.

The Mouse Button condition returns satisfied depending upon it's match type and specified button. When configured to look for a pressed button it will return satisfied when that button is down and unsatisfied when that button is up.

When configured to look for a released button it will return satisfied when that button is up and unsatisfied when that button is down.

You can control the button queried by clicking in the editor and pressing the required button.

Triggers
See: Overview, Identifier, Alias, Editing Triggers ( Overview, Adding a Trigger, Editing a Trigger or Removing a Trigger ), Types of Triggers ( Ban, Bits, Donations, Follow, Free, Host, Points, Raid, Subscription, Timed, Unban or Words ) or Permissions ( Viewer, VIP or Moderator )
Triggers are used by commands to signal when they should be processed. For example a command might be triggered when a certain amount of bits has been donated or when a viewer follows you for the first time.
Note: The examples below are for an Input command but this applies equally to all other command types.
A command triggers has two components:
-
The text a user must type in chat for the command to be queued. This is also the text that can be typed to use a previously given use of a command.
-
The list of triggering events which will cause the command to be queued, these may or may not make reference to the identifier.
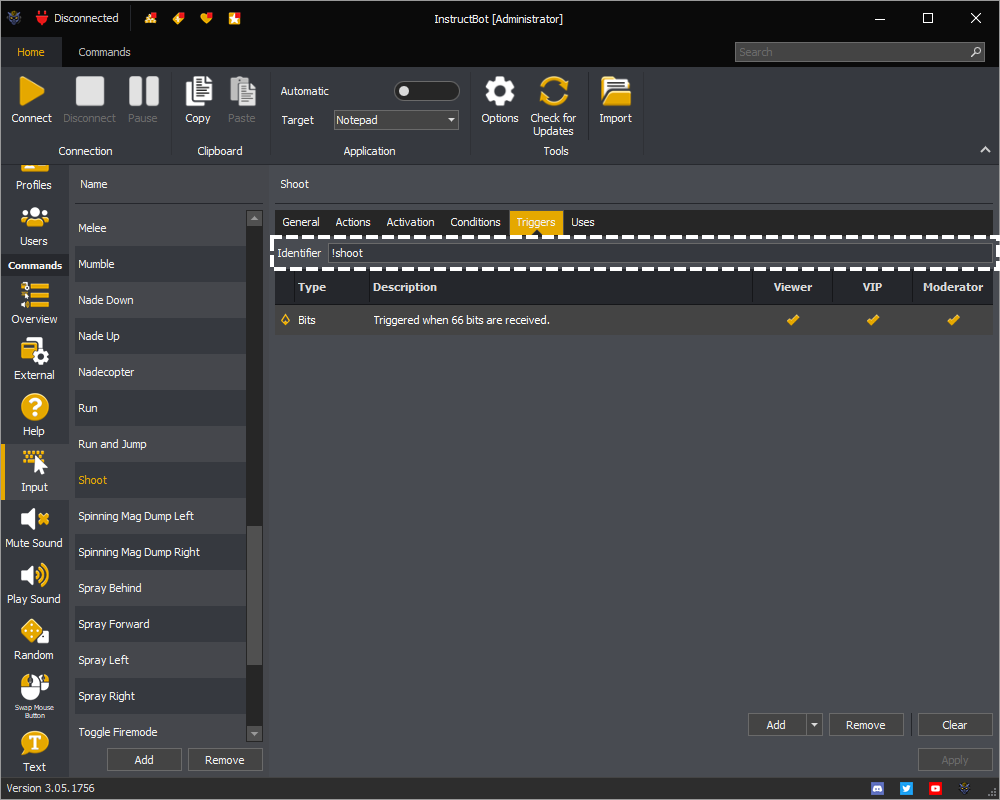
The identifier is used to trigger the command from chat, identify the command to trigger when multiple commands have the same cost or a user is redeeming a use of the command.
Aliases act as alternative identifiers for the command and can be used to trigger the command from chat, identify the command to trigger when multiple commands have the same cost or a user is redeeming a use of the command.
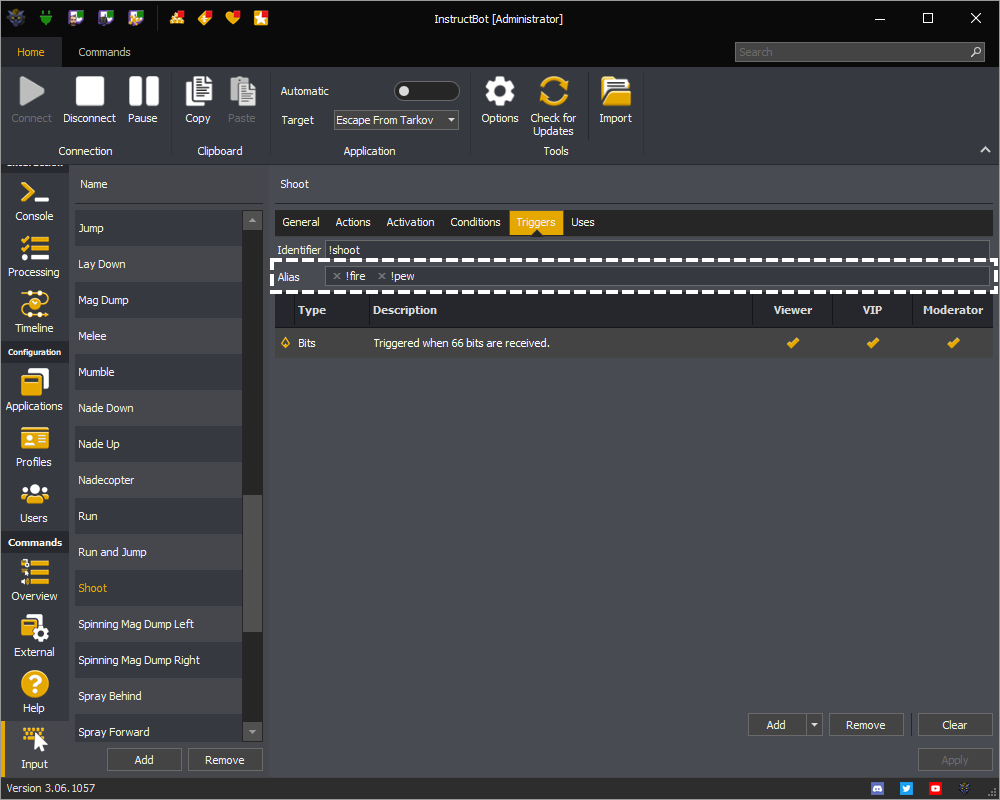
For example in the above a user could type !shoot, !fire or !pew and the command would be triggered.
Editing Triggers
See: Overview, Adding a Trigger, Editing a Trigger or Removing a Trigger
The triggers editor is common for all commands.
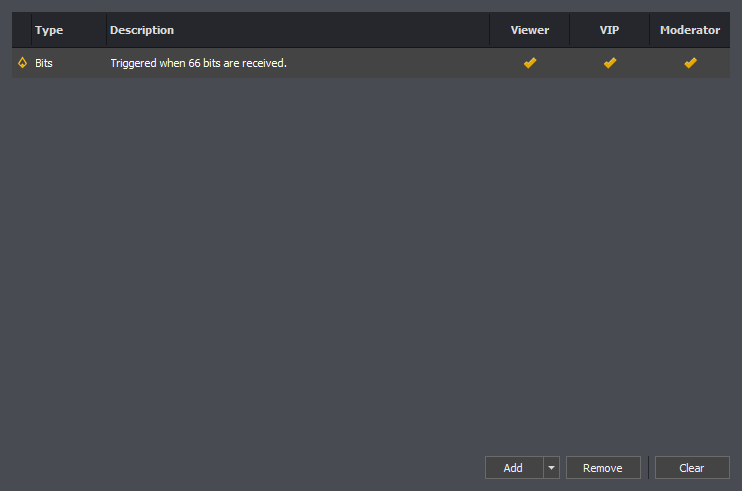
The type column of the trigger editor shows an icon and name of the trigger type.
The description column gives a synopsis of when the trigger will queue the command.
The viewer, VIP and moderator columns will show, when applicable, if the type of user can use the trigger.
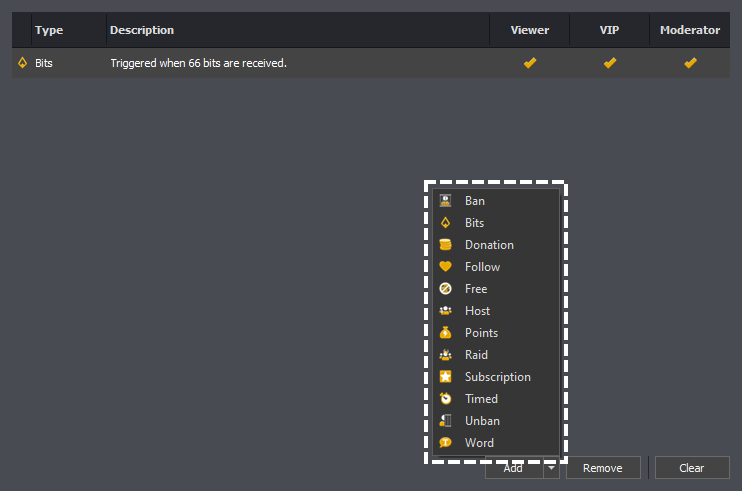
To create a new trigger, press the add button.
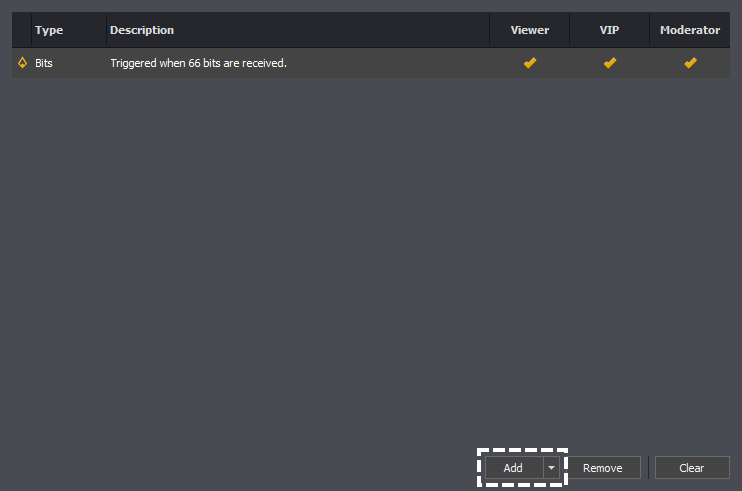
If you've added a type of trigger before, a new trigger of that type will be added, otherwise you'll be shown a list of the available trigger types, see Types of Triggers, clicking on one will create a new trigger of that type.
To edit a trigger you should double click upon the row.
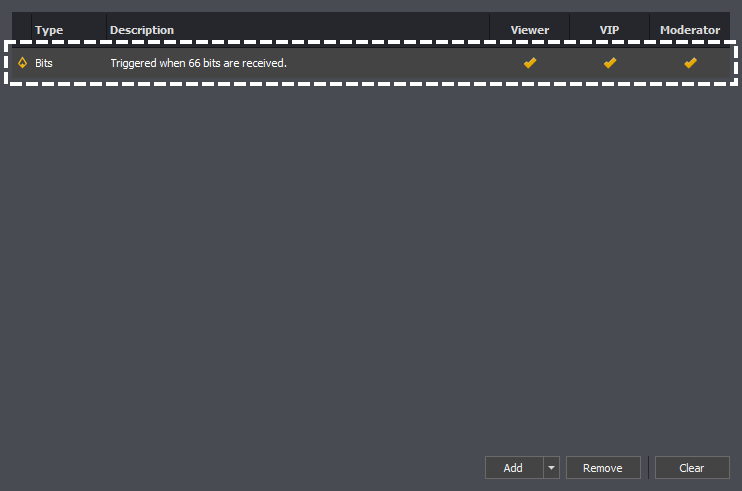
This will open the editor for the selected trigger.


The ban trigger causes the command to execute whenever a user is banned in your stream.

Permissions: A ban trigger can't have permissions assigned.
You can get a brief overview of adding a ban trigger here:
The bits trigger causes the command to execute whenever a user cheers a matching amount in your stream.

Permissions: A bits trigger can have permissions, for more information on permissions see here.
You can get a brief overview of adding a bits trigger here:
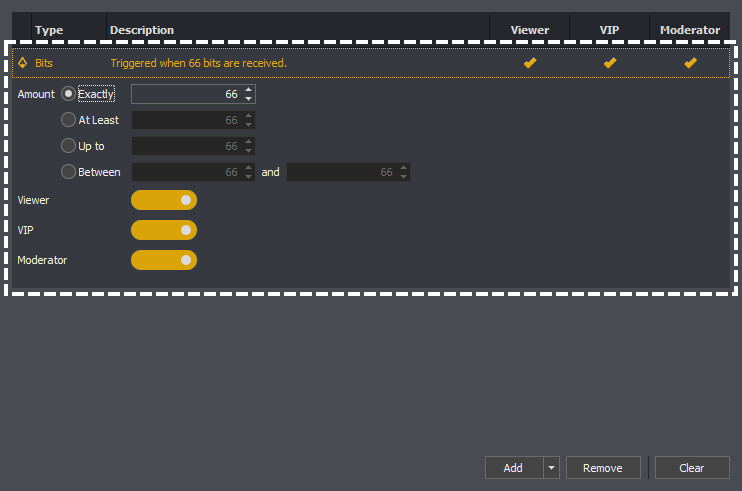
The amount setting of a bits trigger can cause it to function in four different ways.

Exactly: Will match when the cheered amount is equal to the specified amount.
Between: Will match when the cheered amount is equal or more than the minimum amount and is equal or less than the maximum amount.
At Least: Will match when the cheered amount is equal or more than the specified amount.
Up to: Will match when the cheered amount is equal or less than the specified amount.
Command Resolution
When deciding which command to trigger, bits triggers are matched from most restrictive to least restrictive, e.g. in the following order: Exactly, Between, At Least then At Most. If there are then multiple commands matched within the grouping they are matched from highest to lowest amount.
For example if you have three commands:
Mag Dump: Cost exactly 100 bits.
Jump Scare: Costs between 90 and 110 bits
Shoot: Costs At least 50 bits.
You can see when each command would trigger below:
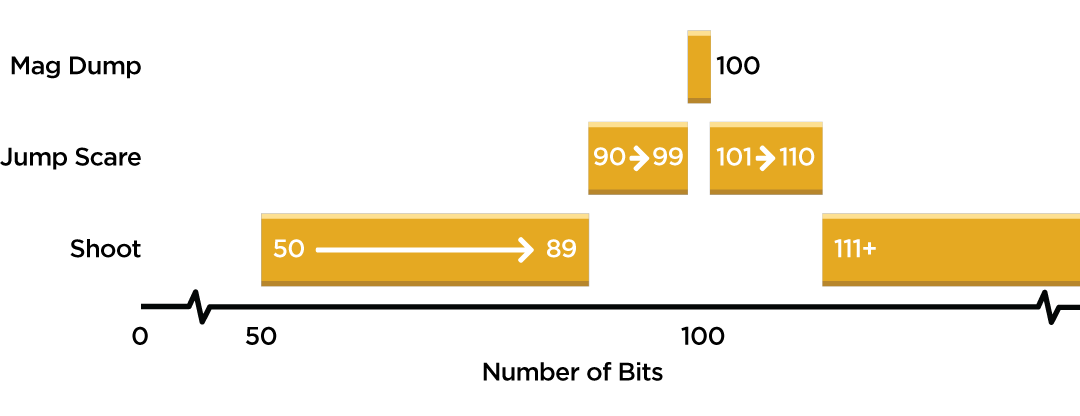
E.g. Mag Dump would trigger on when a user cheered 100 bits, Jump Scare would trigger on any cheer between 90 and 99, and between 101 and 110 and then finally Shoot would trigger on and cheer between 50 and 89 and then any amount including and over 111 bits.
Note: If multiple commands within the same method could be picked, then the most expensive command will be selected. If there are commands with the same bit cost, one will be picked randomly.
The donation trigger causes the command to execute whenever a user cheers a matching amount in your stream.

Permissions: A donation trigger can have permissions, for more information on permissions see here.
You can get a brief overview of adding a donation trigger here:
The amount setting of a donation trigger can cause it to function in four different ways.
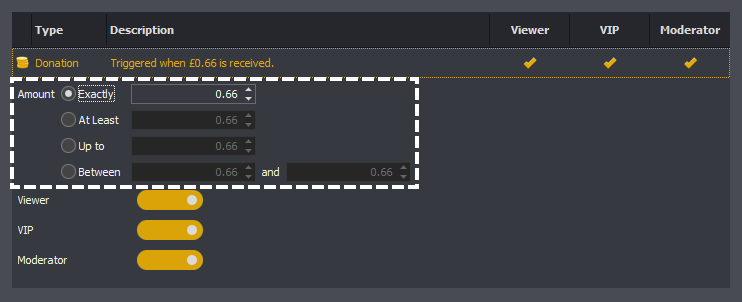
Exactly: Will match when the donated amount is equal to the specified amount.
Between: Will match when the donated amount is equal or more than the minimum amount and is equal or less than the maximum amount.
At Least: Will match when the donated amount is equal or more than the specified amount.
Up to: Will match when the donated amount is equal or less than the specified amount.
Command Resolution
When deciding which command to trigger, donation triggers are matched from most restrictive to least restrictive, e.g. in the following order: Exactly, Between, At Least then At Most. If there are then multiple commands matched within the grouping they are matched from highest to lowest amount.
For example if you have three commands:
Mag Dump: Cost exactly 100 cents.
Jump Scare: Costs between 90 and 110 cents.
Shoot: Costs At least 50 cents.
You can see when each command would trigger below:

E.g. Mag Dump would trigger on when a user donated 100 cents, Jump Scare would trigger on any donation between 90 and 99, and between 101 and 110 cents and then finally Shoot would trigger on and donation between 50 and 89 and then any amount including and over 111 cents.
Note: If multiple commands within the same method could be picked, then the most expensive command will be selected. If there are commands with the same donation cost, one will be picked randomly.
The follow trigger causes the command to execute whenever a user follows you for the first time in your stream.

Permissions: A follow trigger can't have permissions assigned.
You can get a brief overview of adding a follow trigger here:
The free trigger causes the command to execute whenever a user types the command identifier, !discord in the example below, into chat.

Permissions: A free trigger can have permissions assigned, for more information on permissions see here.
You can get a brief overview of adding a free trigger here:
The host trigger causes the command to execute whenever your channel is hosted.

Permissions: You can assign permissions to the trigger, for more information on permissions see here.
You can get a brief overview of adding a host trigger here:
The minimum number of users controls when the host trigger will execute the command.

For example of you set this to 5, only a host with 5 or more viewers will trigger the command.
The points triggers causes the command to execute when ever triggered from chat when, using the identifier and StreamElements or StreamLabs are enabled; or a Twitch channel point reward of matching amount is redeemed.

Permissions: You can assign permissions to the trigger, for more information on permissions see here.
You can get a brief overview of adding a points trigger here:
The points setting controls the required number of points, or cost of reward, required to trigger the command.
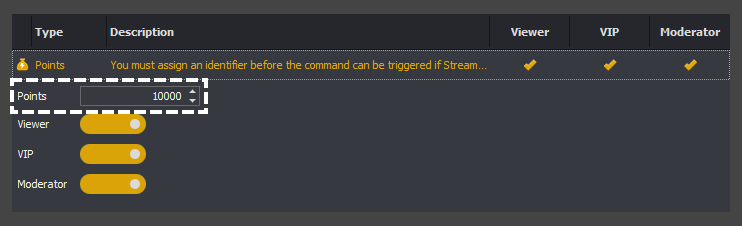
For example in the above 10,000 points are required. If triggered and StreamElements or StreamLabs are enabled, they would be queried for the number of points and if available deducted before the command is executed.
If a reward costing 10,000 points was redeemed on Twitch and Twitch rewards are enabled, the command would be executed immediately, InstructBot doesn't wait for the redemption to be accepted.
You so how to enable StreamElements points please click here, for StreamLabs here or Twitch channel point redemptions here.
The raid trigger causes the command to execute whenever your channel is raided.

Permissions: You can assign permissions to the trigger, for more information on permissions see here.
You can get a brief overview of adding a raid trigger here:
The minimum number of users controls when the raid trigger will execute the command.
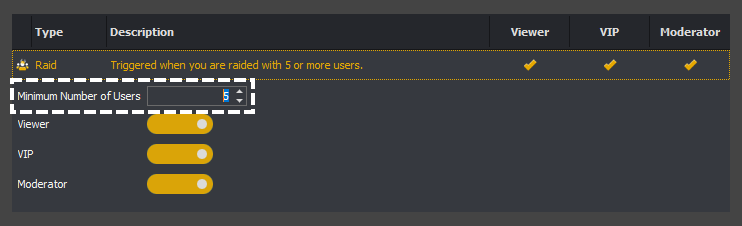
For example of you set this to 5, only a raid with 5 or more viewers will trigger the command.
The subscription trigger causes the command to execute whenever a user subscribes with the matching tier.

Permissions: You can assign permissions to the trigger, for more information on permissions see here.
You can get a brief overview of adding a subscription trigger here:
The tier controls what type of subscription will execute the command.
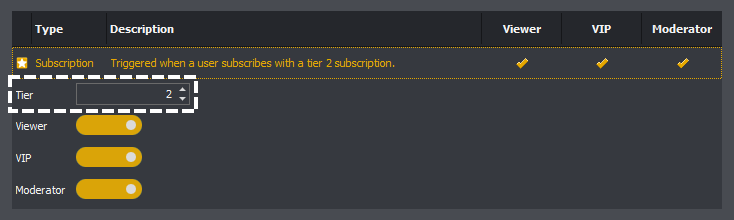
For example if you set this to 2, only a tier 2 subscription will trigger the command.
If you want multiple tier's of subscriptions to trigger the command, you should create a trigger per tier. For example in the below both tier 1 and tier 2 subscriptions will trigger the command.

The timed trigger cause the command to execute at a set frequency; assuming the minimum message count, if any, has been reached.

Permissions: You can't assign permissions to the trigger.
You can get a brief overview of adding a timed trigger here:
The frequency setting of a timed trigger controls how often the timed trigger will execute.
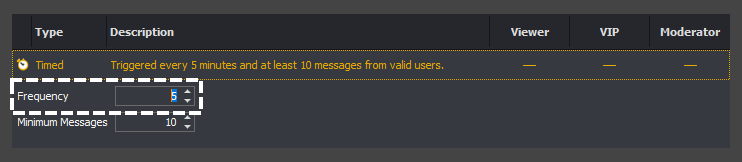
For example in the above the frequency is set to 5 minutes. This mean the command will execute every 5 minutes, assuming the minimum number of messages has been reached.
The minimum message setting controls how many message must have been received between the last execution of the timed trigger and now.
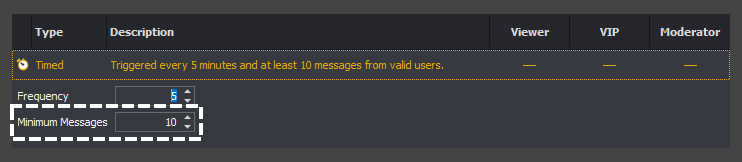
If you set a value of zero there is no validation on the number of message and the command will execute at the frequency. If you're value isn't zero then the command will only be executed when that number of messages has been reached. Note this may mean that the command executes slower than the frequency specified.
For example if you have a frequency of 5 minutes and a minimum number of messages of 10, if after 5 minutes you only receive 9 messages the command will be delayed. If after 6 minutes you receive another message the command would then be executed after the 5 minute wait restarted.
The unban trigger causes the command to execute whenever a user is unbanned in your stream.

Permissions: An unban trigger can't have permissions assigned.
You can get a brief overview of adding a unban trigger here:
The word trigger causes the command to execute whenever the active matching word is typed in chat.

Permissions: You can assign permissions to the trigger, for more information on permissions see here.
You can get a brief overview of adding a word trigger here:
The words setting of a word trigger controls what word(s) will cause the command to execute.
When only one word is entered, this word will always be matched.
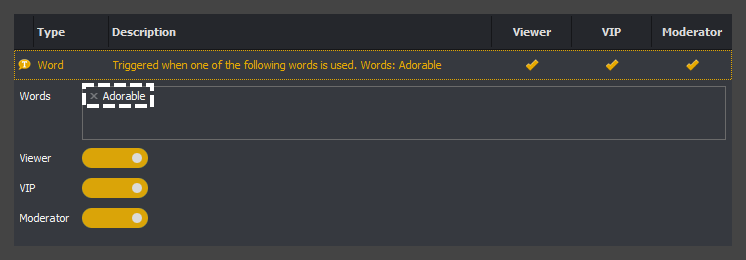
For example in the above someone typing Adorable in chat will cause the command to execute.
When multiple words are entered the trigger behaves differently.
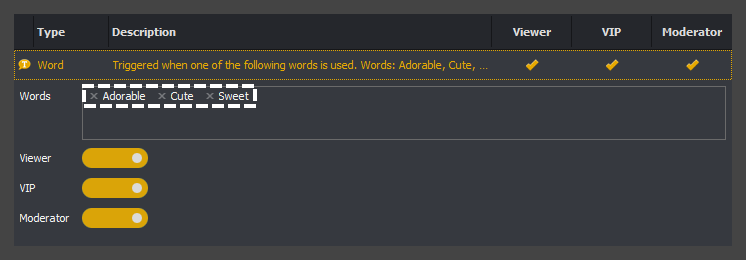
In this case one word will be picked as the triggering word, for example Cute. Once that word has been used to trigger the command, another word will be picked to be the triggering word e.g. Adorable. This process will then repeat it's self once that word has been picked, for example Cute or Sweet could be picked.
This allows you to have a set of words which will trigger the command but allow you to cycle through them to stop the command being spammed.
Permissions control which type of users can trigger the command.

Note: if the trigger has a cost, then the cost must still be paid, the permission just allows that type of user to activate it.
When enabled a viewer can use the trigger to execute the command.
For example the below is a bits viewer only trigger and would execute the command when they cheered 66 bits.


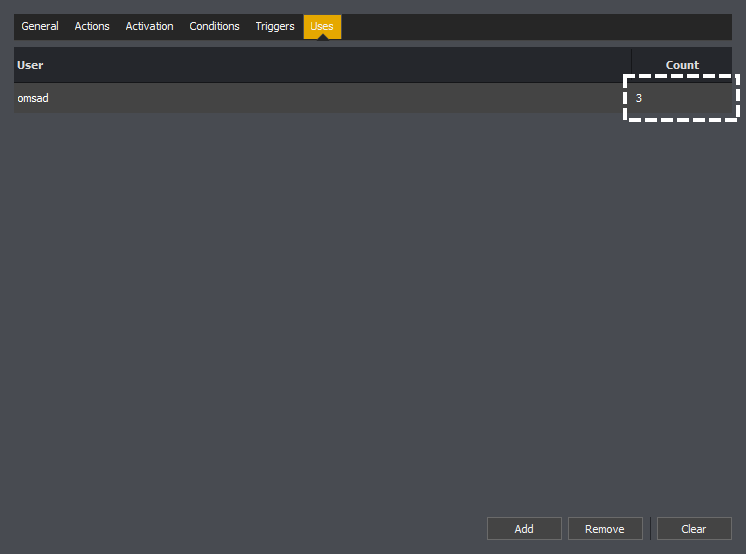
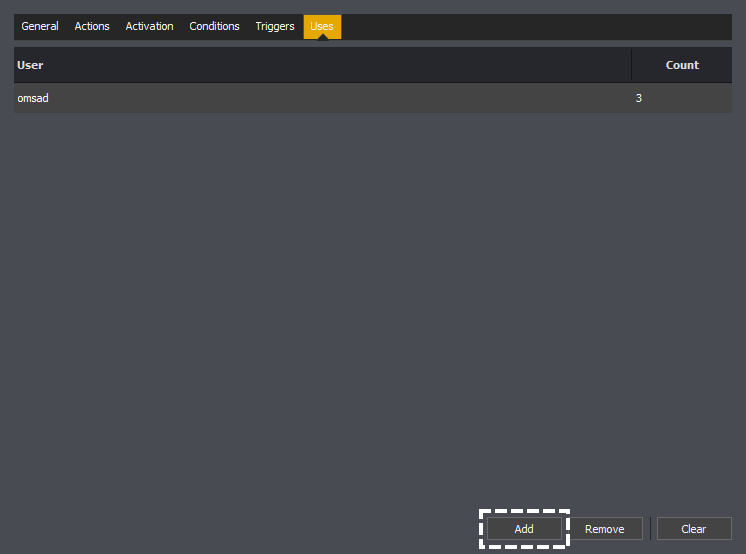
The uses tab of a command shows the number of uses each user has. Each use of a command allows a user to execute that command once for free.

Note: The examples shown above is for an Input command but this applies equally to all other command types which support uses.
You can get a brief overview of uses here:
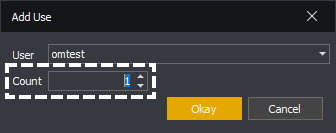
To add uses for a new user, press add.
This will open the add use window.
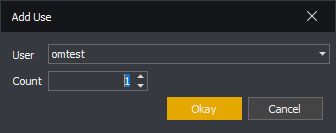
You can then lookup the user.
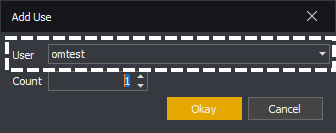
And assign the number of uses.